Workflow Management
Overview
Zita’s Workflow Management feature allows for the creation of tailored hiring pipelines, streamlining each stage of recruitment for efficiency and consistency, specific to job roles and organizational needs. Additionally, Zita's Applicants Page presents a clear view of candidates for each job, facilitating efficient management and optimization of the hiring process.
Workflow Customization
In Zita, you have the ability to create an unlimited number of recruitment pipelines, each with its unique stages. These pipelines can be customized and applied individually to different job openings as needed.
Create a workflow
This feature in Zita allows the creation of new recruitment workflows, where you can add and rearrange stages according to your hiring process.
- Head to "Settings" in your Zita account and click on the "Workflow" tab
- Additionally, you can find "Tailor Workflow" in the sidebar, providing a convenient and easy way to customize the workflows whenever you need.
- In the "Workflow" card,click on the "Manage Workflow" button.
- To add a new pipeline in Zita, simply click on the "Add Pipeline" button.
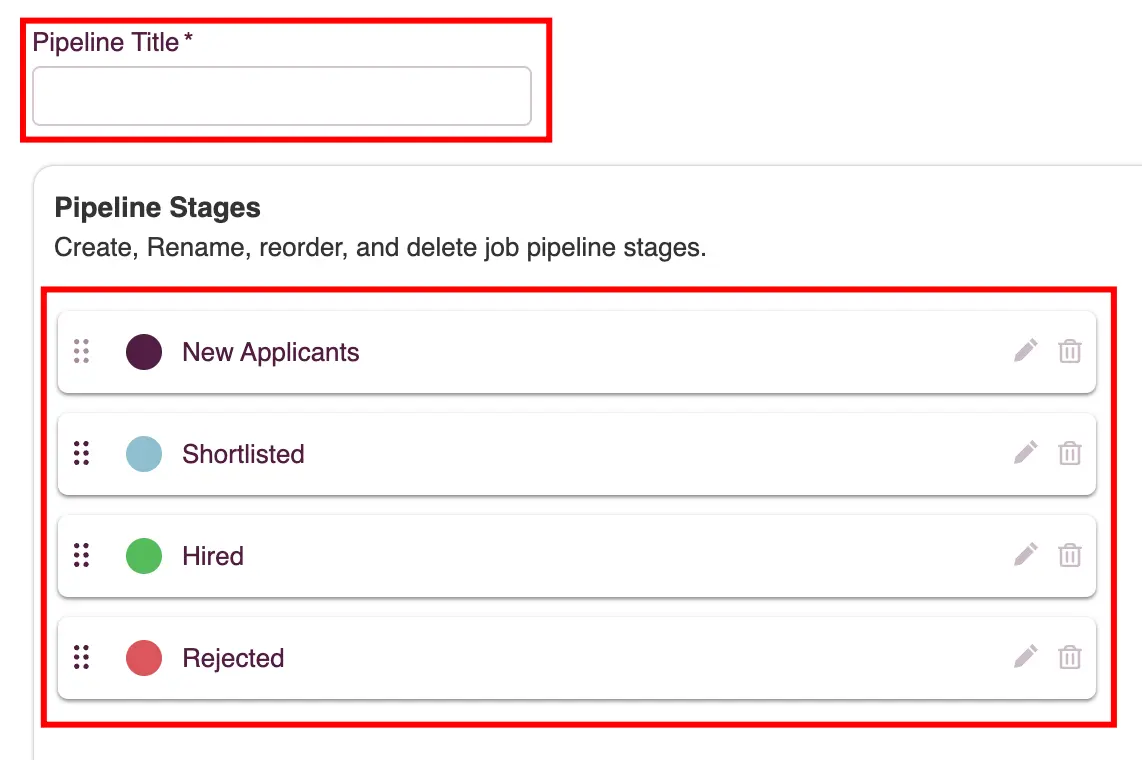
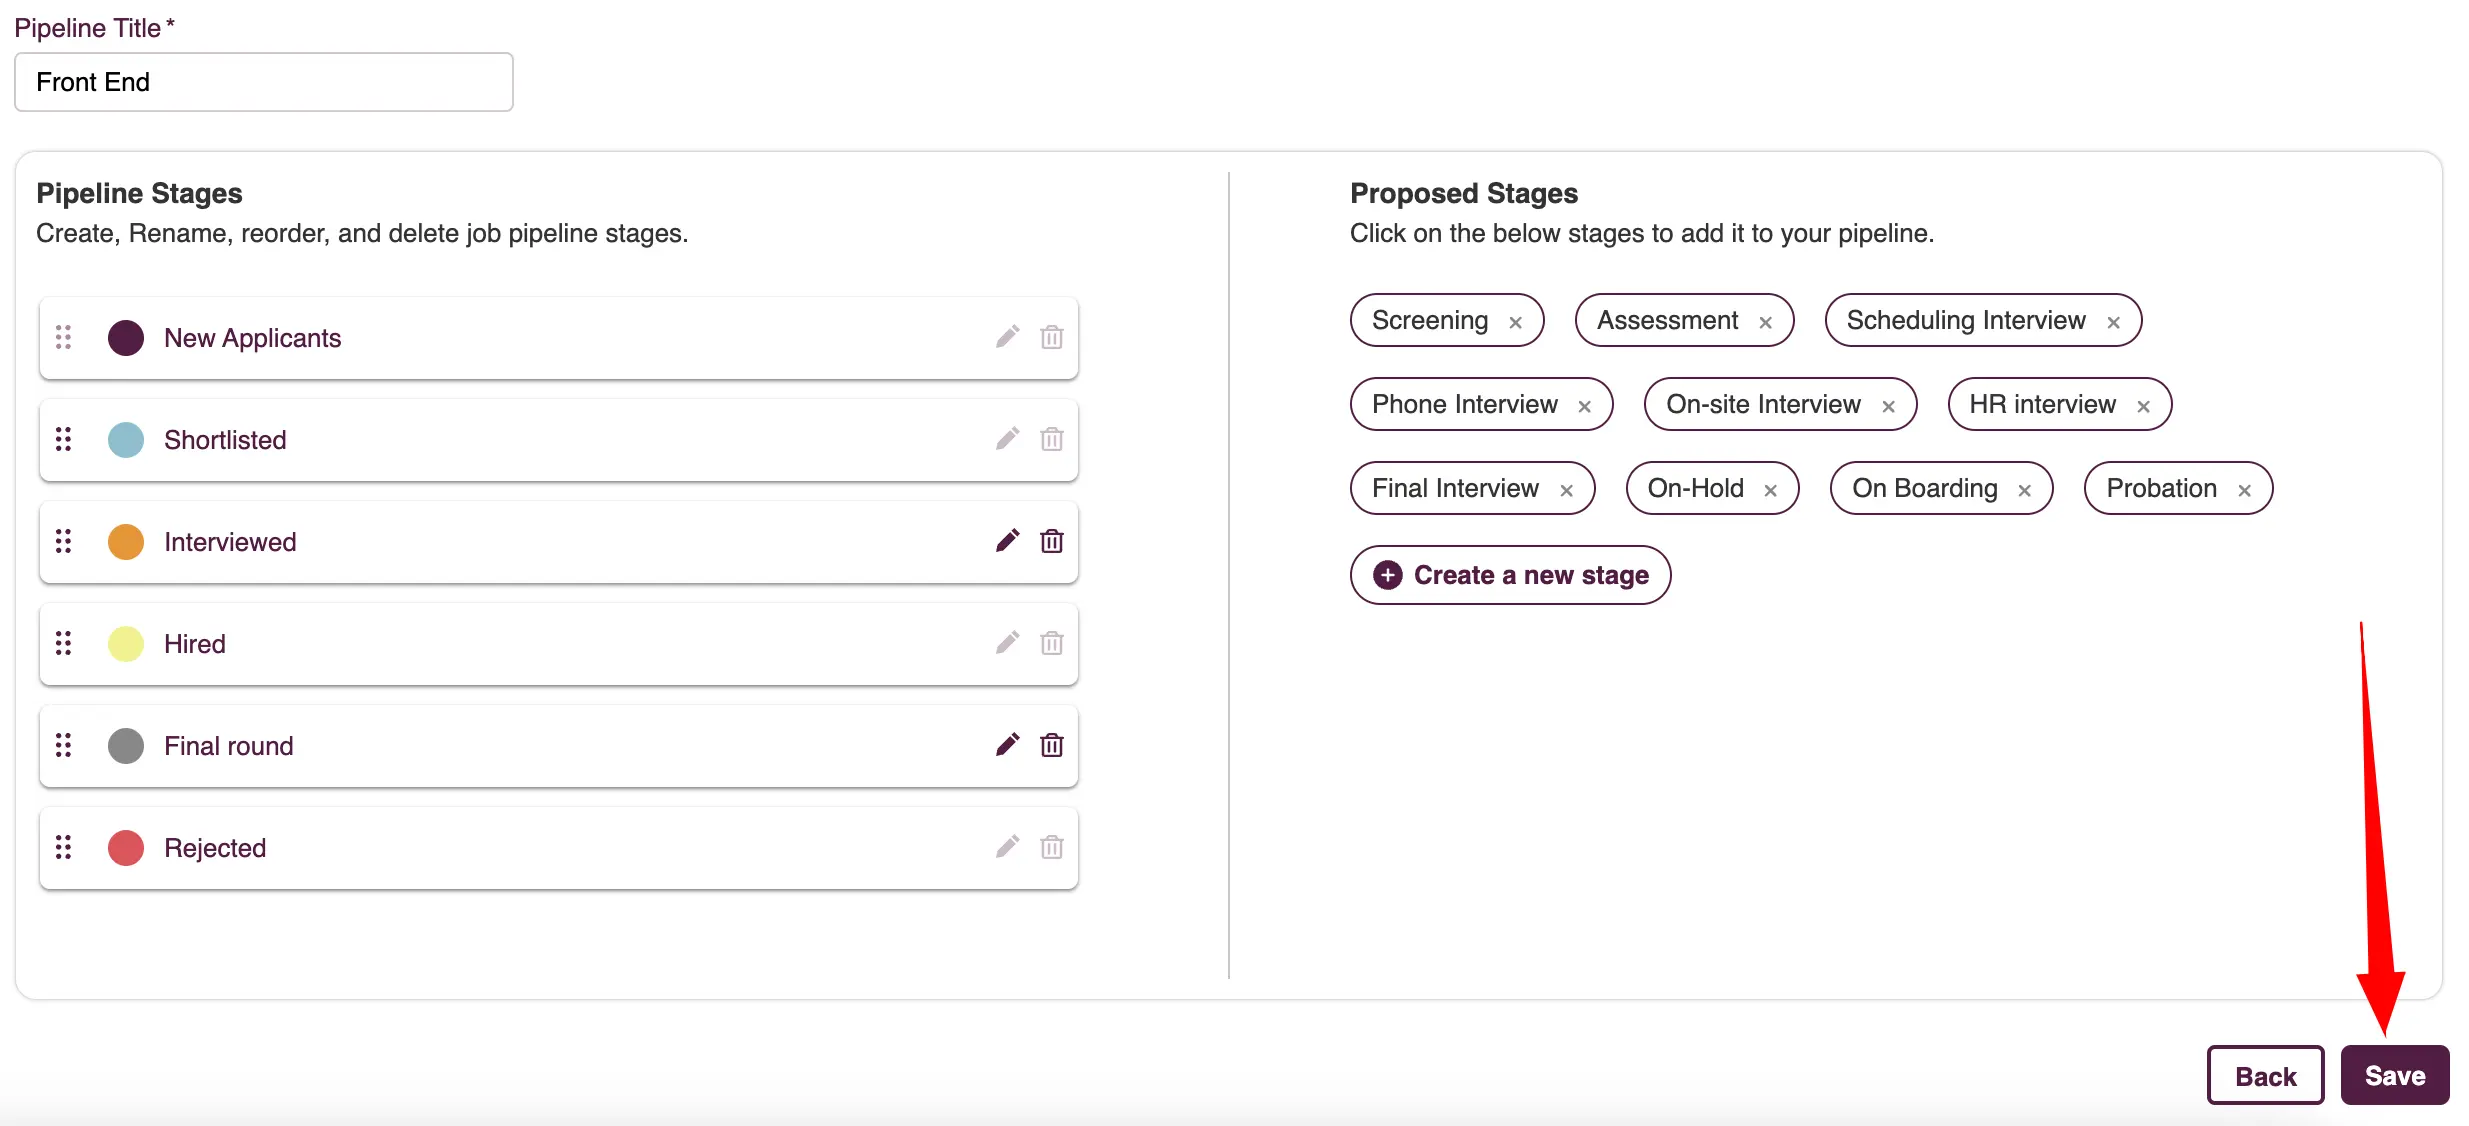
- Start by giving your pipeline a unique title. Zita includes four default stages - "New Applicants", "Shortlisted", "Hired", and "Rejected". These stages are fixed and cannot be modified or deleted.
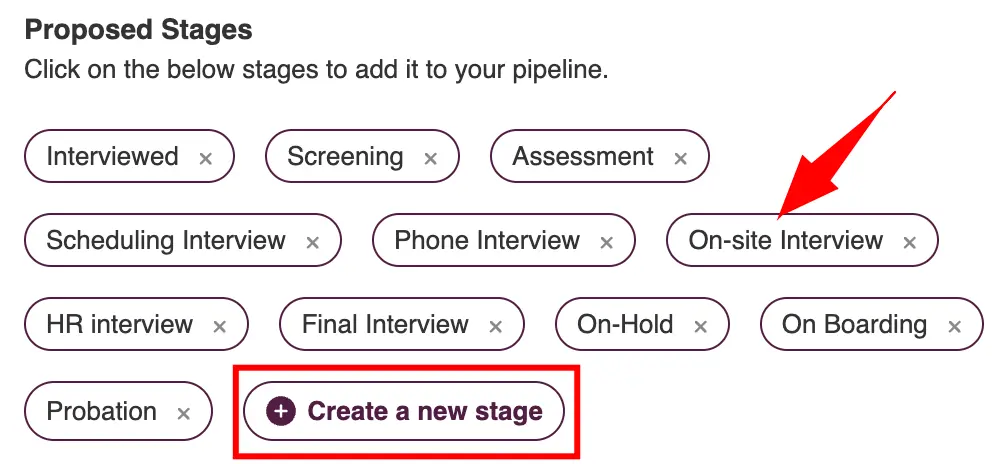
- Choose from Zita’s suggested stages or create your own by clicking on"Create a New Stage" . Enter the name for your new stage and confirm by clicking the "Tick" button.
- You can rearrange the order of the stages simply by dragging and dropping a stage to your preferred position in the sequence.



Note:
In Zita, the position of the "New Applicants" stage is fixed and cannot be changed, as it serves as the initial stage in the pipeline.
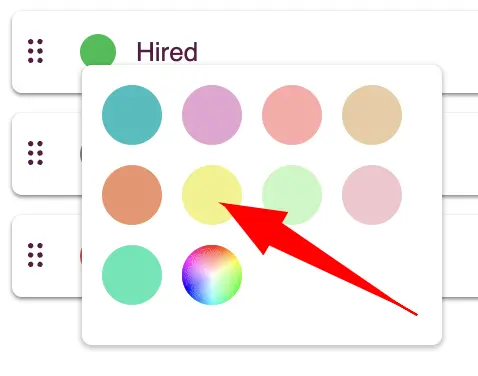
- Zita’s color picker lets users assign distinct colors to each stage for visual clarity. Click on the color bar in the respective stage card to choose the color.
- Once you’re satisfied with the setup, click the "Save" button to finalize your new pipeline.

Note:
Zita initially sets a "Default pipeline" as the standard workflow for newly created jobs. This default pipeline cannot be edited or deleted according to your recruitment needs.
Configure Workflow
This section lets you modify existing workflows, offering options to rename them, adjust the order of stages, add new stages, or remove unnecessary ones.
- Head to "Settings" in your Zita account and click on the "Workflow" tab
- Additionally, you can find "Tailor Workflow" in the sidebar, providing a convenient and easy way to customize the workflows whenever you need.
- In the "Workflow" card,click on the "Manage Workflow" button.
- Click on the "Configure pipeline" option associated with the pipeline you want to modify.
- To Rename pipeline title, Update the pipeline title in the designated field.
- To Rename the stage name, click on the "Edit" icon in the stage card and click on the "Tick" button.
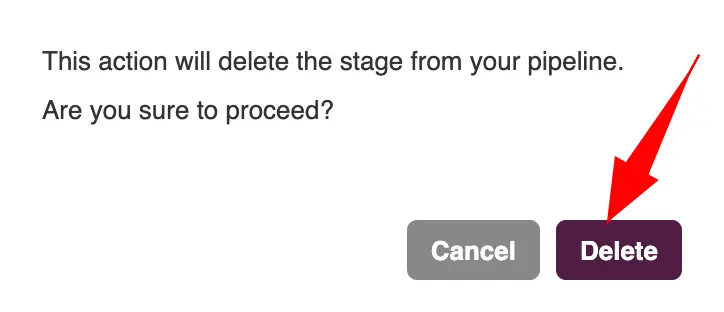
- To Delete a Stage, click on the "Delete" icon in the stage card.
- In the confirmation popup, click on the delete button.
- Once satisfied with the changes, click on the "Update" button to apply them.



Tip:
You can refer the above section to Reorder, create a new stage and add stages from suggestion
Manage the workflow
Here, you can further manage your workflows by renaming them, setting a default for standard recruitment processes, or deleting those no longer needed.
- Head to "Settings" in your Zita account and click on the "Workflow" tab
- Additionally, you can find "Tailor Workflow" in the sidebar, providing a convenient and easy way to customize the workflows whenever you need.
- In the "Workflow" card,click on the "Manage Workflow" button.


Zita Provided three option to manage the workflow
- Rename Workflow Pipeline
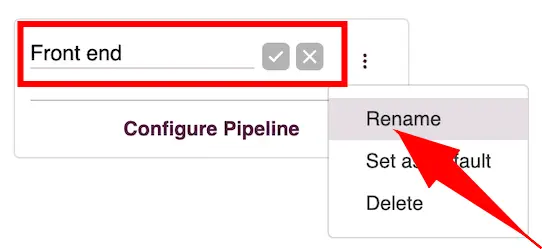
- Identify the workflow pipeline you want to rename. Click on the "More options" icon next to the pipeline title.
- Choose "Rename" from the dropdown menu.
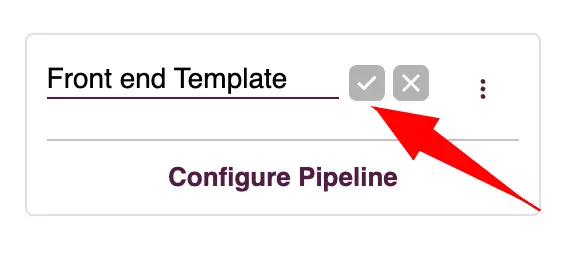
- Enter the new name for the workflow pipeline. Confirm the new name by clicking on the "Tick" button.
- Delete Workflow Pipeline
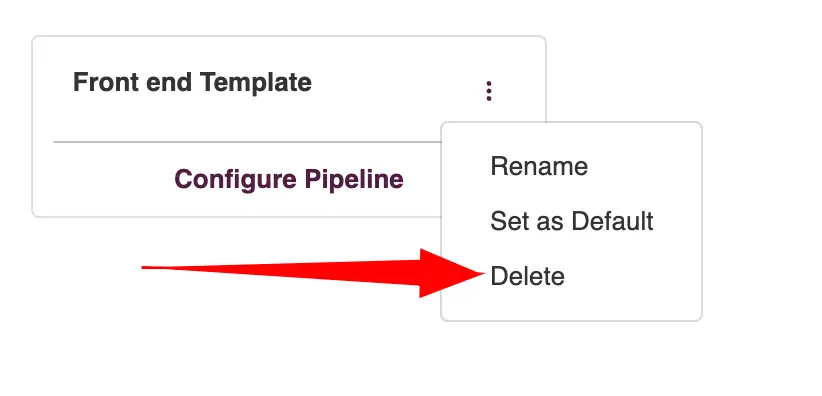
- Identify the workflow pipeline you want to rename. Click on the "More options" icon next to the pipeline title.
- Select "Delete" from the dropdown menu.
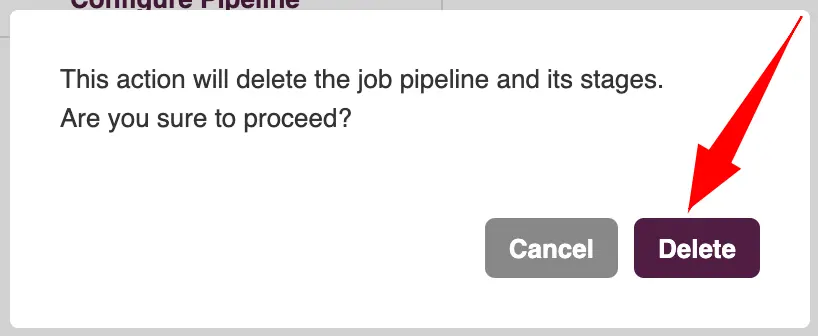
- Confirm the deletion in the pop-up window by clicking "Delete" again.
- Set Default Workflow Pipeline
- Locate the pipeline you wish to set as the default for new jobs.
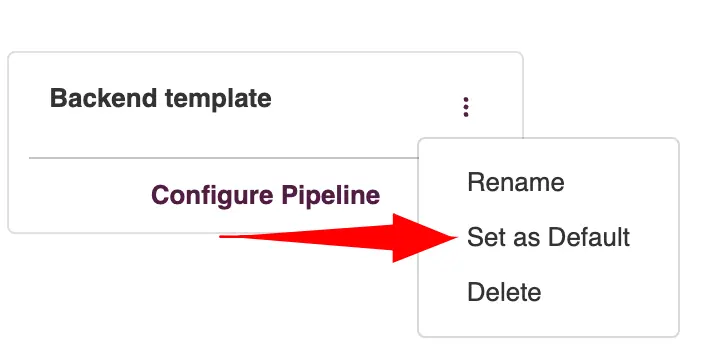
- Click on the more options icon next to the pipeline title and select "Set as default" in the dropdown menu.
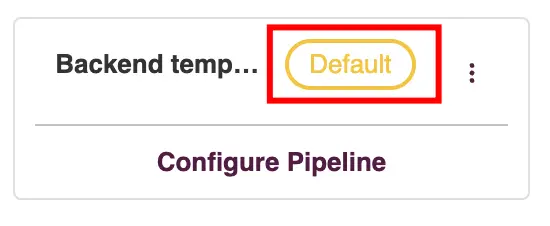
- Once selected, this pipeline will immediately become the default for any new jobs created.


Note:
Workflow pipelines that are currently being used in jobs cannot be deleted. Before deleting these pipelines, remove or reassign the jobs using them.

Note:
The chosen default pipeline will be automatically used for new jobs.
Hiring Workflow Management
Zita streamlines recruitment by allowing users to manage and track applicants. This feature provides users with the flexibility to choose and set distinct pipelines for individual jobs or apply a single pipeline universally across all openings. This flexibility enhances efficiency, simplifying the hiring process across the organization
Set the pipeline for the job:
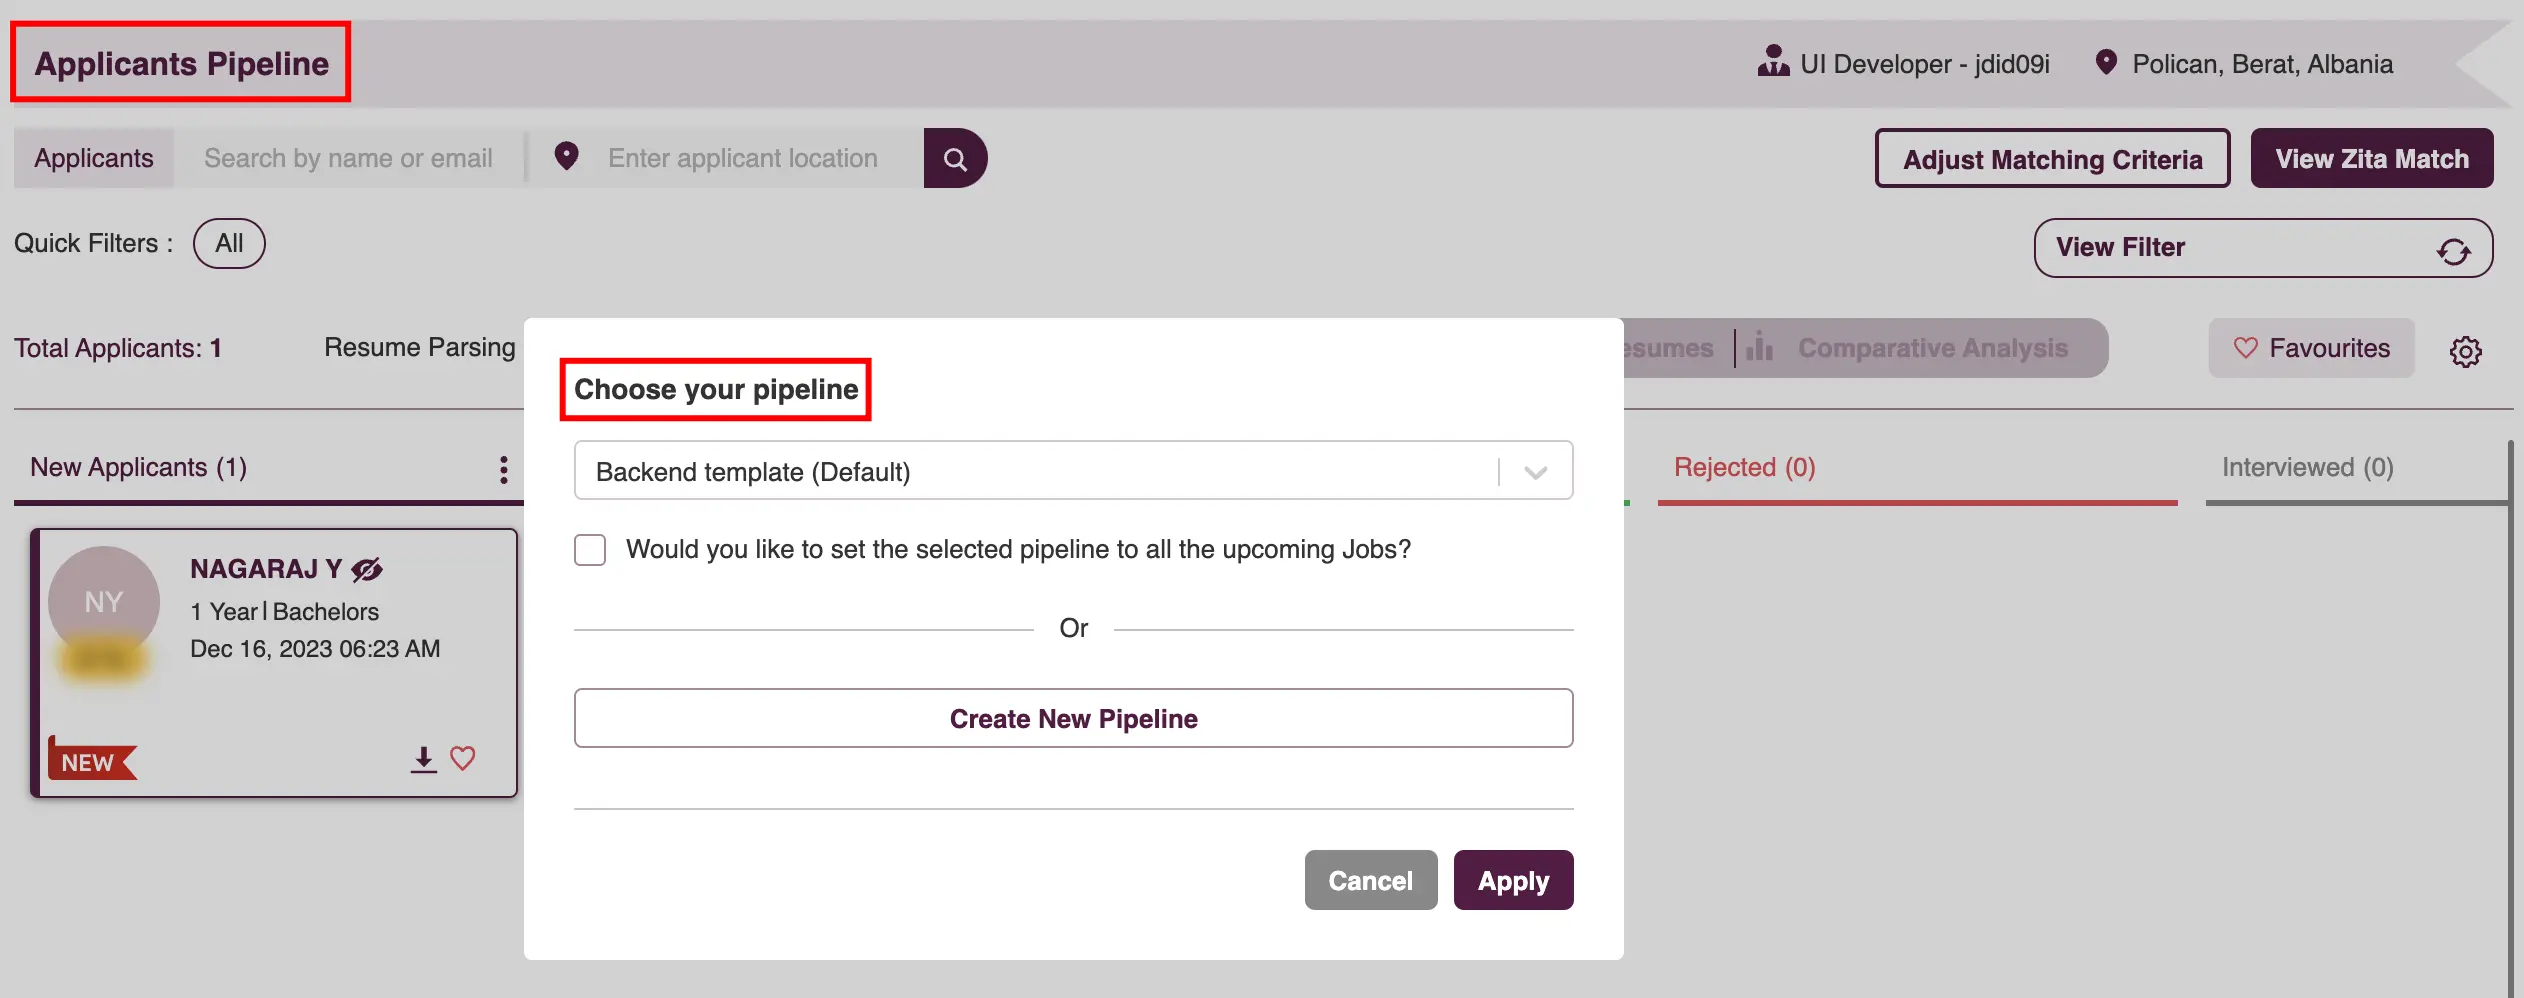
- When you view the applicant pipeline page for a specific job for the first time, you need to set the pipeline for that job.
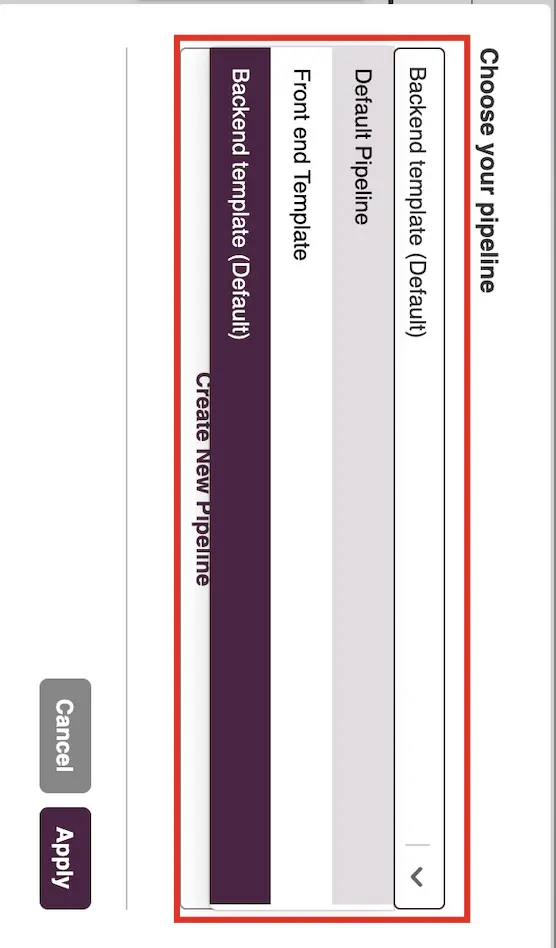
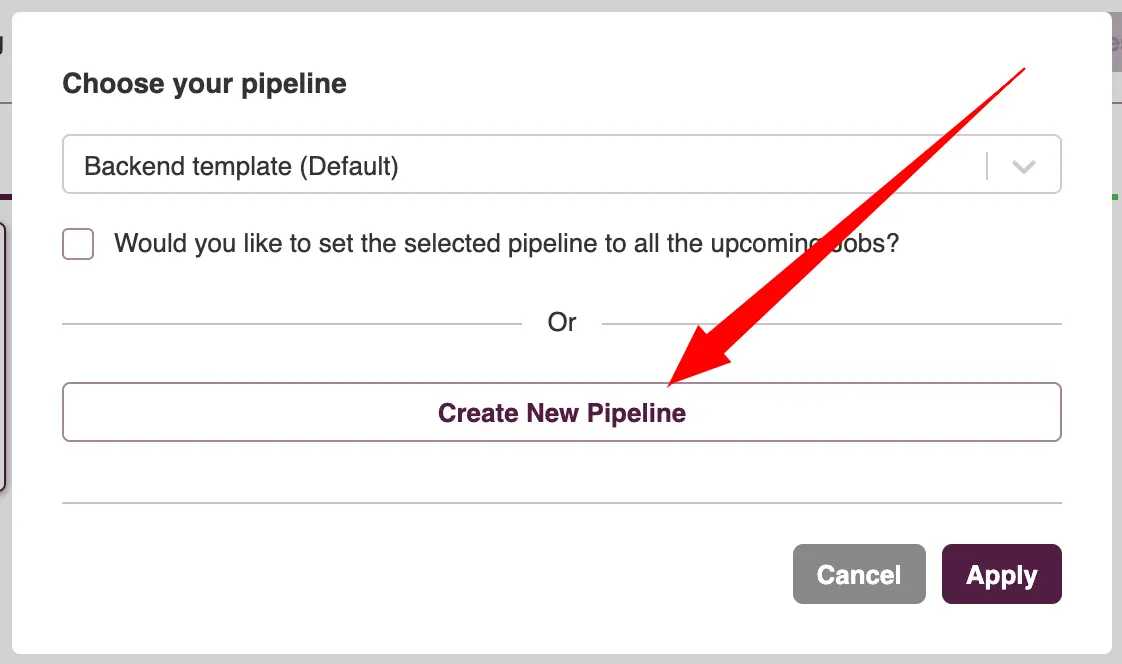
- Choose a pipeline from the dropdown menu or create a new pipeline by clicking on the "Create a New Pipeline" button.
- Refer to Create a Workflow sections for more details
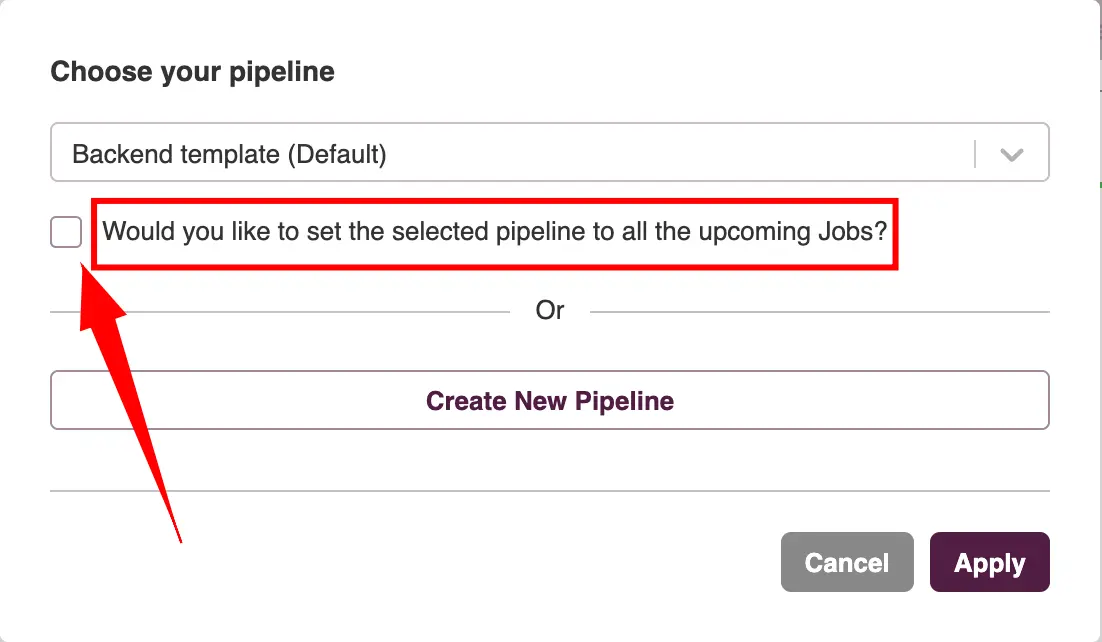
- You can set the pipeline for upcoming job creations by checking the checkbox provided for this option.
- Once you’re satisfied, click on the "Apply" button, to set the pipeline for the particular job.
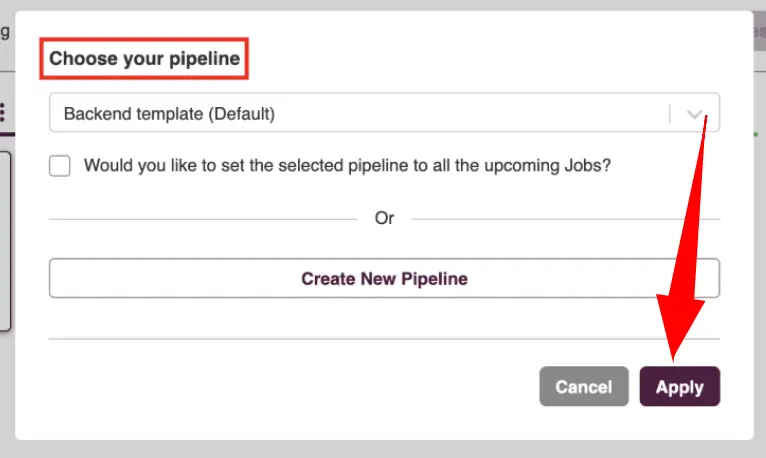
Applicant pipeline page
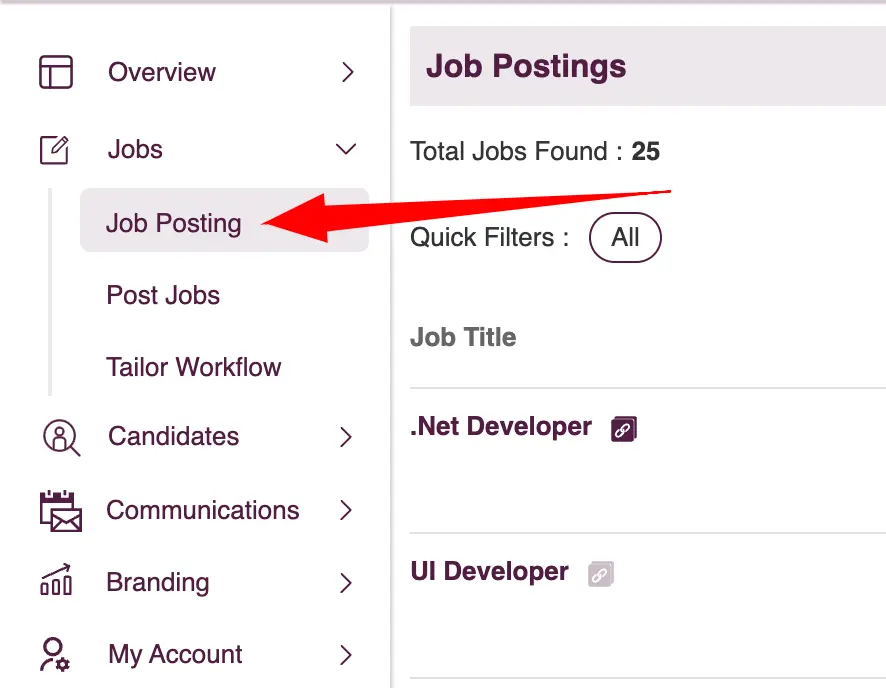
- Navigate to "Job Posting" in the sidebar menu.
- Click on the number under the "Applicants" column to view all applicants for that job. Alternatively, to view applicants based on their screening progress, click on the number in the "Screening Status" column for the specific job.
- This will direct you to the "Applicants Pipeline" page.

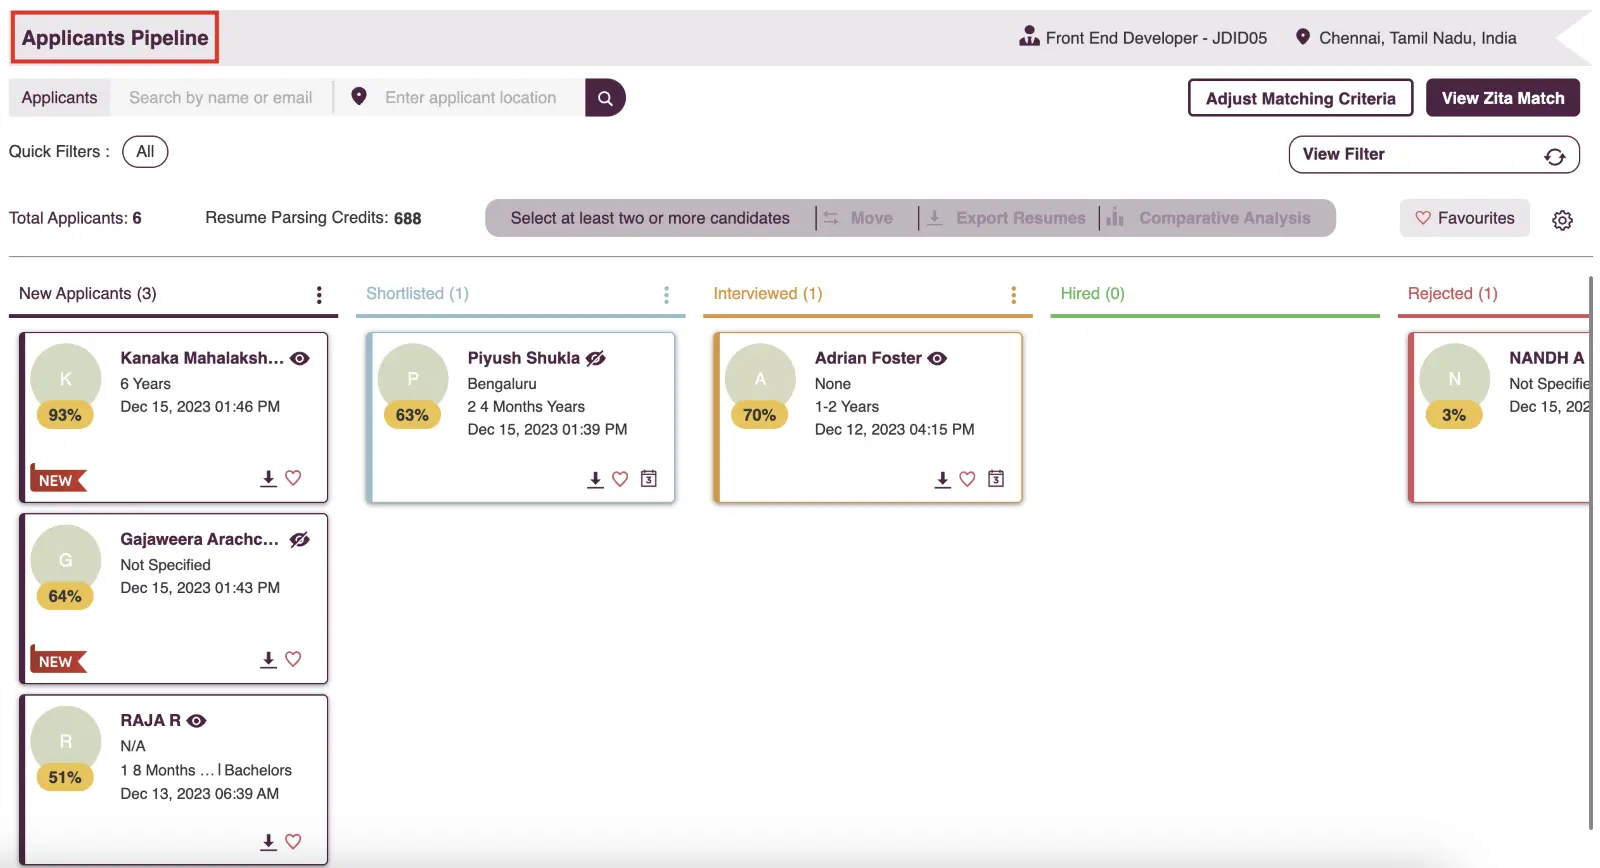
Zita’s applicant pipeline board streamlines hiring by enabling easy movement of candidates between different stages of the process.
Drag and drop Applicants
- To move an applicant along the stages in Zita, click and hold down the mouse button on the desired applicant’s profile.
- Drag the applicant’s profile to the desired stage in the hiring process.
- Release the mouse button when hovering over the desired stage to place and display the applicant’s card there alongside other applicants.
- All screening stages in the process will be automatically notified to the applicants.
Note:
- Once an applicant is moved from the "New Applicants" column, they cannot be moved back to this column.
- Similarly, if an applicant is moved to the "Rejected" column, they cannot be moved back to any previous stages.
Schedule Interview
- Once you move an applicant from the "New Applicants" column, you can then schedule an interview for them.
- Click on the "Schedule Interview" icon to open the integrated calendar in a separate window, where you can schedule the interview using Zita’s calendar.

Download Resume
- Click on the "Download Resume" icon to download the applicant’s resume.

Smart Filters
Filter criteria such as Profile, Experience, Qualification, and Skills. Applying these filters will automatically update the results on your screen, and you can view the active filters in the quick filters section for easy reference.
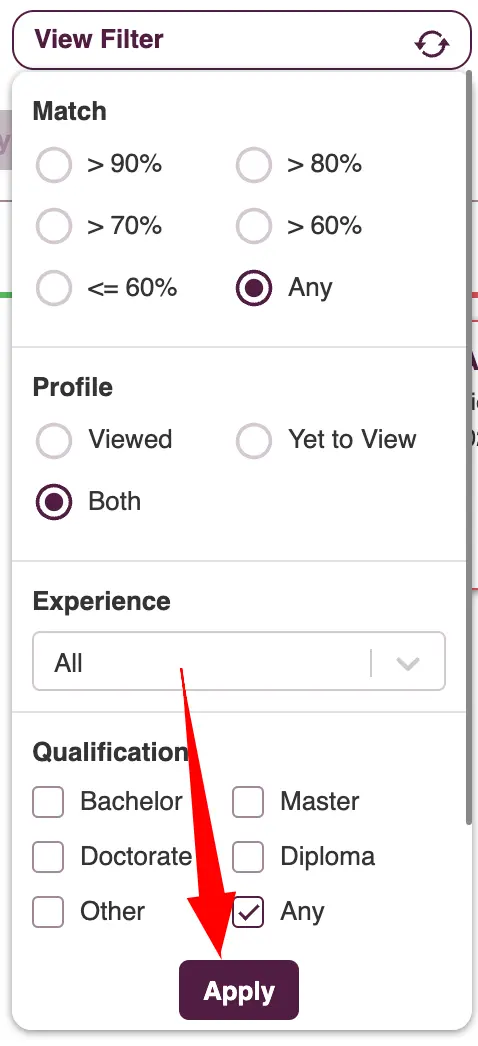
Sort By Filter
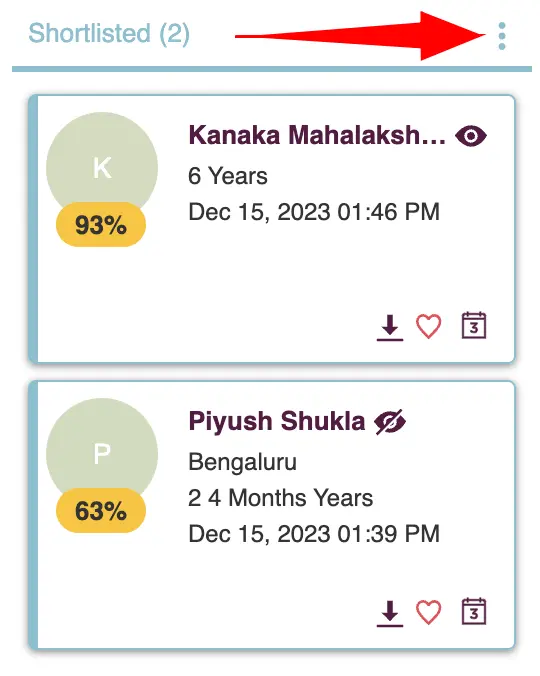
- When there are applicants in the stages, locate the "More" option next to the stage name.
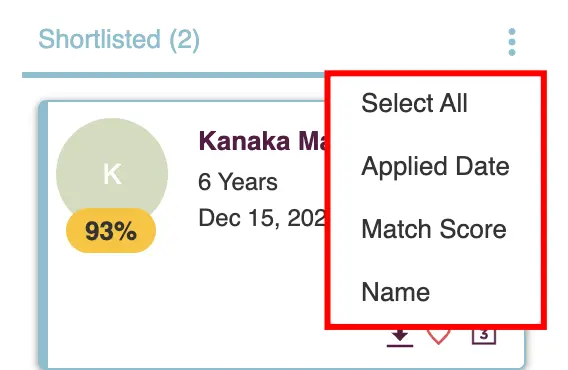
- You have the option to sort by Match Score, Applied Date, and Name.
- Click on the respective sort of option you want to apply, and you will see the changes reflected for that particular stage.
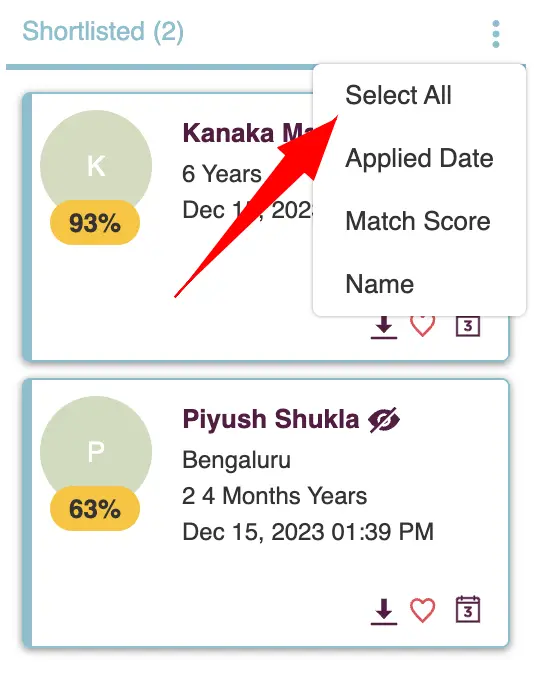
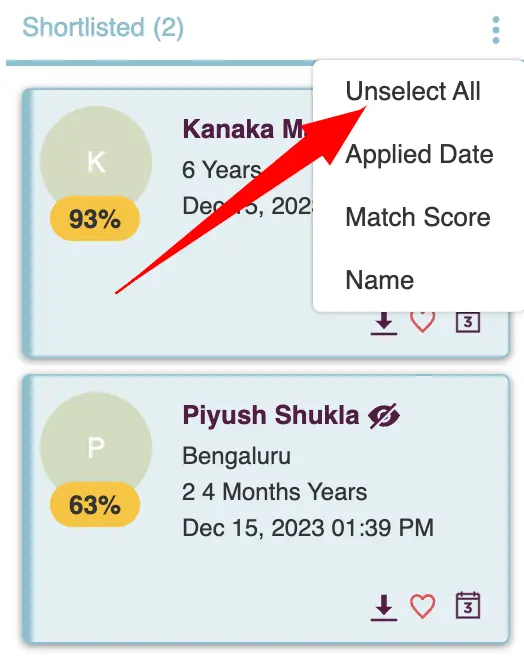
- Additionally, you have the option select and unselect all the applicants in the particular stage
Favorite Candidates
The Favorite Candidates feature enables easy marking of top candidates as favorites for quick access and organization within a job’s applicant list.
Marking as Favorites
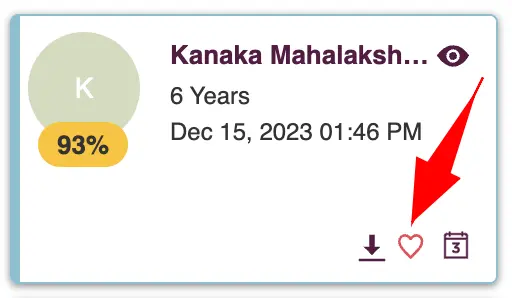
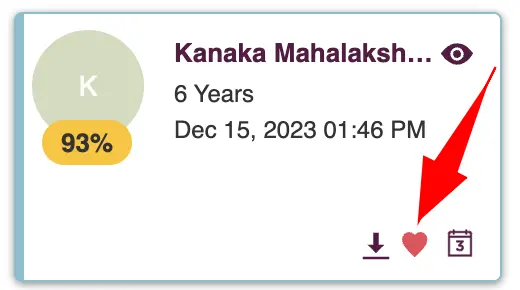
- Each applicant’s snippet includes a "Favorite" icon. Click on this icon to mark a candidate as a favorite.
- To remove an applicant from favorites, click the icon again to mark them as non-favorite.
Viewing Favorite Candidates
- Click on the "Favorites" button to display your list of favorites candidates.
- Click the button again to return to viewing all candidates.


Settings
This section covers two main settings in Zita: "Edit Stages" for customizing recruitment stages, and "Export CSV" for Downloading Pipeline Board Data.
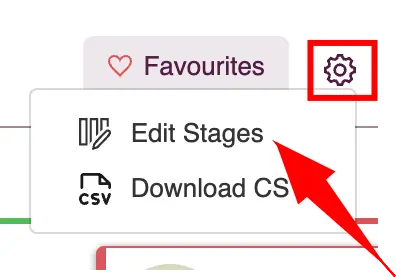
- Click on the "Settings" icon located in the right corner.
Edit stages
- Select the "Edit Stage" option from the dropdown menu under the Settings icon.
- This allows you to add new stages, assign colors to specific stages, rename existing stages, and reorder them. You also have the option to delete stages if they are no longer required.
- Check for the detailed information and options in the Workflow section.
Note:
Note that a stage cannot be deleted if there are applicants associated with it.
Export CSV
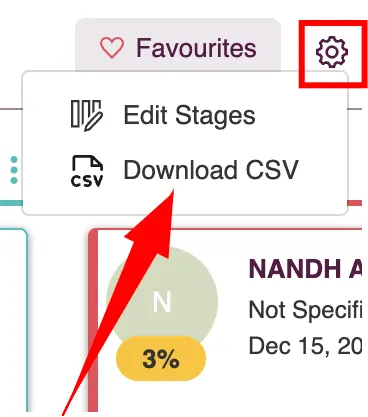
- Click on the "Download CSV" option from the dropdown menu under the Settings icon.
- This action will download a CSV file containing details such as personal information, job preferences, and pipeline stage details of the applicants.
- Additionally, Zita provides two more options: one to adjust the matching weightage and another to view the Zita match page. Explore the section below for insights into its functionality.

Managing Multiple Applicants Efficiently: Bulk Actions in the Applicant Pipeline
- Navigate to "Job Posting" in the sidebar menu.
- Click on the number under the "Applicants" column to view all applicants for that job. Alternatively, to view applicants based on their screening progress, click on the number in the "Screening Status" column for the specific job.
- This will direct you to the "Applicants Pipeline" page.
- When two or more applicants are selected in Zita’s pipeline board, the bulk action bar offers options like:


- Move
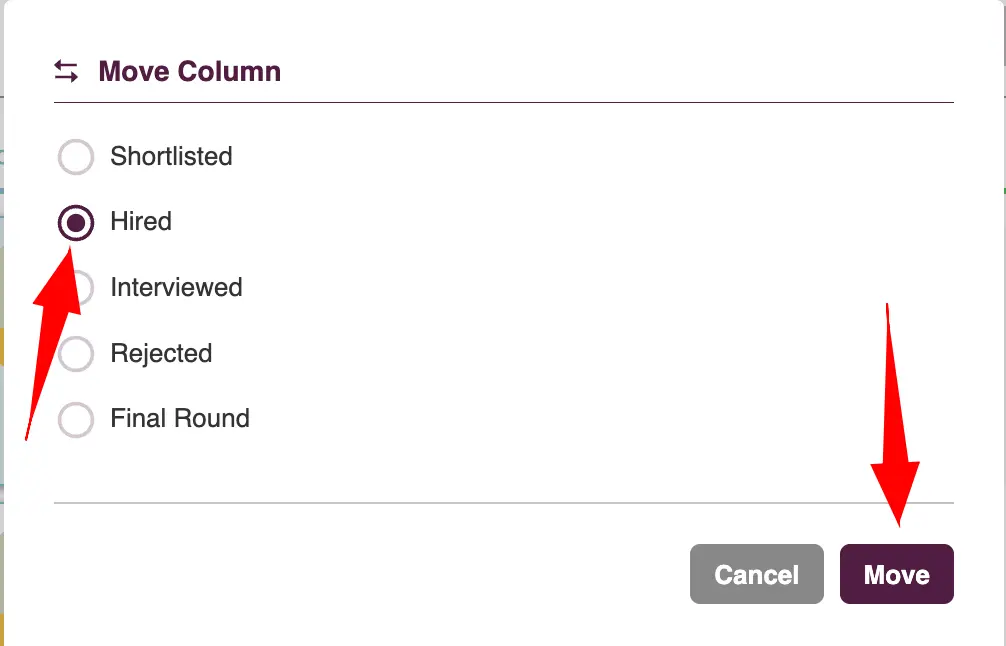
- In the bulk action bar, click on the "Move" option.
- Select the desired stage for the selected applicants.
- Click on the "Move" button to immediately move the applicants to the chosen stage.
- Export Resumes
- Click on the "Export Resumes" option in the bulk action bar.
- This will download the resumes of all selected applicants.
- Comparative Analysis
- Conduct a comparative analysis of selected applicants based on predefined criteria.
- View detailed information about this Comparative Analysis in the subsequent section of the interface.

