Interview and Assessment Tools
Overview
The Interview and Assessment Tools suite streamlines the recruitment process with in-built interview scheduling and an easy-to-use slot picker, complemented by AI-generated interview questions for targeted candidate assessment. It also includes both basic and customizable evaluation forms, enhancing the overall efficiency and effectiveness of the interview process.
In-Built Interview Scheduling
In Zita, you benefit from In-Built Interview Scheduling for seamless organization, AI-Generated Interview Questions for efficient screening, and both Basic and Customizable Evaluation Forms to tailor your candidate assessments to your needs.
Interview Scheduling
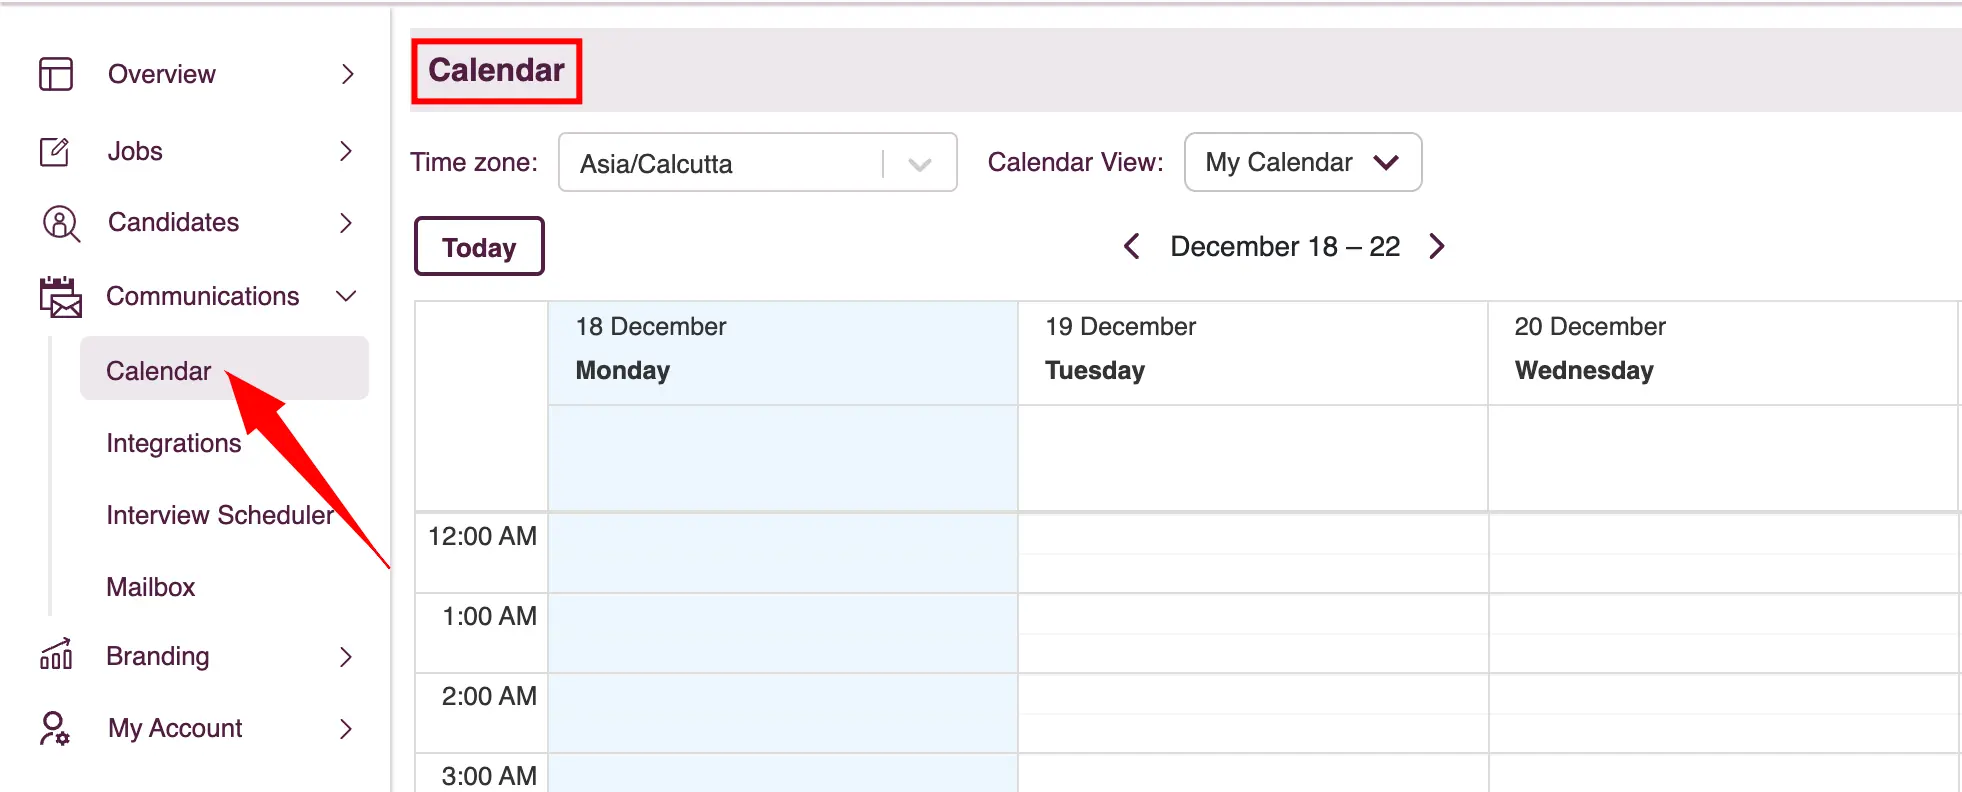
- Go to the "Calendar", located under the Communication menu in the sidebar
- Ensure that you've integrated your Zita calendar with either Outlook Mail or Google Mail.
- For integration in the Zita calendar, refer to the following section: Calendar Integration
- Within the calendar, you can view events in day, work week, week, month, and agenda views. Toggle between these views to check for upcoming events.

AI-Generated Interview Questions
AI-Generated Interview Questions' is a feature that automatically generates interview questions based on candidate profiles and job requirements. These questions are designed to streamline the interview process and help assess candidate suitability efficiently. Users can access and utilize these AI-generated interview questions within the Zita application
- If this feature is not included in your plan, you have the opportunity to purchase it as an add-on.
- Functionality: Generate personalized, AI-optimized interview questions and answers for each interviewer, complete with a customizable scorecard evaluation form.
- Impact: Elevate your interview process, ensuring a more targeted and effective candidate assessment.
- Upon successfully purchasing the add-on feature, you will enjoy unlimited access to AI interview question generation.
Add on Feature: AI Interview Questions Generation & Customize Evaluation
You can find detailed information on how to purchase the add-on feature.
You can generate interview questions in two primary ways within our system:
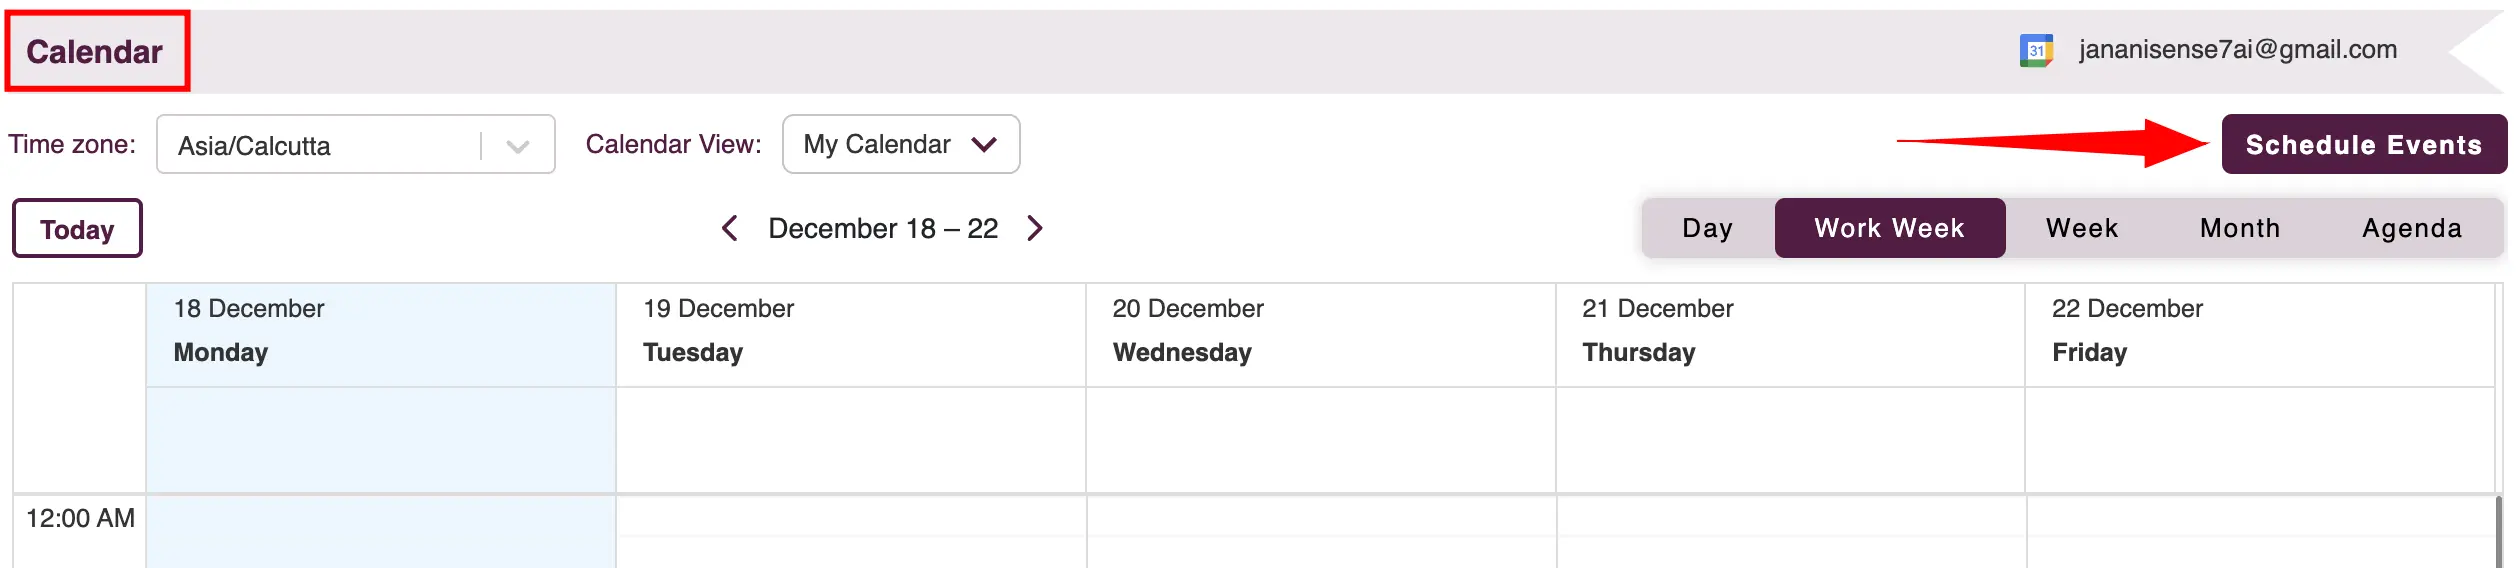
- During Event Scheduling in the Calendar
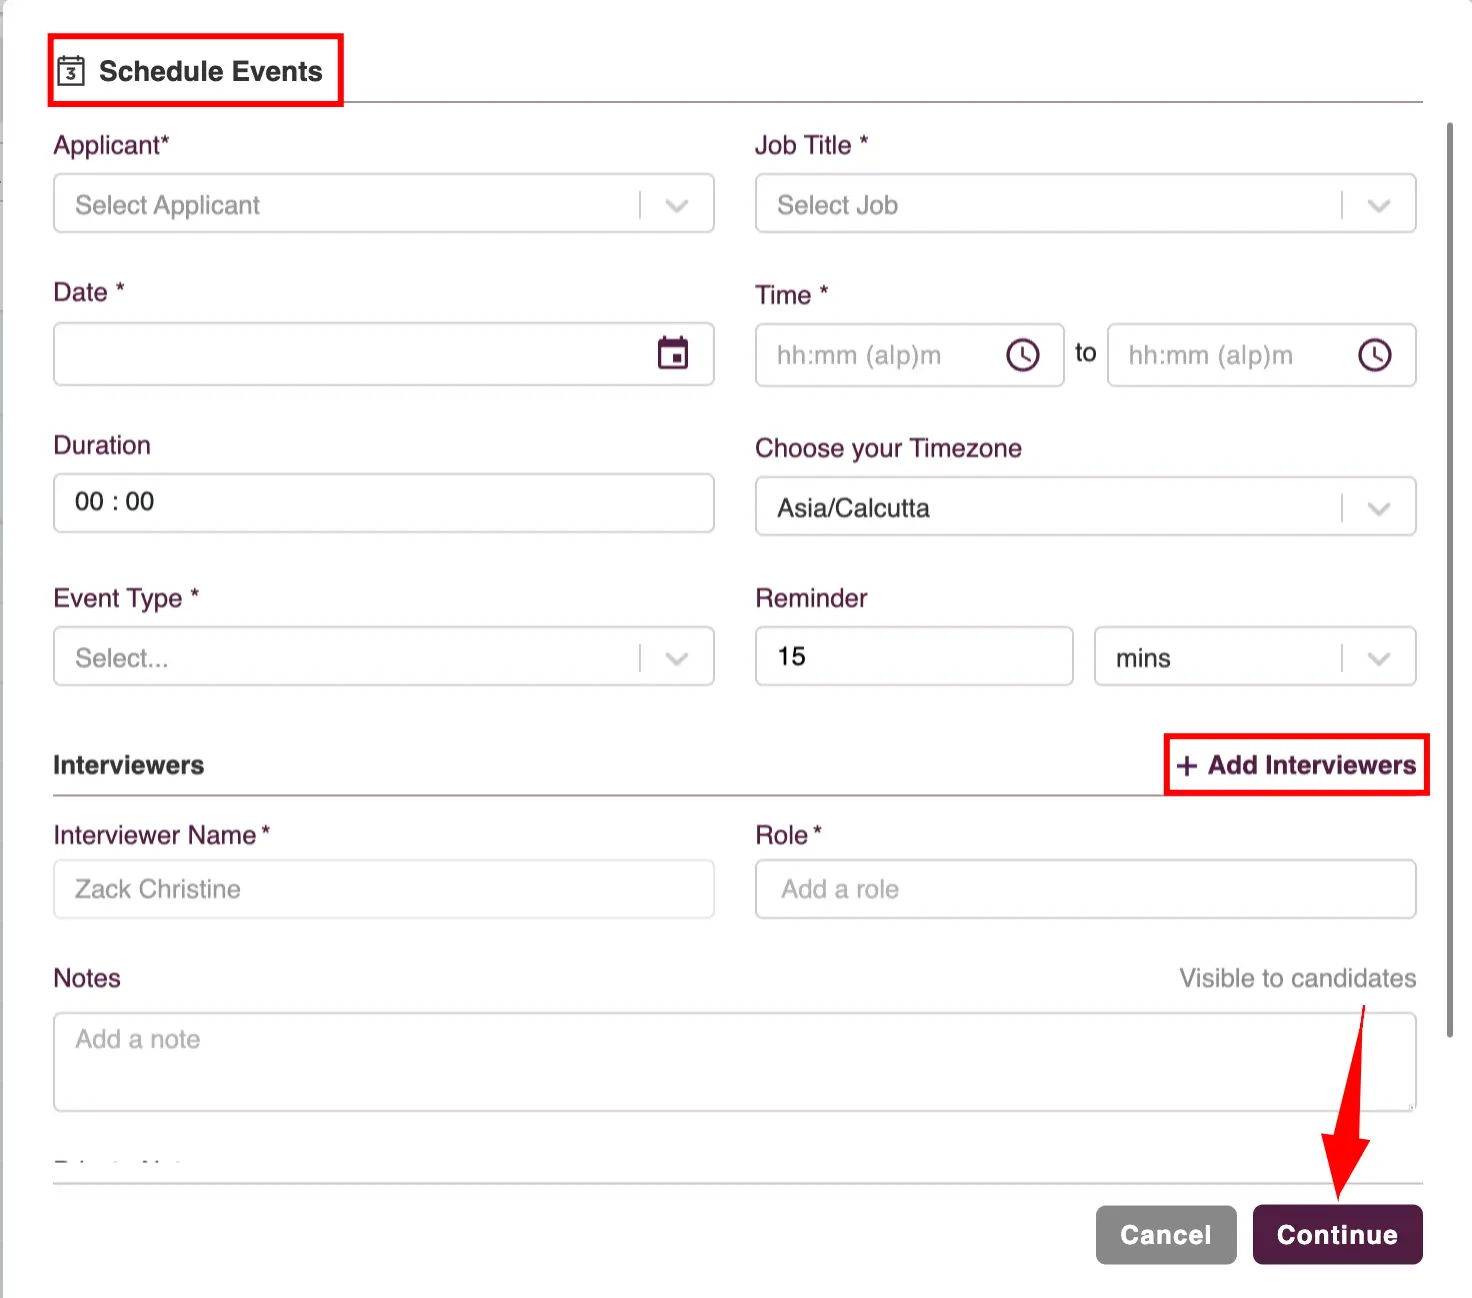
- To schedule an interview, click on "Schedule Events" in the calendar screen.
- Alternatively, within an applicant's profile, you can navigate to the "Meetings" tab and then click on the "Schedule Events" button, which allows scheduling process specific to the candidate.
- Another option is to use the Interview Scheduler; here, you click on "Calendar Events" and then select "Schedule Events" . This method is especially useful for coordinating multiple interviews or managing a complex interview schedule.
- Fill in all the mandatory fields and add interviewers from the team by clicking on "Add interviewer" . Provide the roles for each added interviewer.
- Click "Continue" to the interview scheduling process.
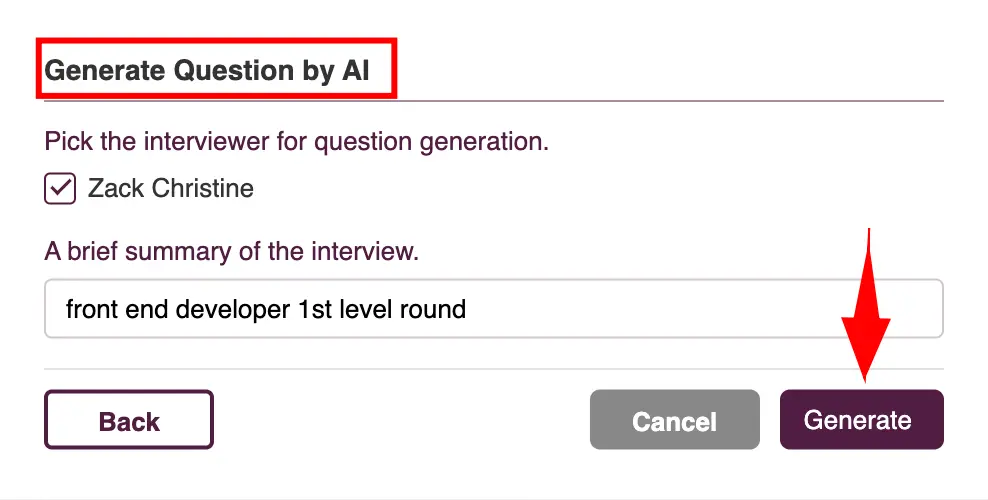
- Choose the interviewer from your team for whom you wish to generate questions. Provide a summary highlighting the job position and essential skills for the role.
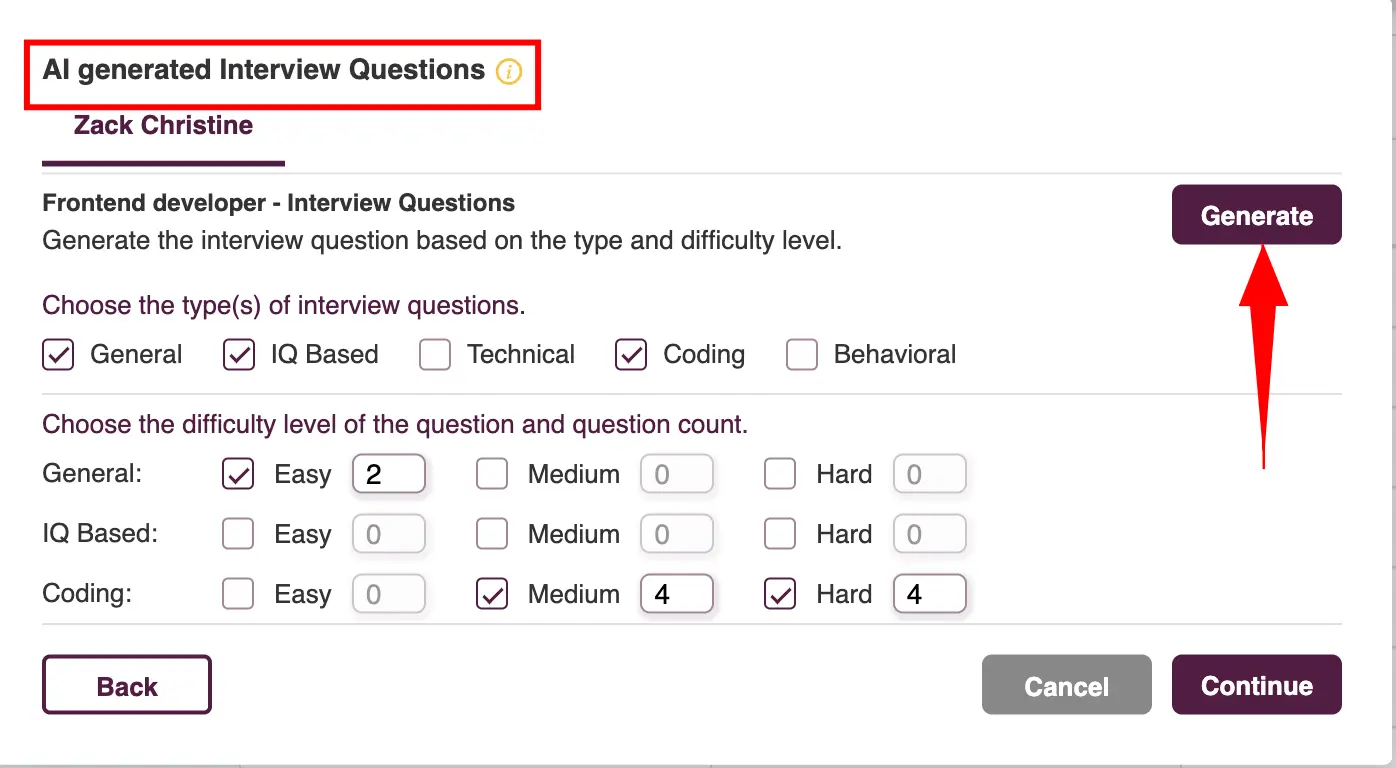
- Choose the right category for each question. Assign a difficulty level to each question. Specify the desired number of questions for each difficulty level and click on the "Generate" button to start the process.
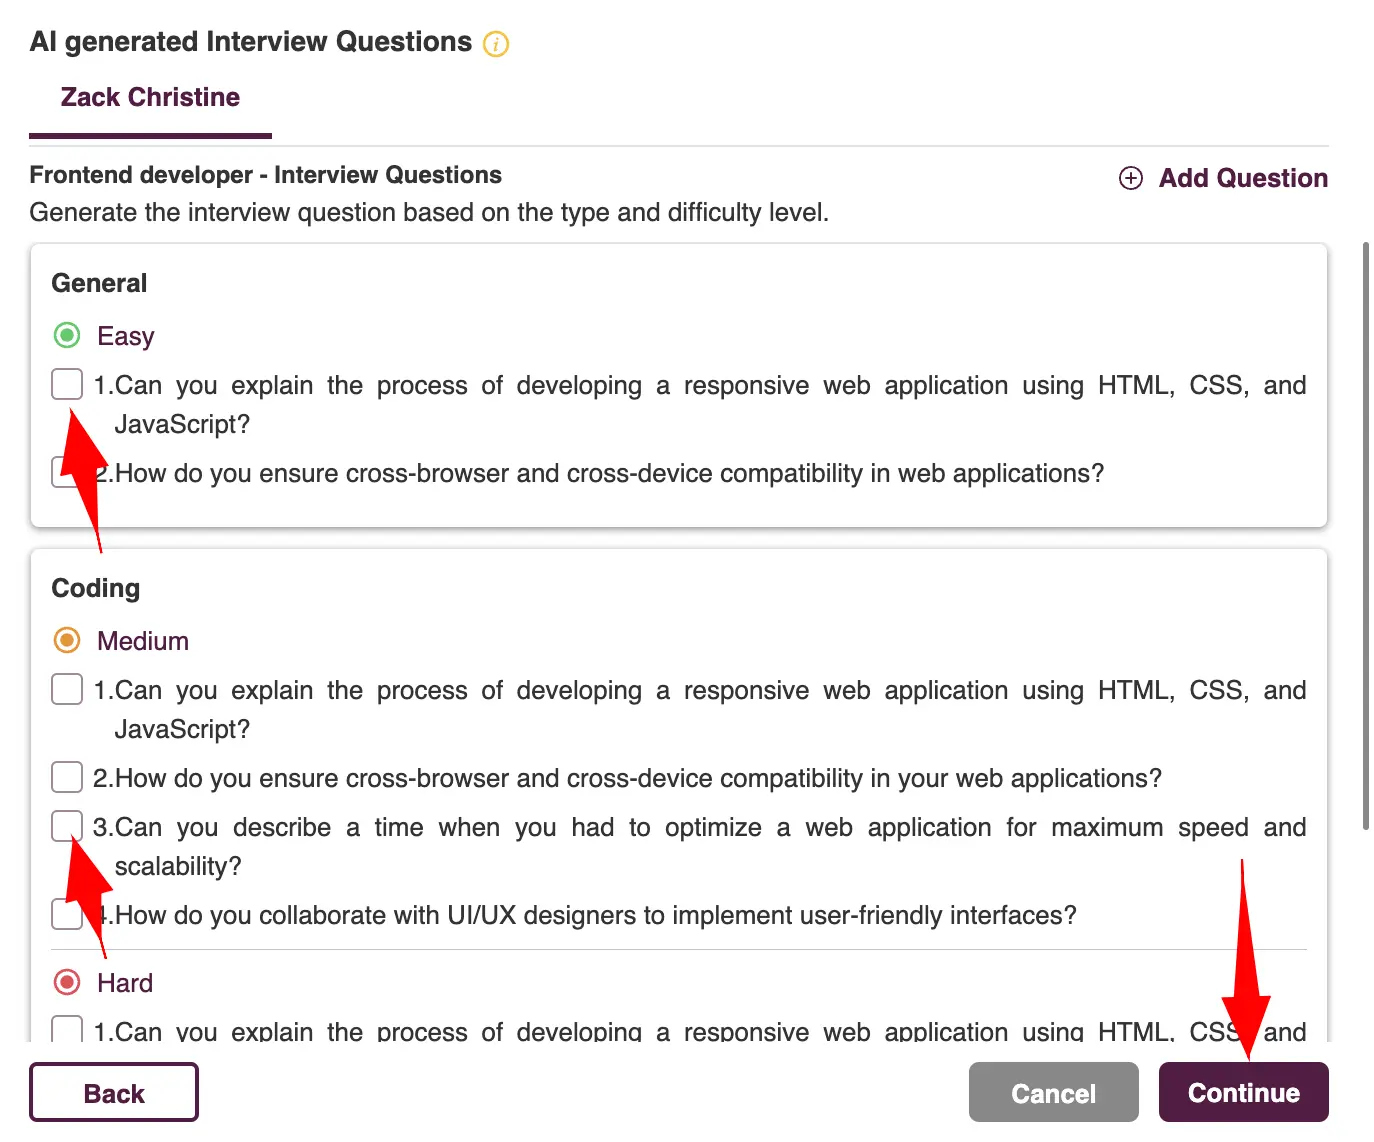
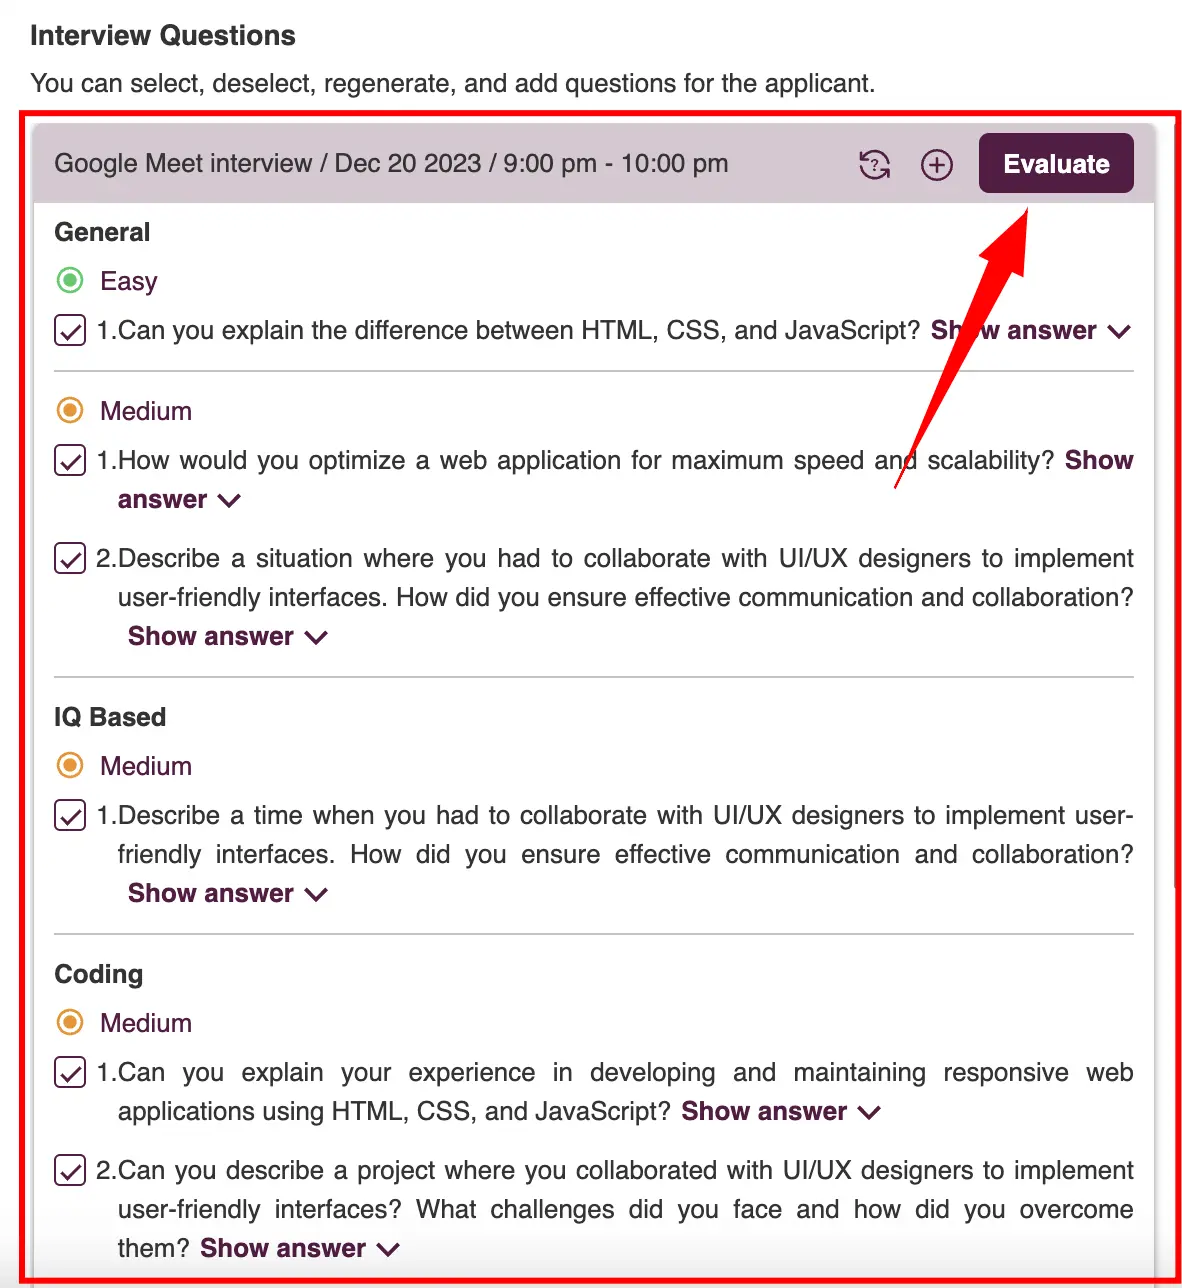
- Check the boxes next to the questions you want to set for the interviewer.
- Once you're ready, click on the "Continue" button to proceed with scheduling the meeting.
- To send the invite, review the meeting notification summary and then click on the "Send Invite" button.
- In the Applicant Profile under Interview Question/Scorecard.
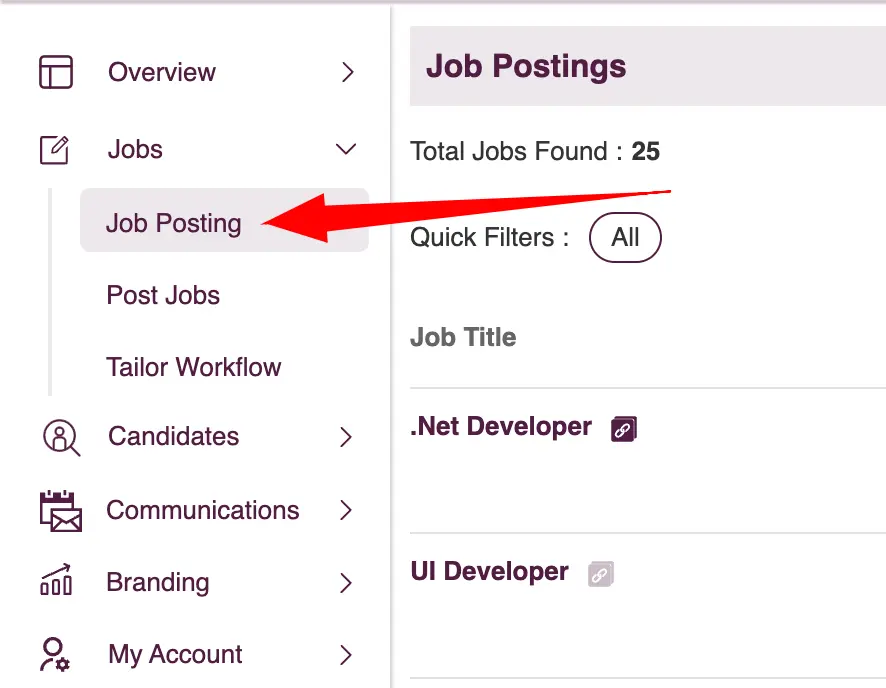
- Navigate to "Job Posting" in the sidebar menu.
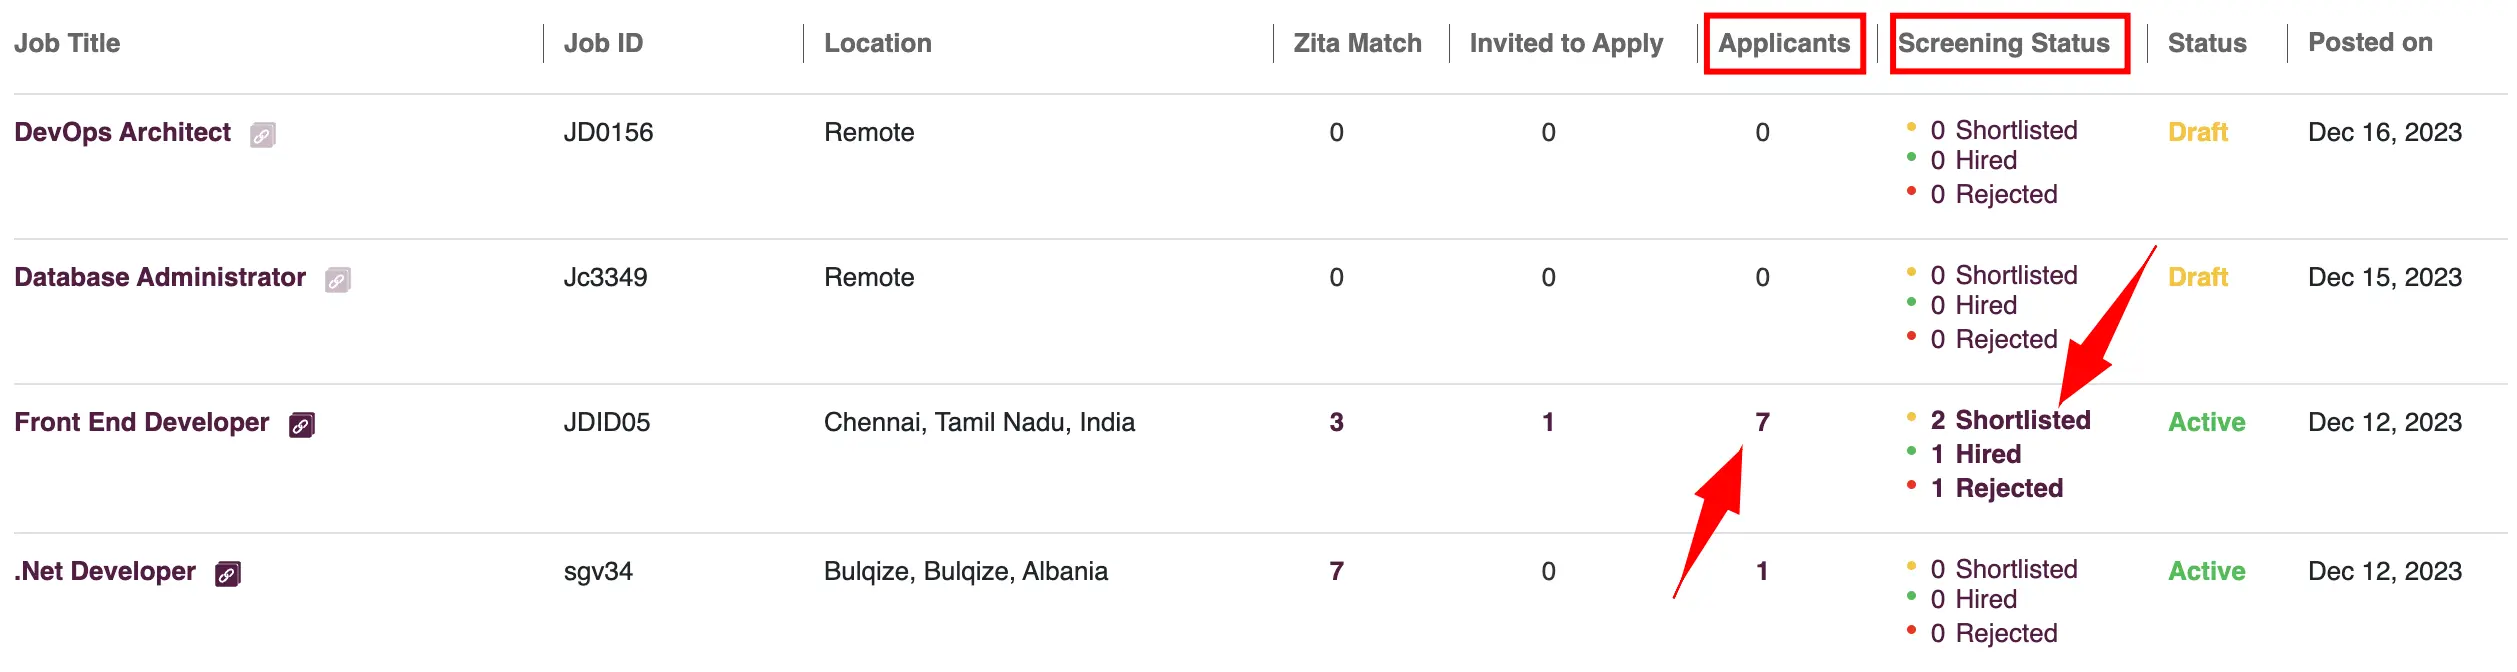
- Click on the number under the "Applicants" column to view all applicants for that job. Alternatively, to view applicants based on their screening progress, click on the number in the "Screening Status" column for the specific job.
- This will direct you to the "Applicants Pipeline" page. Then, click on the name of the applicant in the snippet to view their full profile.
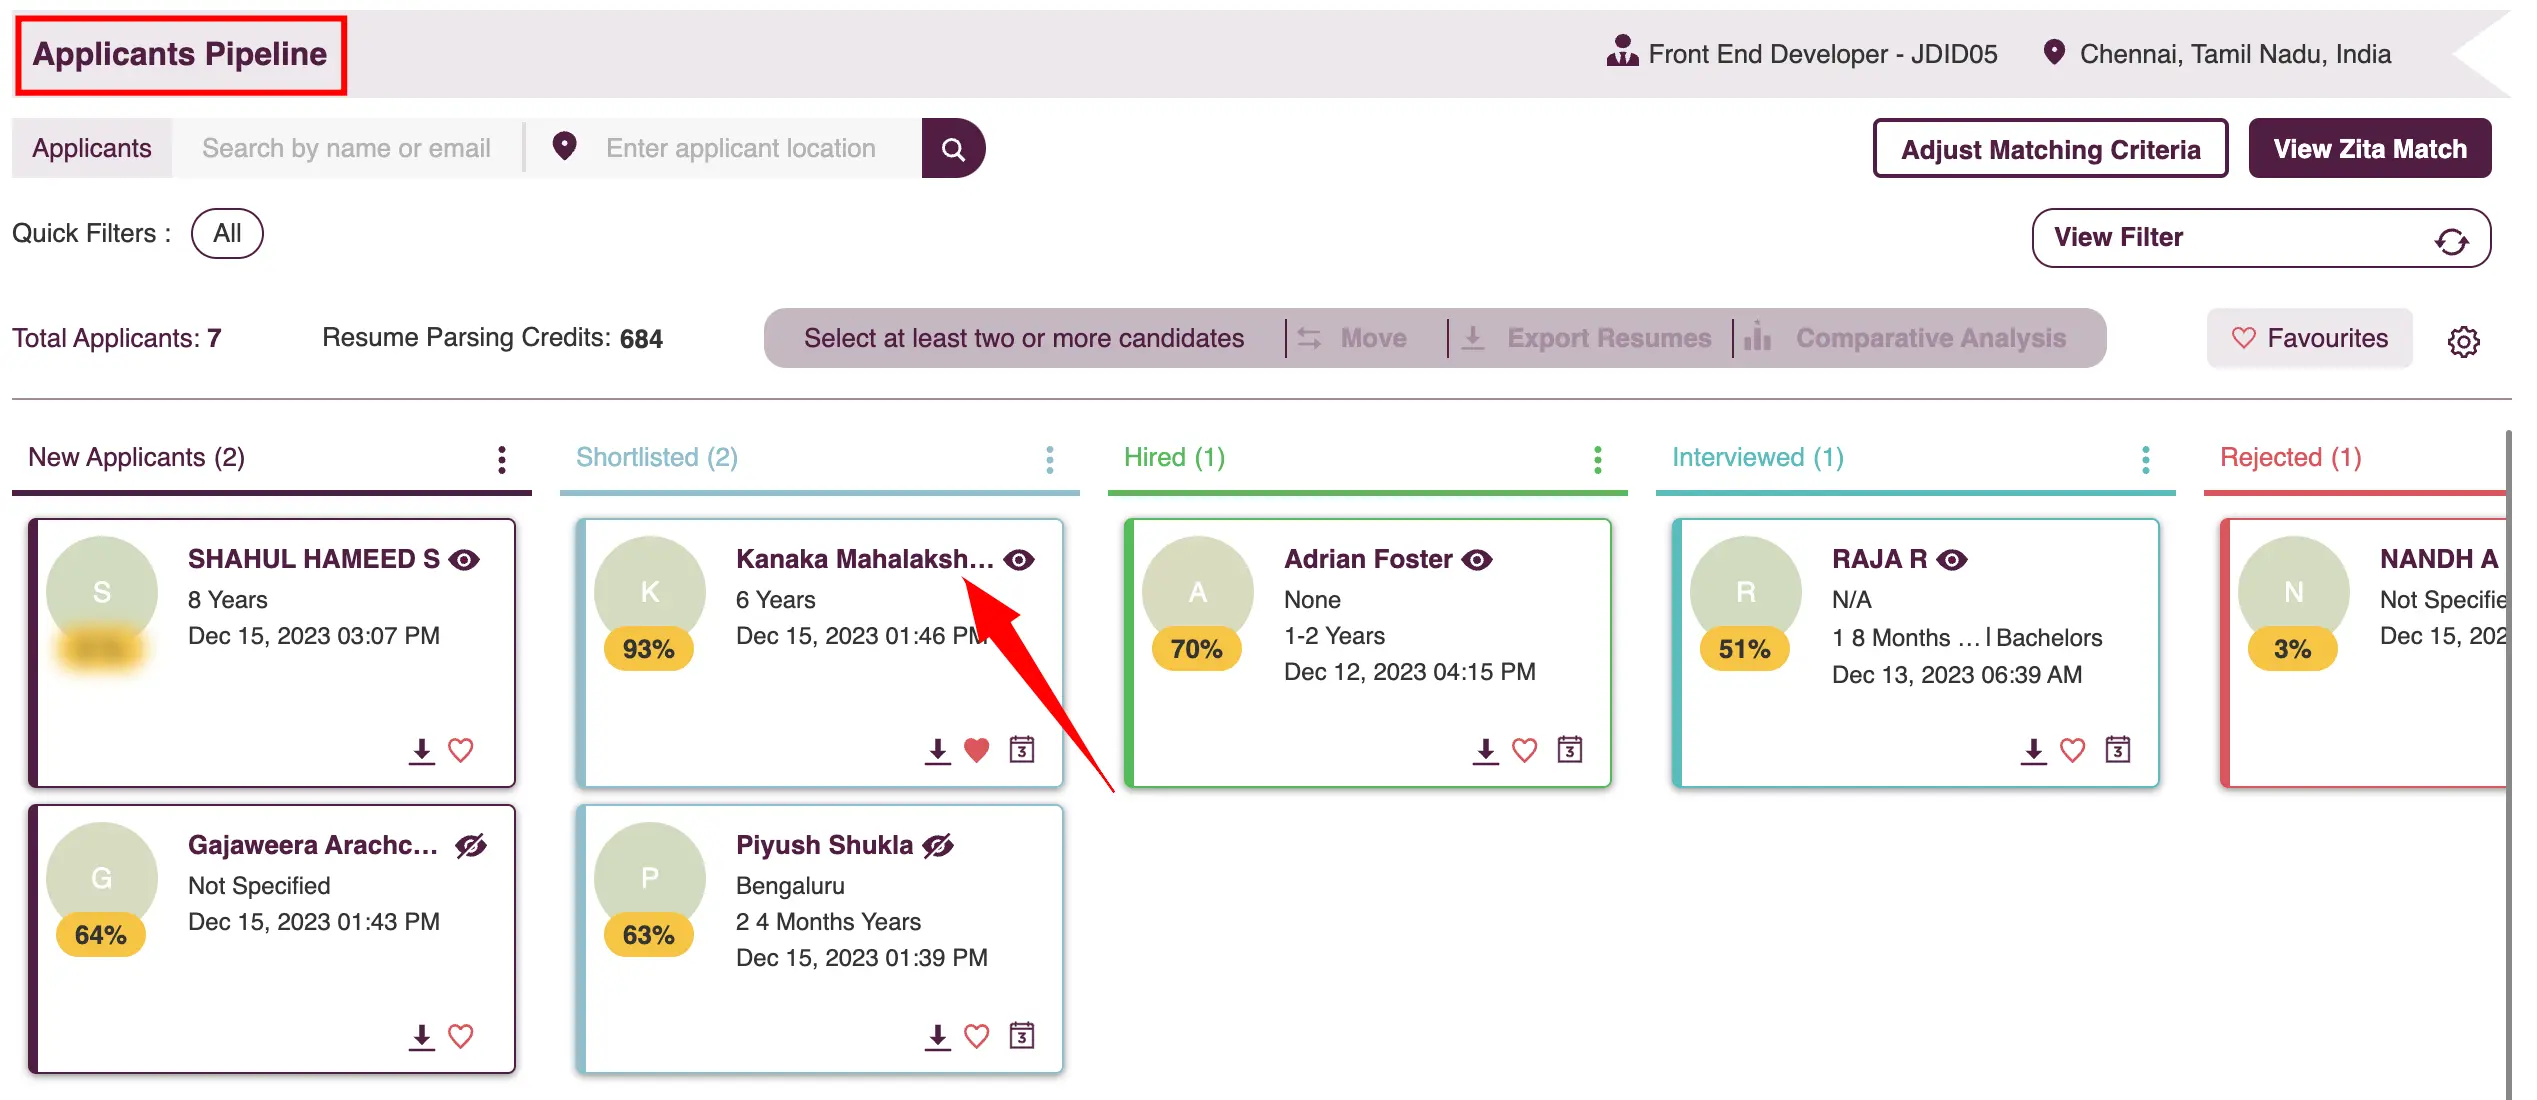
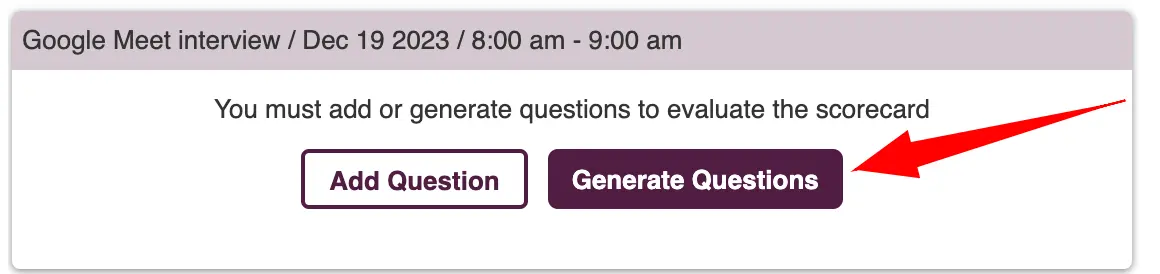
- Click the "Interview Questions/Scorecard" tab.
- Locate the interview for which you wish to generate questions and click on the “Generate Questions” button.
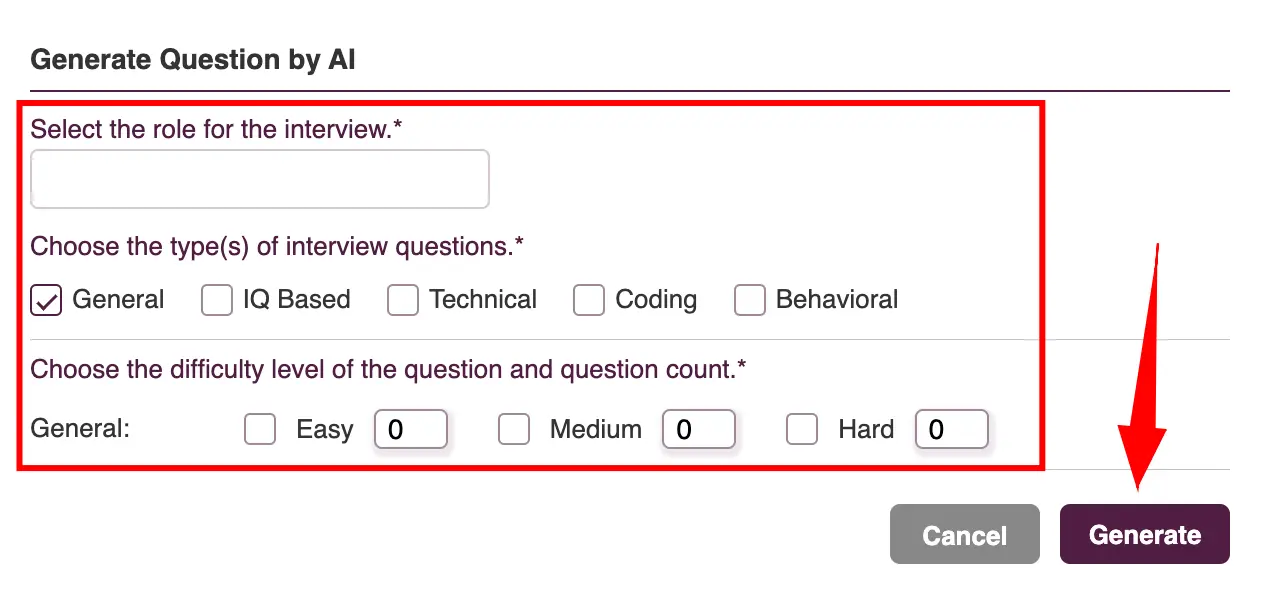
- Choose the right category for each question. Mention the role of the interviewer, Assign a difficulty level to each question. Specify the desired number of questions for each difficulty level and click on the "Generate" button to start the process.


Basic and Customizable Evaluation Forms
Post-interview, evaluate applicants based on their performance, focusing on their skills, responses, and alignment with job requirements to determine their suitability for the role.
- Navigate to "Job Posting" in the sidebar menu.
- Click on the number under the "Applicants" column to view all applicants for that job. Alternatively, to view applicants based on their screening progress, click on the number in the "Screening Status" column for the specific job.
- This will direct you to the "Applicants Pipeline" page. Then, click on the name of the applicant in the snippet to view their full profile.
- Click the "Interview Questions/Scorecard" tab.
- Zita provides two distinct methods for applicant evaluation to suit different hiring needs:
Tip:
In the Interview section, Zita provides options to add new questions and regenerate the existing question set by clicking on the respective buttons for each function.
Basic Evaluation Form
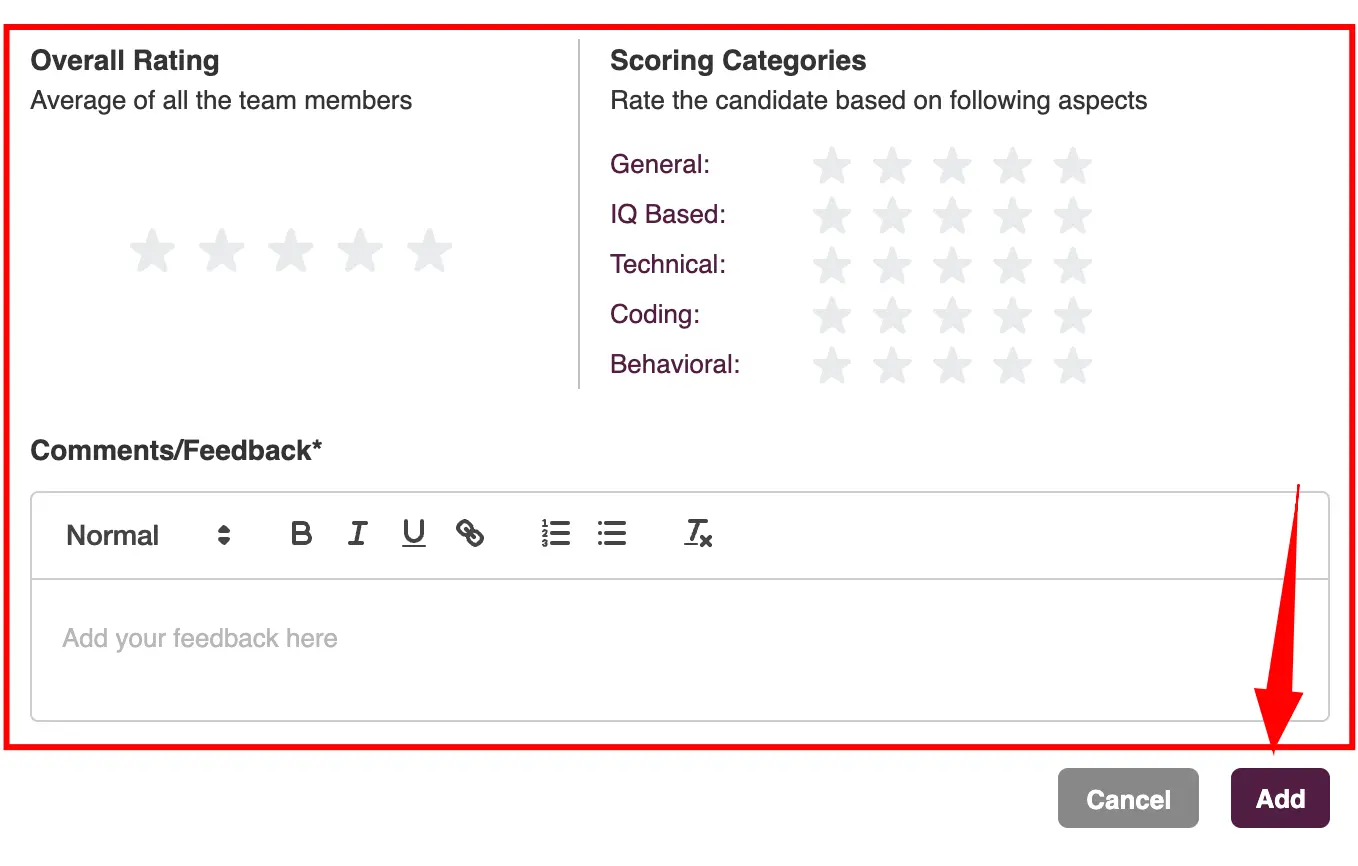
This is a standard form with predefined criteria, encompassing areas like general knowledge, IQ, coding, technical, and behavioral skills. It also includes a dedicated section for comments and feedback, making it a comprehensive tool for basic assessment needs.
- Locate the scheduled interview for which you wish to Evaluate and click on "Evaluate" button.
- Provide all the required fields and click on the "Add" Button.

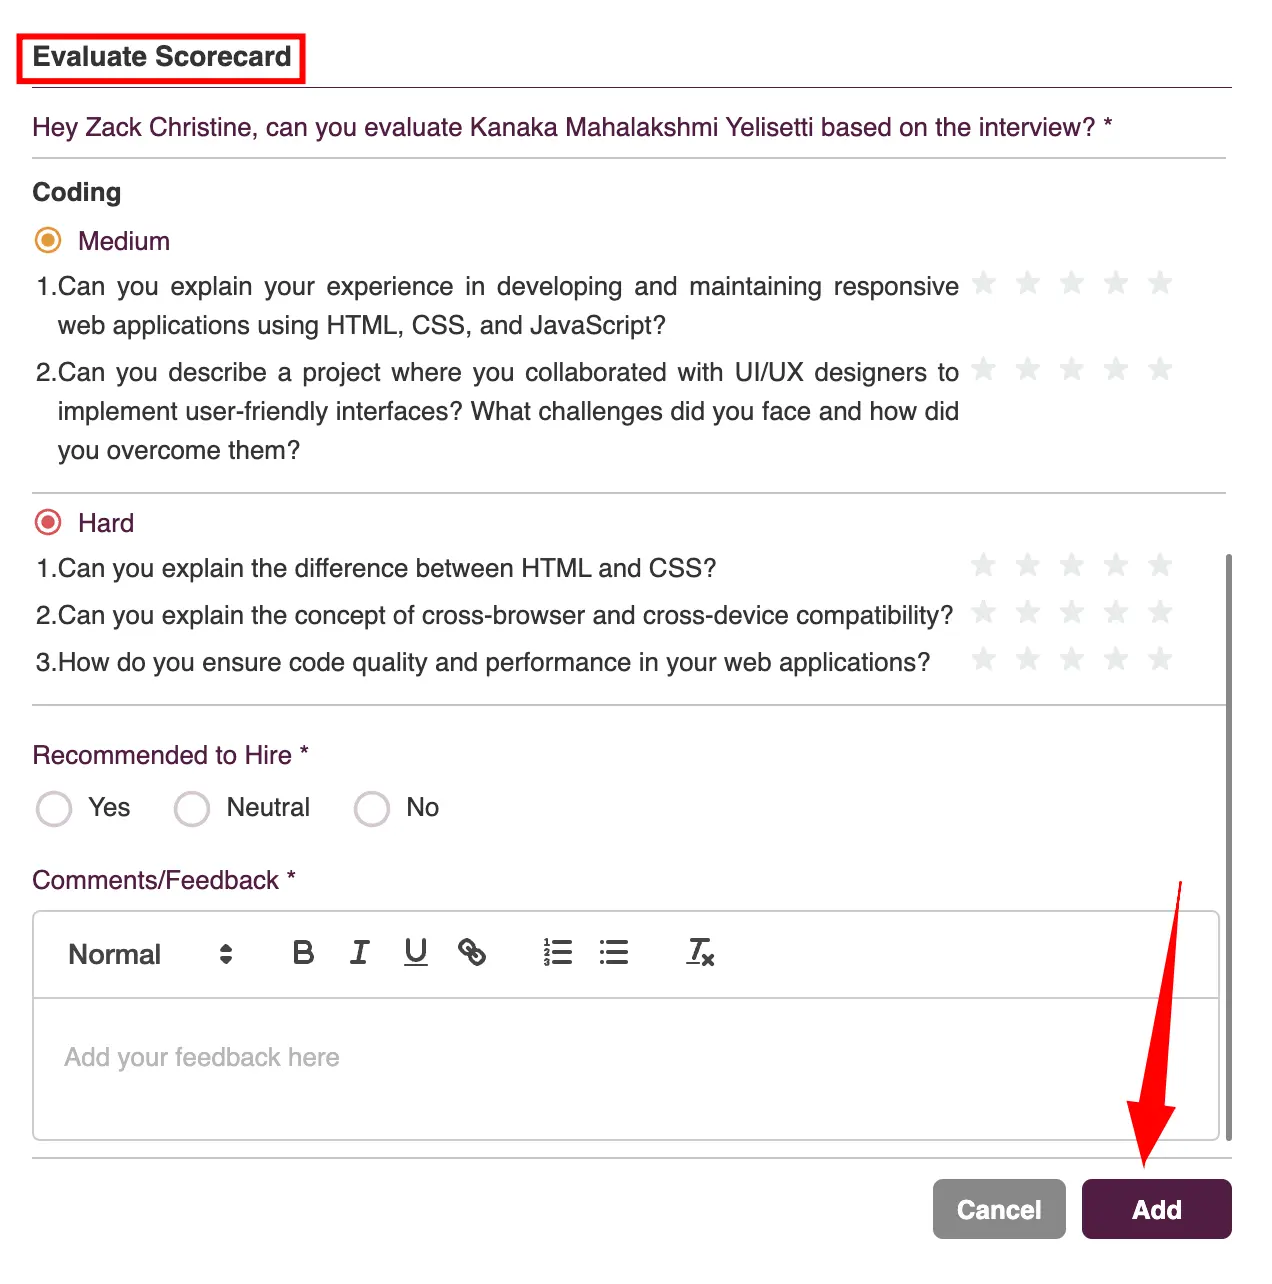
Customizable Evaluation Form
The "Customizable Evaluation Form" is an add-on feature within the "AI Interview Questions and Customizable Form" package. It enables interviewers to choose relevant questions, rate responses, recommend applicant status, and offer comments and feedback, ideal for detailed, tailored evaluations.
- Locate the scheduled interview for which you wish to Evaluate and click on "Evaluate" button.
- Provide all the required fields and click on the "Add" Button.
Important:
Make sure to purchase the add on feature to avail the evaluation Form
Scorecard View
The scorecard in the "Interview Question/Scorecard" section is a detailed evaluation tool designed to provide a comprehensive overview of a candidate's interview performance.
- In the "Interview Question/Scorecard" section, the scorecard is accessible on the right-hand side. Each interview comes with its own scorecard
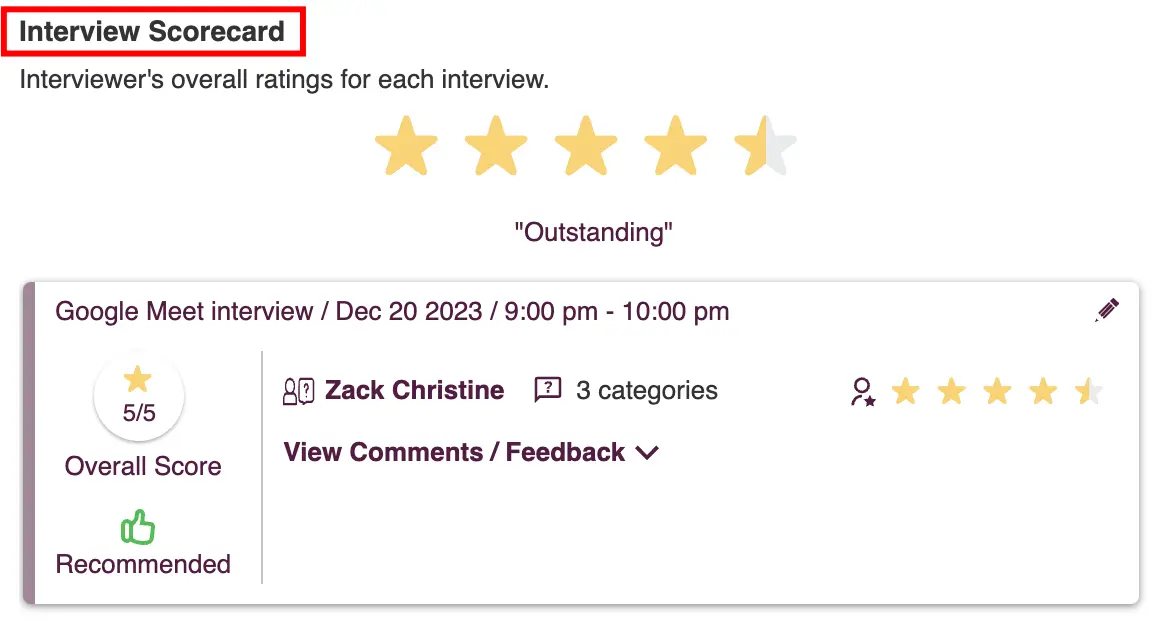
Key features of the scorecard include:
- Cumulative Overall Score: This represents the aggregated score from the interview, giving a holistic view of the candidate's performance across all assessed areas.
- Overall Rating for each interview: which is a cumulative measure reflecting the candidate's performance across various evaluation criteria.
- Individual Ratings and Comments: Each interviewer provides their own ratings and personalized comments on the candidate's performance. This section offers diverse perspectives and insights from different interviewers, contributing to a well-rounded evaluation.
- Recommendation for the Candidate: If the add-on feature is enabled, the scorecard also includes a recommendation section where interviewers can suggest the suitability of the candidate for the position.
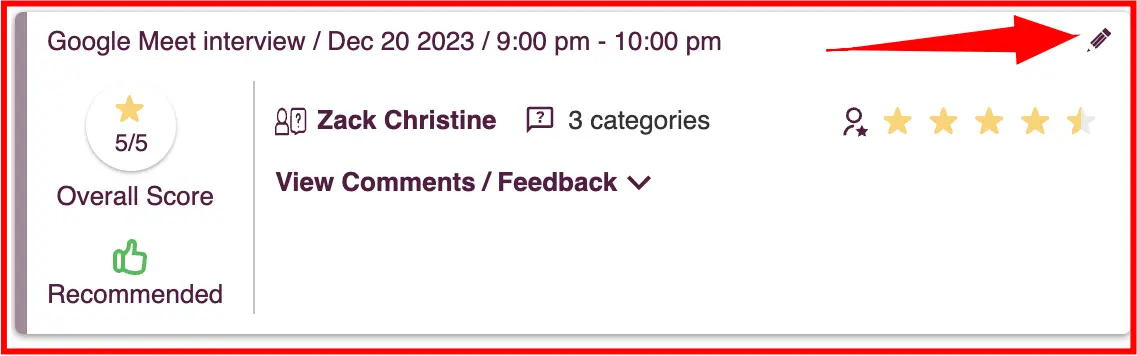
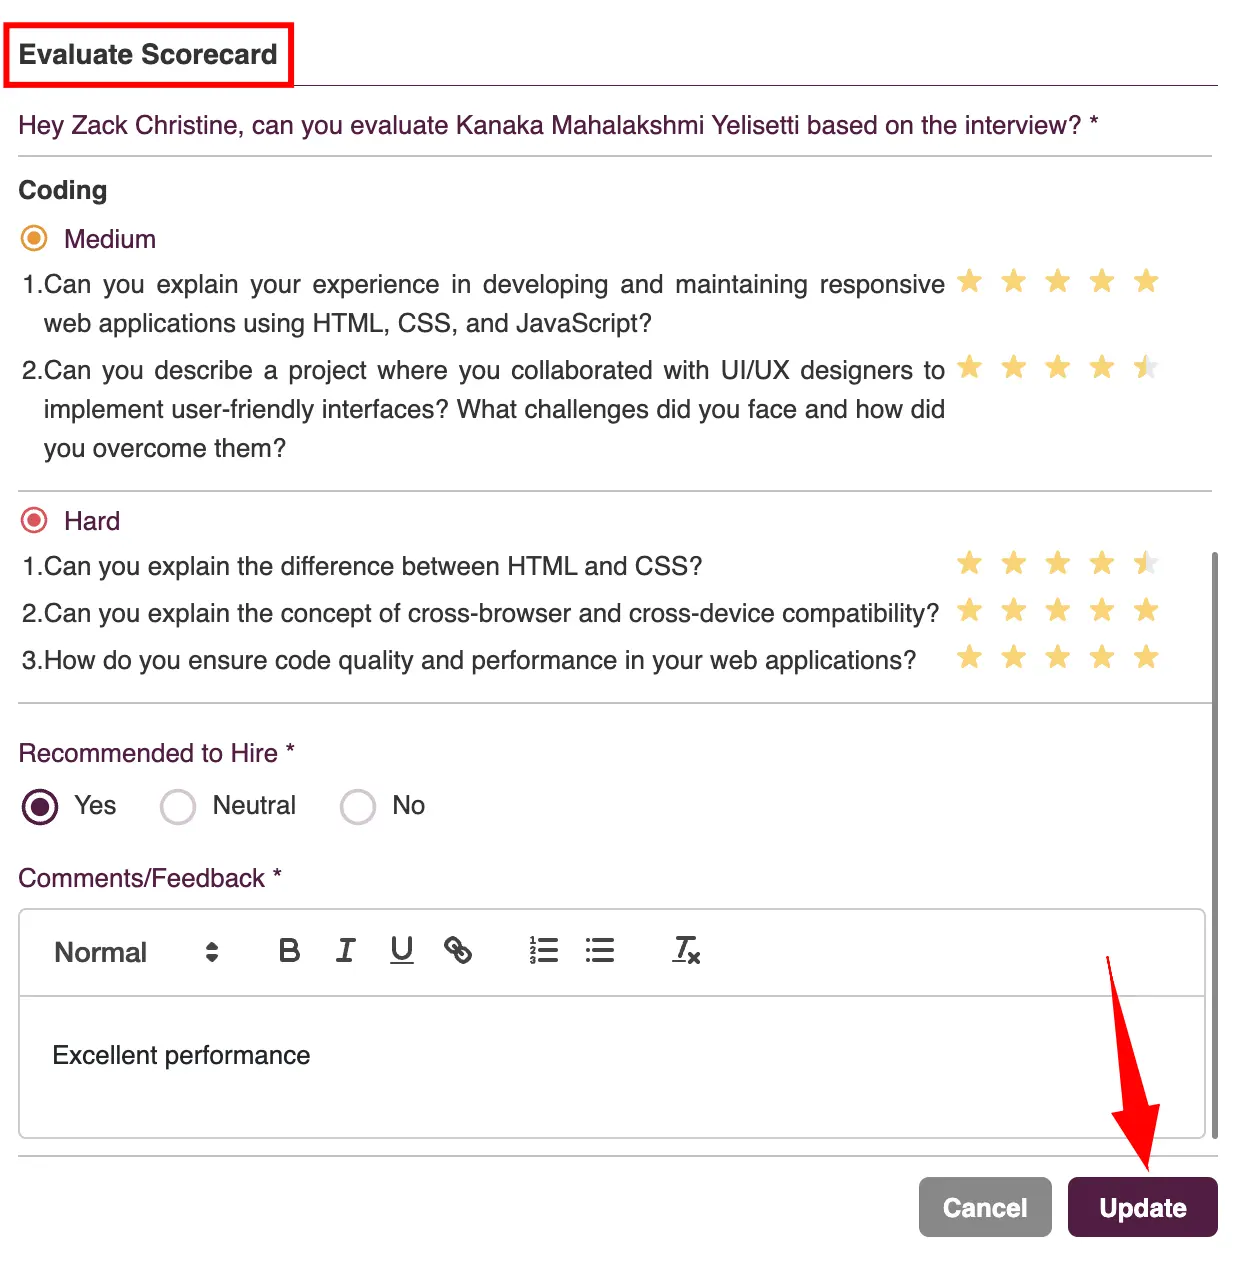
Scorecard Updating:
- Find the interview scorecard and click the "Edit" icon. Make any necessary changes, then click on the "Update" button.
In-Built Interview Slot Picker
The In-Built Interview Slot Picker is a convenient tool designed to streamline the scheduling process for interviews. It allows interviewers and candidates to easily select and confirm suitable time slots for interviews, ensuring efficient coordination and time management. This feature simplifies the interview setup, reducing the back-and-forth communication often required to find a mutually agreeable time.
To begin using the Interviewer Slot Picker follow the steps
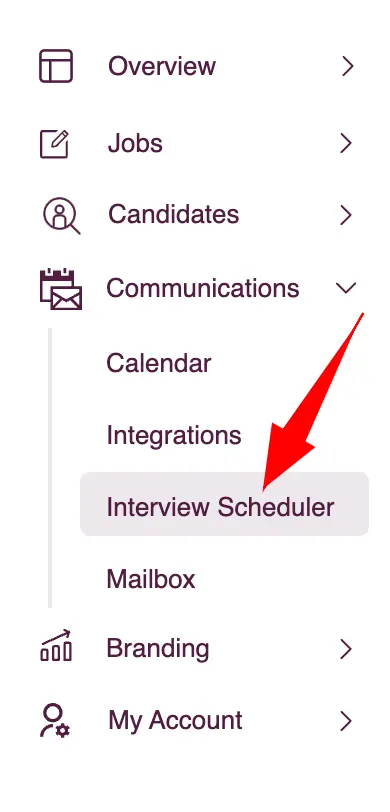
- Go to the "Interview Scheduler" , located under the Communication menu in the sidebar.
- Ensure that you've integrated your Zita calendar with either Outlook Mail or Google Mail.
- For integration in the Zita calendar, refer to the following section: Calendar Integration
Events Scheduler
In the Events Scheduler, you not only have access to a list of previously created events but also the option to create new events. This feature allows for the sharing and previewing of event details before they are sent to applicants. It's an effective tool for managing event information and ensuring clear communication with applicants, enhancing the overall coordination process.
To efficiently organize a new event using the "Events Scheduler" , here's the streamlined process:
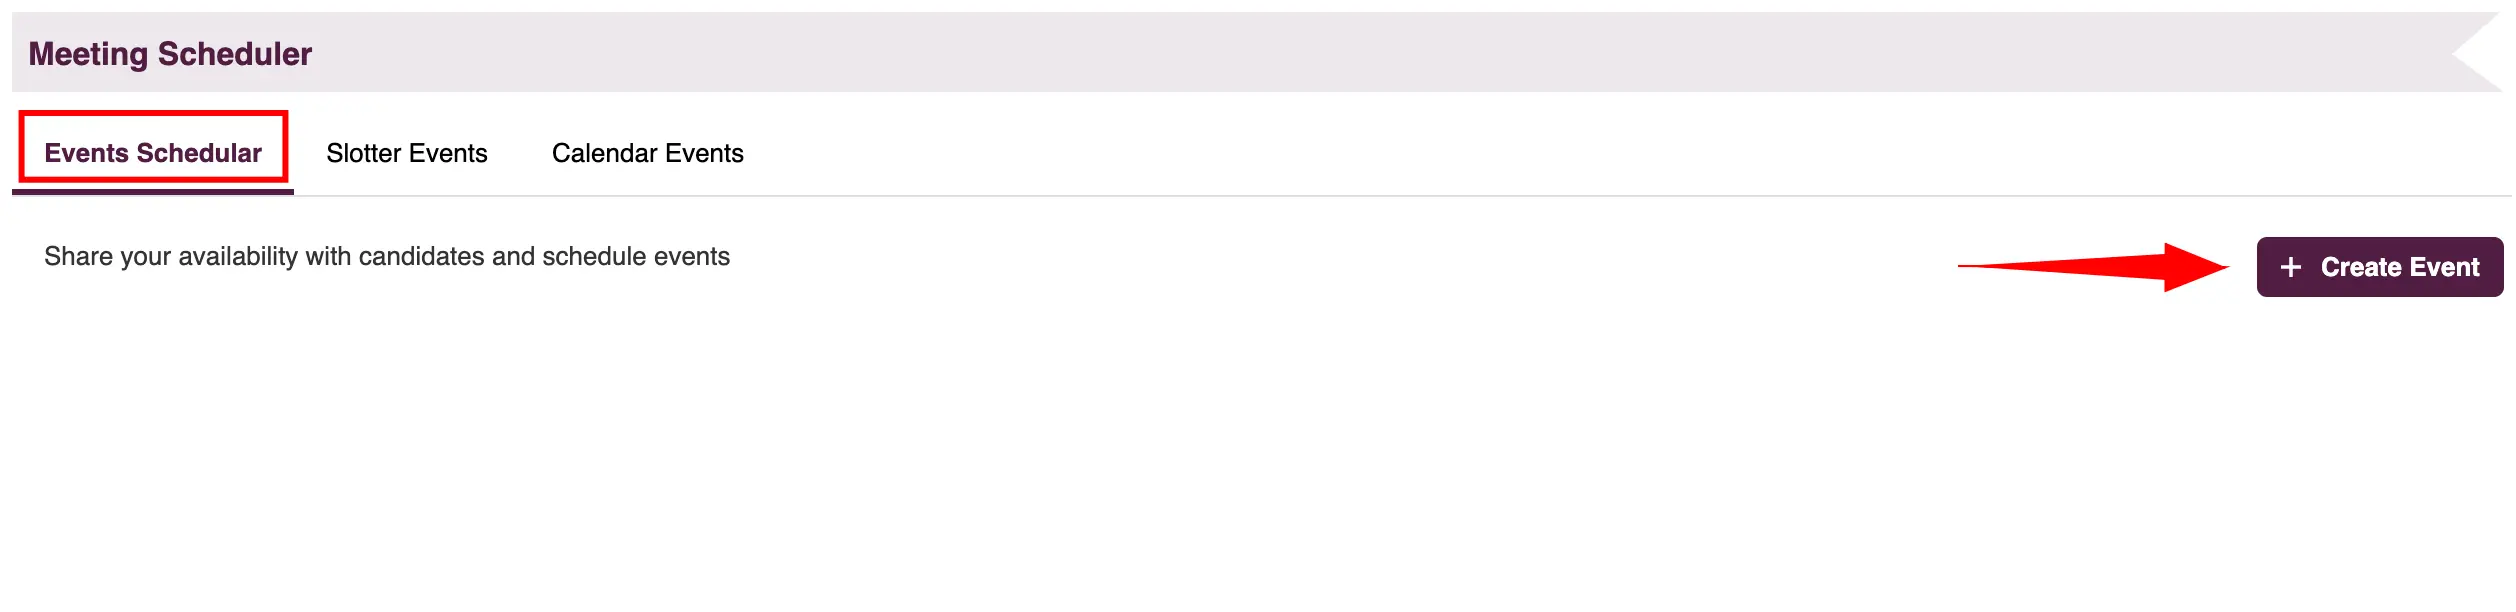
- Begin by navigating to the "Events Scheduler" tab.
- Click on the "Create Event" button to start.
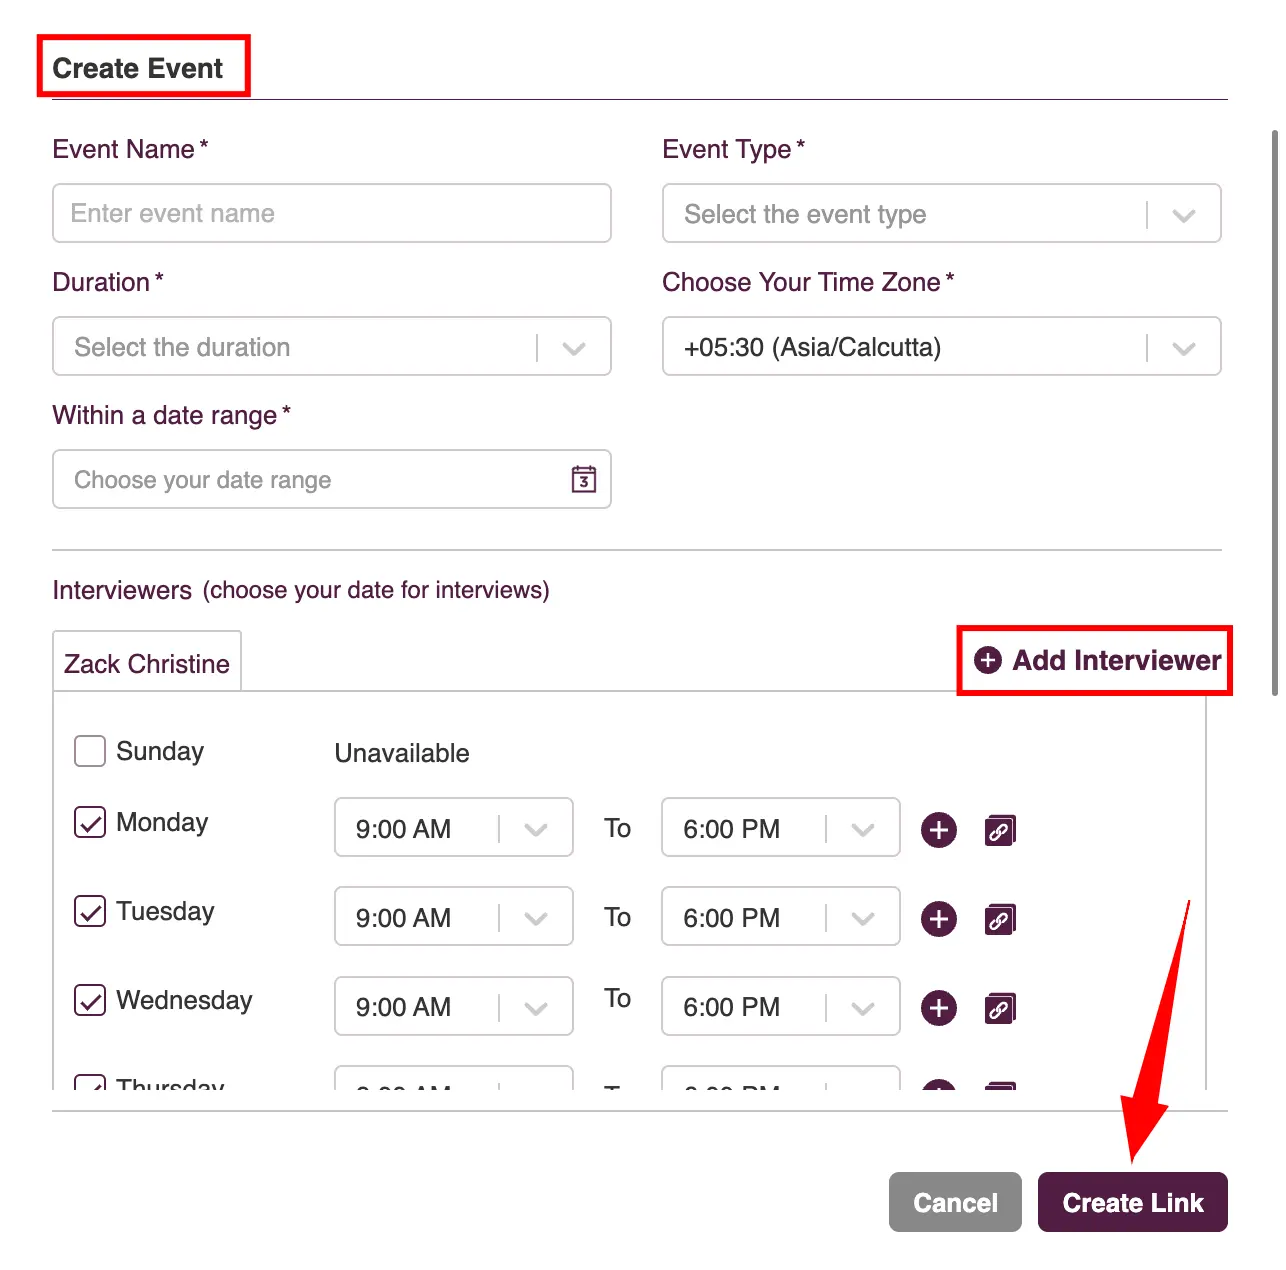
- Carefully fill in all the required fields with relevant event information.
- If additional interviewers are needed, use the "Add Interviewer" option. Choose the date and timing that align with the interviewer's availability.
- Complete the process by clicking on the "Create Link" button, which will establish the event.
Event Options in the Events Scheduler
The Events Scheduler is equipped with a variety of options to manage and share your events effectively
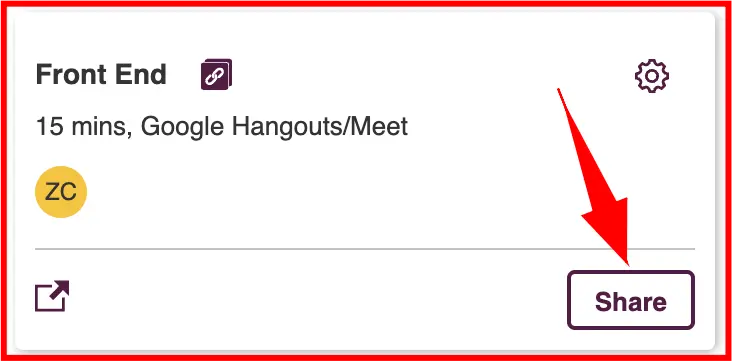
- Share: To share event details with candidates using the "Share" feature in the Events Scheduler.
- Identify the specific event you want to share. Click on the "Share" button located within this event snippet.
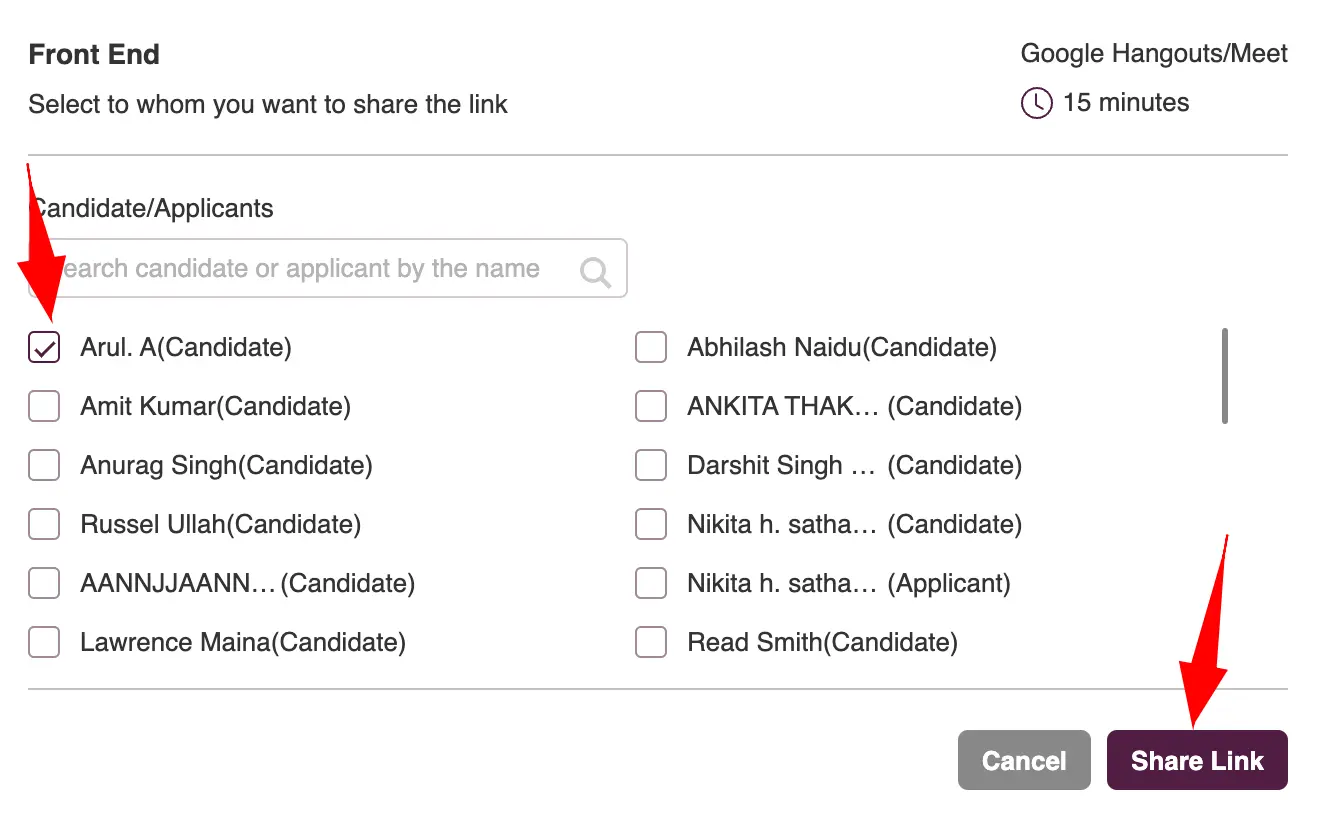
- In the share popup, search for the candidates. Then, check the boxes next to the names of the candidates you wish to share the details with.
- Click on the "Share" button in the popup to finalize.
- The slotter link, containing the event details, will be shared with all selected candidates/applicants through email and in-app notifications.
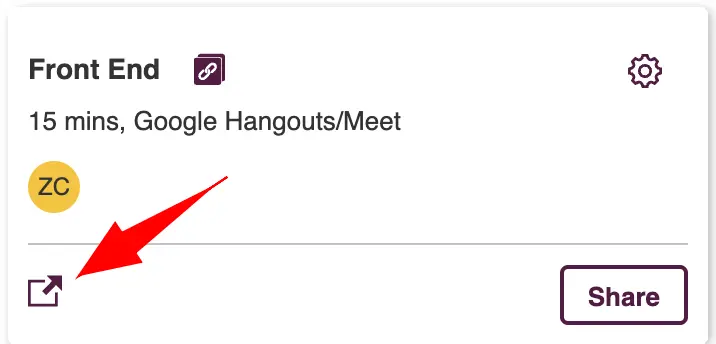
- Slotter Preview: Offers a glimpse of how the slotter information will appear to Candidate, allowing for any necessary adjustments.
- Navigate to the specific event you wish to preview. Click on the "Preview" icon associated with this event.
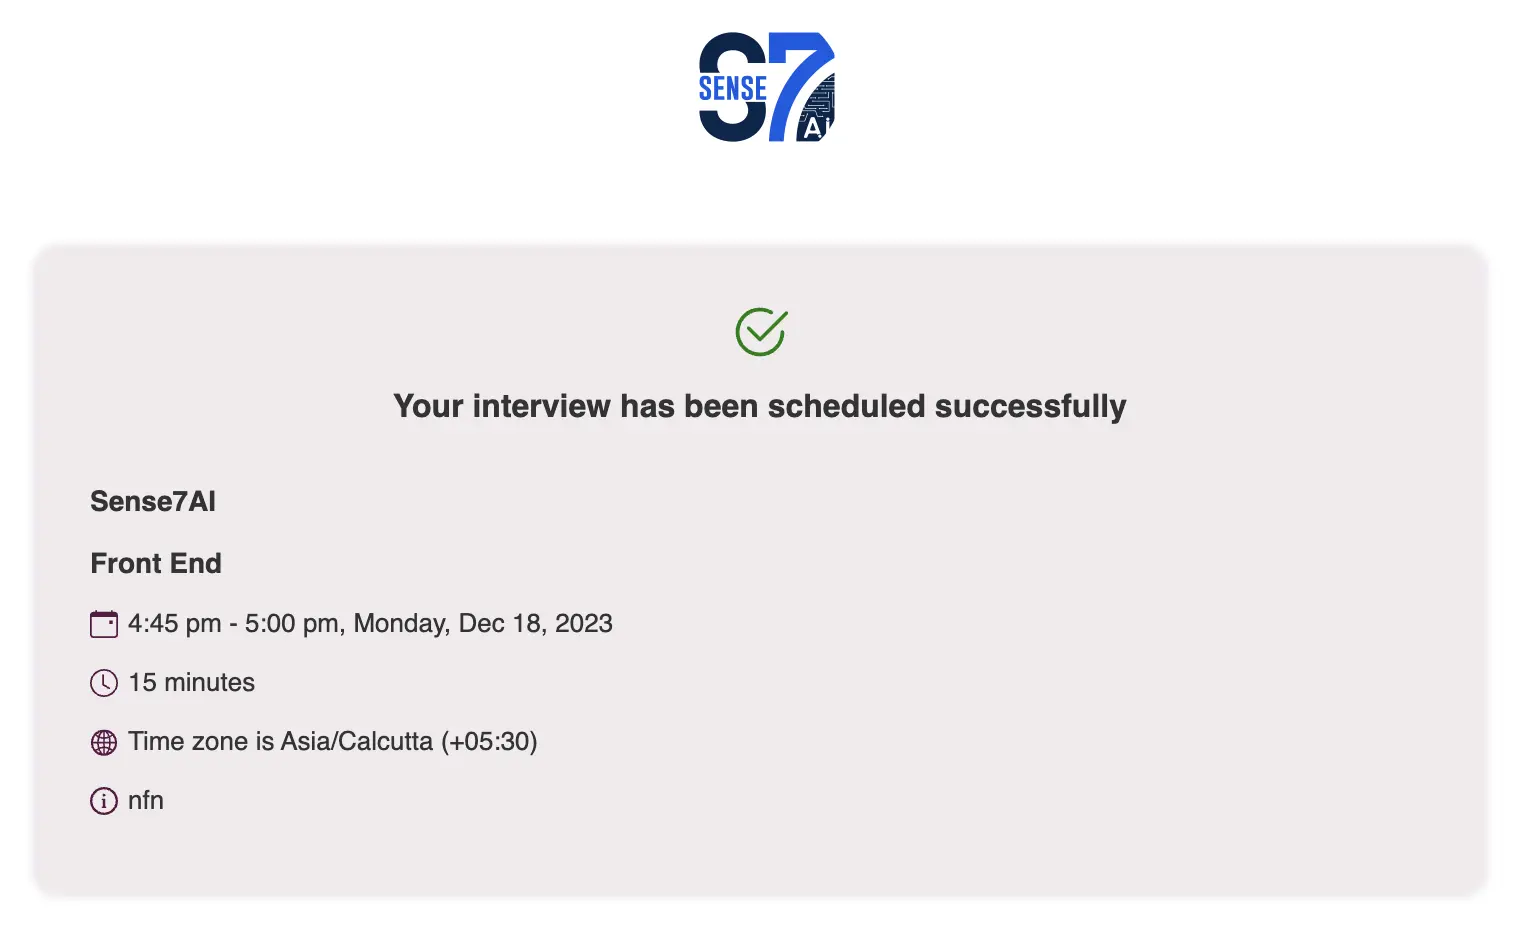
- A new tab will open displaying the preview of the slotter. Here, you'll see all the details of the interview slotter such as duration, candidate information, interviewer details, etc.
- Select a date and time, then click the "Schedule" button. A confirmation message for the event will be displayed.
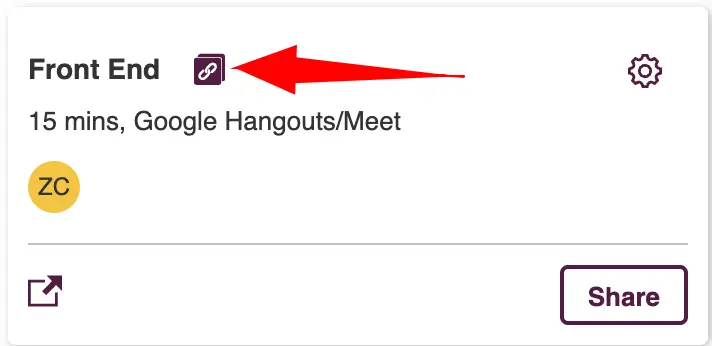
- Copy Link: Allows quick copying of the event's direct link for easy sharing and access.
- Find the specific event you want to share. Click on the "Copy link" icon associated with the event.
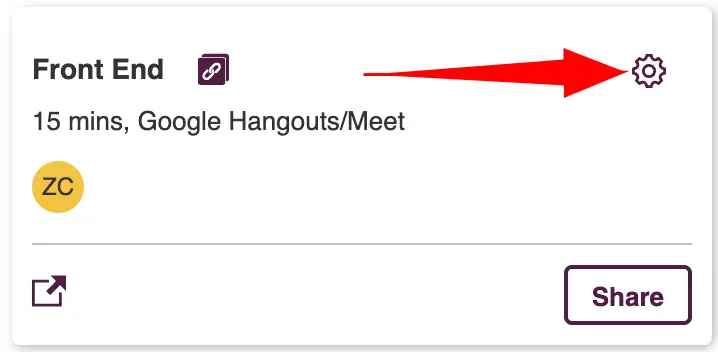
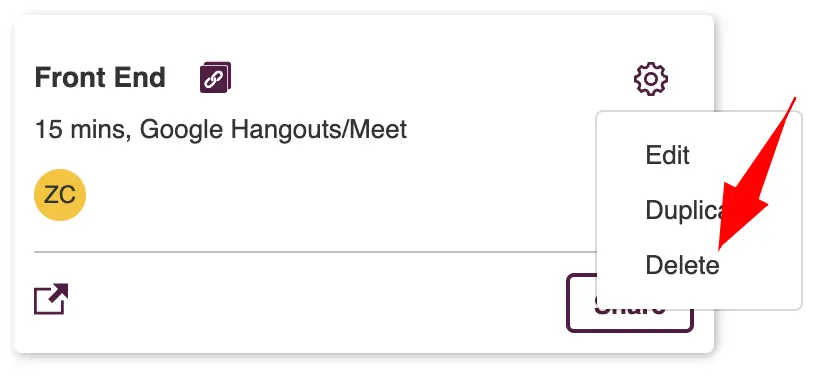
- Settings: Easily manage your events with options to edit, duplicate, or delete, ensuring flexible and precise event coordination.
- Navigate to the specific event you wish to Manage. Click on the "Settings" icon associated with this event.
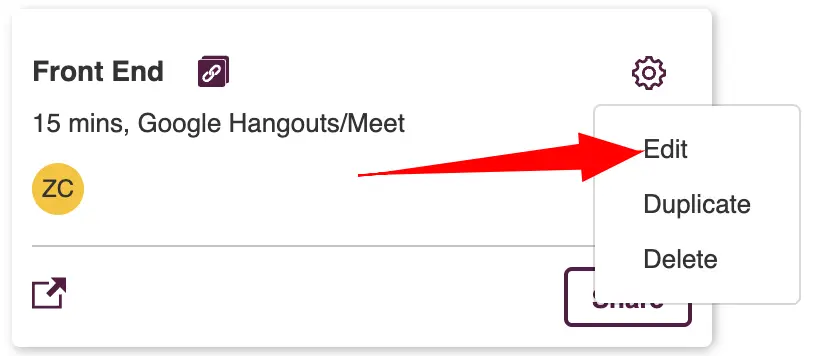
- Edit: To edit the event, click on the "Edit" menu to open the event editing popup.
- Modify the event details as required. Click on "Save Link" to update the event with the new details in the scheduler.
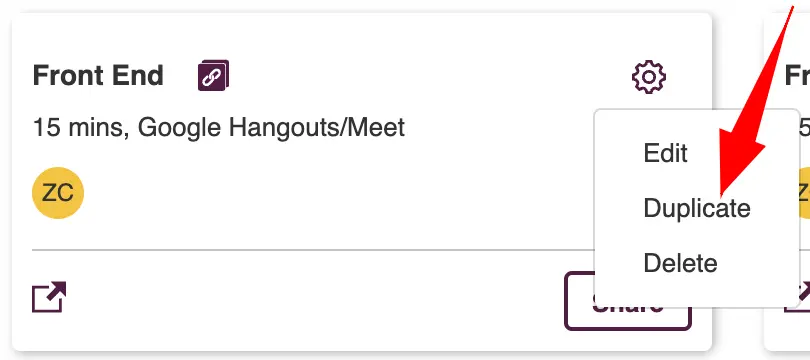
- Duplicate: To create a similar event without starting from scratch. Click on the "Duplicate" menu. This will automatically create a clone of the selected event.
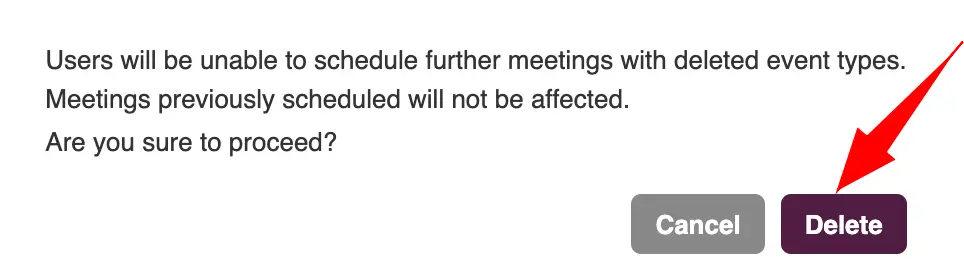
- Delete: Select "Delete" to begin the removal process.
- In the confirmation popup, click on the "Delete" button to delete the event.