Job Creation & Posting
Overview
The Job Creation & Posting section encompasses several integral components:
Job Creation and Posting Processes
or drafting and advertising job listings, for maintaining and updating these listings.AI-Powered JD Parsing and Generation
for streamlined job description creation, and offers adaptable templates for consistent and professional postings.- Each element is designed to enhance and simplify the recruitment process.
Job Creation and Posting Processes
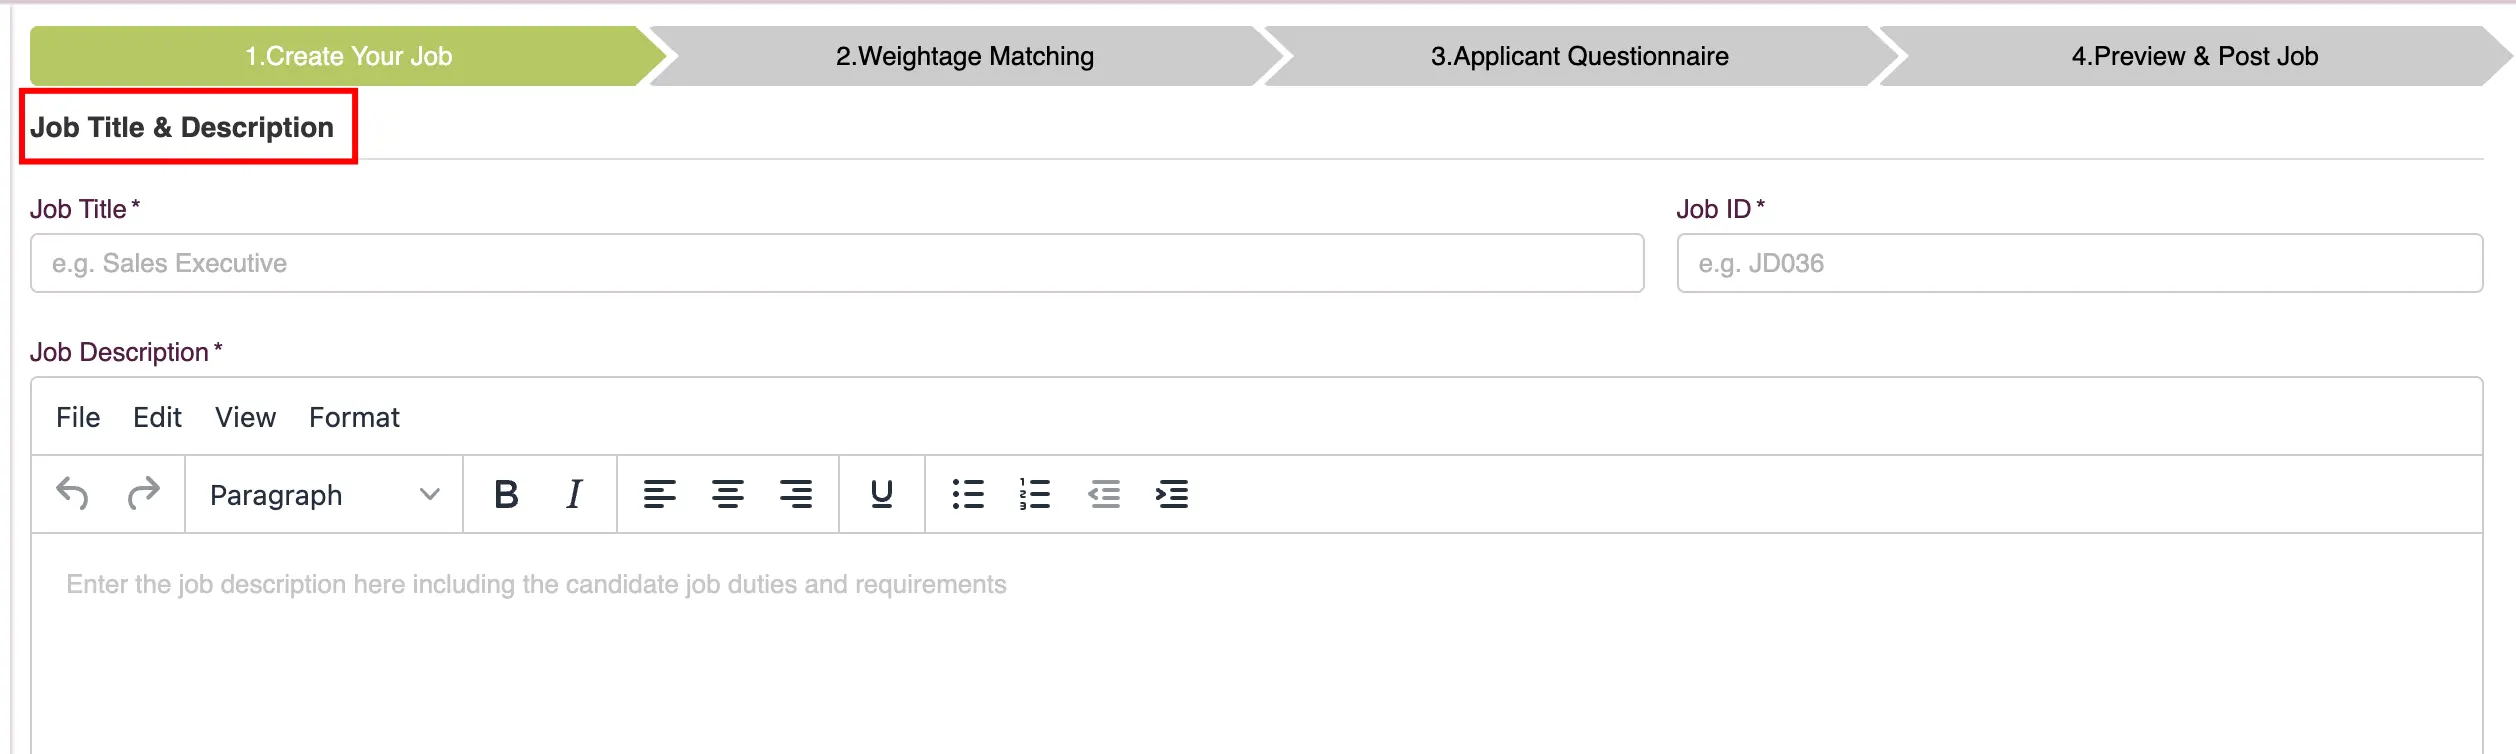
You start with "Create your Job" to enter job specifics and requirements, followed by "Adjustable Weightage Matching" for fine-tuning candidate selection criteria. Then, use the "Applicant Questionnaire" to gather more information from candidates, and finally, Preview & Post Job to finalize and publish your job listing, ensuring a thorough and tailored recruitment approach.
Create your Job
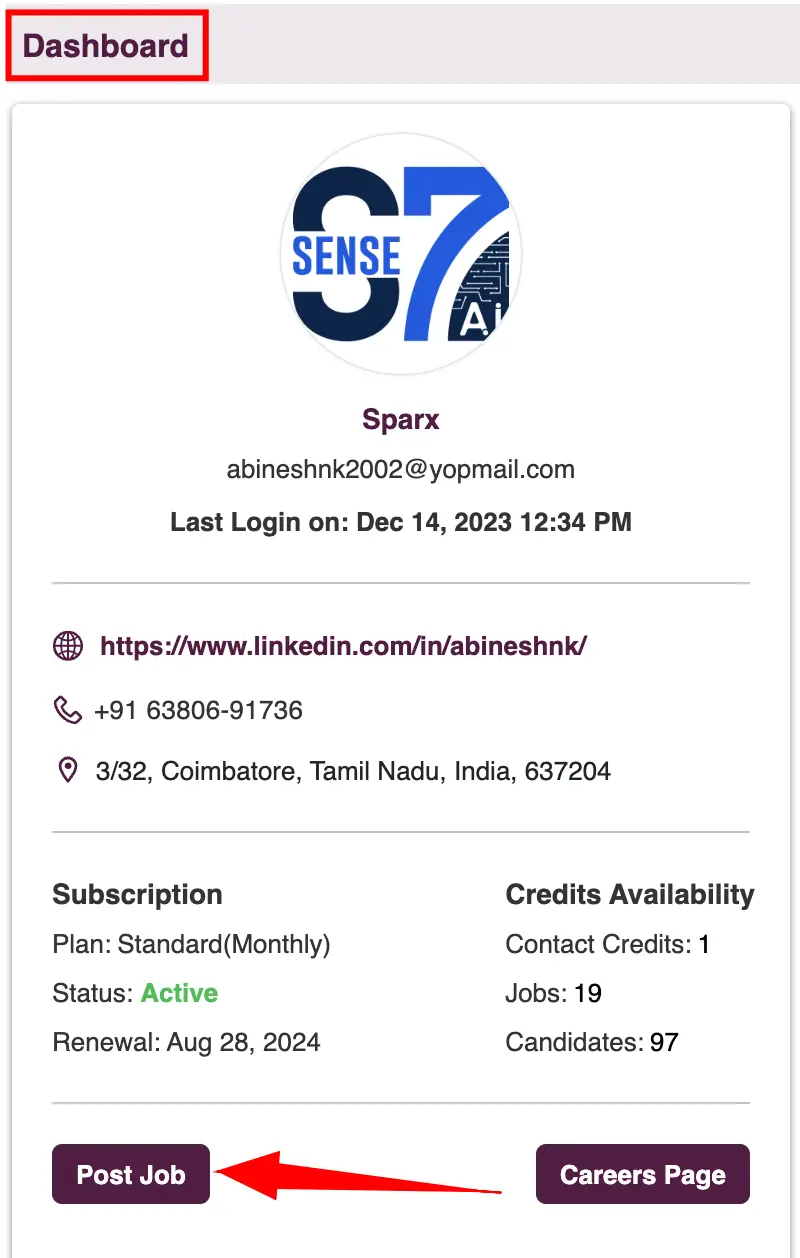
To get started with creating a job post in Zita, you have three convenient options:
- Dashboard: Directly from your Dashboard, find and click on the "Post Job" button.
- Job Post Menu: Go to the sidebar, select the "Job Post" menu, and then click the "Post a Job" button
- Post Jobs Menu: Use the "Post Jobs" option in the sidebar menu, which will directly open the job post creation form for you to fill out.


Three Ways to Create a Job in Zita
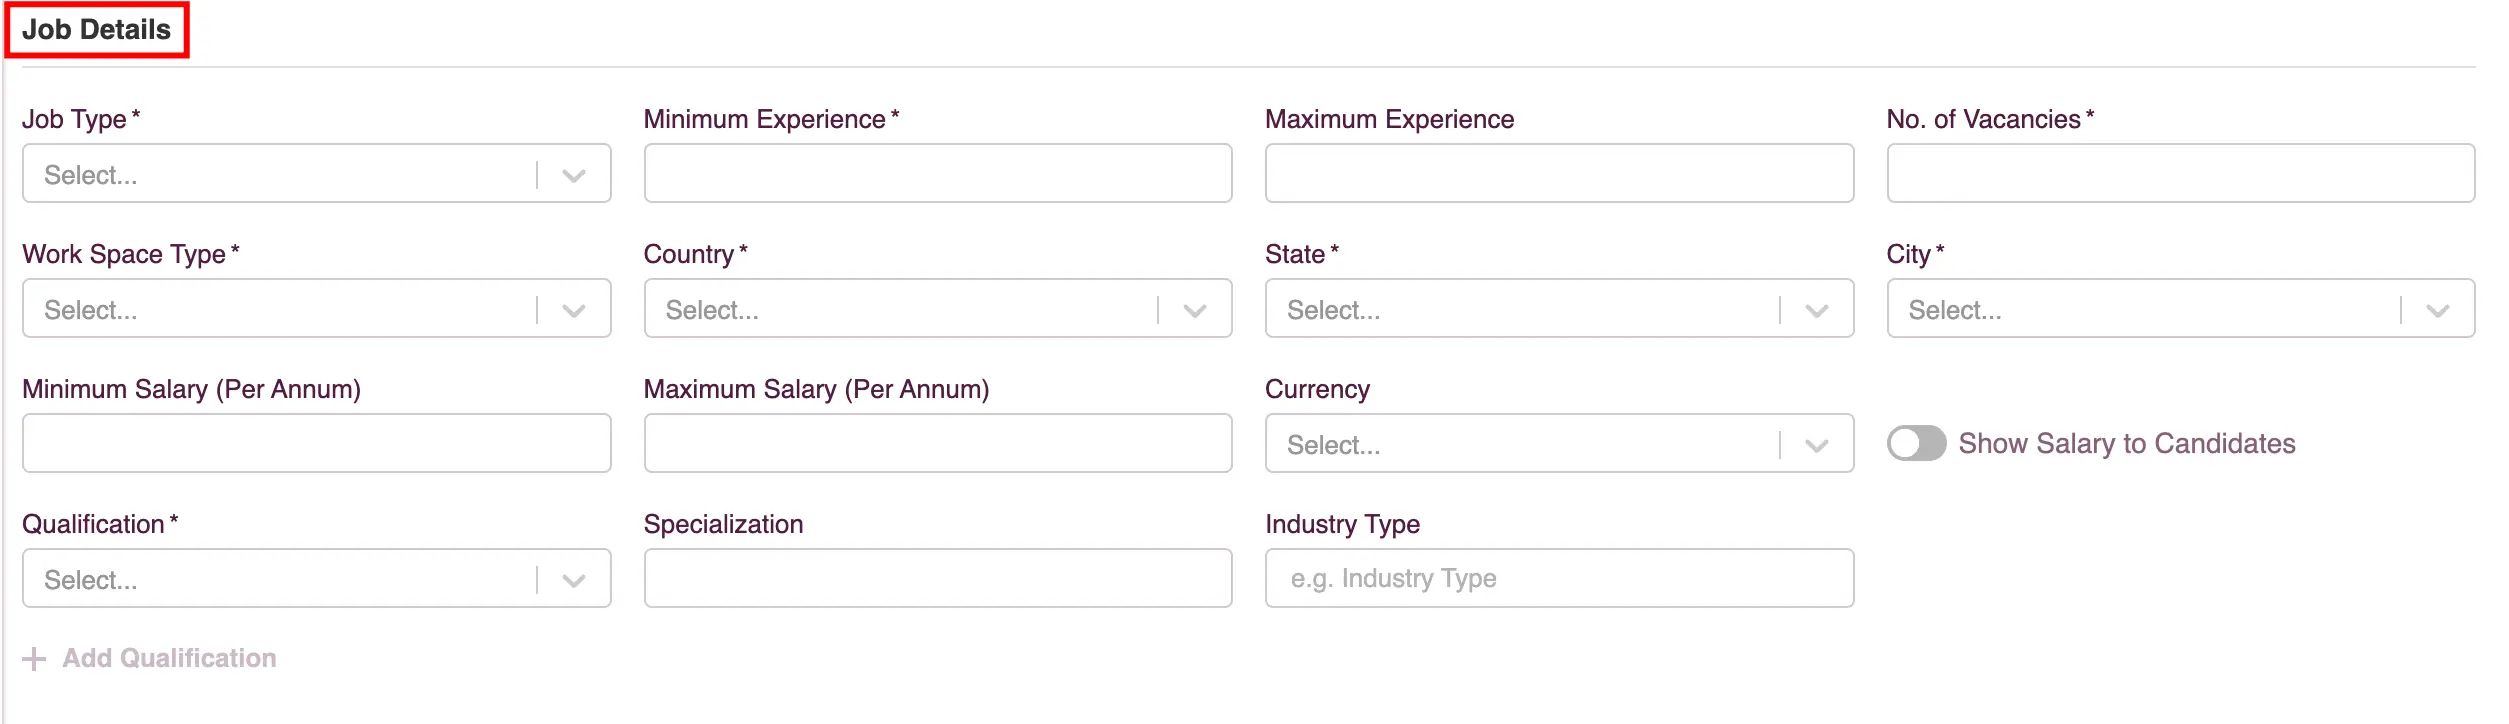
- Manual Form Filling: To create a job manually in Zita, complete the job form by filling in all required fields. This includes entering the job title, job ID, job description, and mandatory skills in the "Job Title & Description" section. Additionally, provide all necessary information in the "Job Details" section. Don't forget to fill in any additional information as per your preferences in both sections of the form.
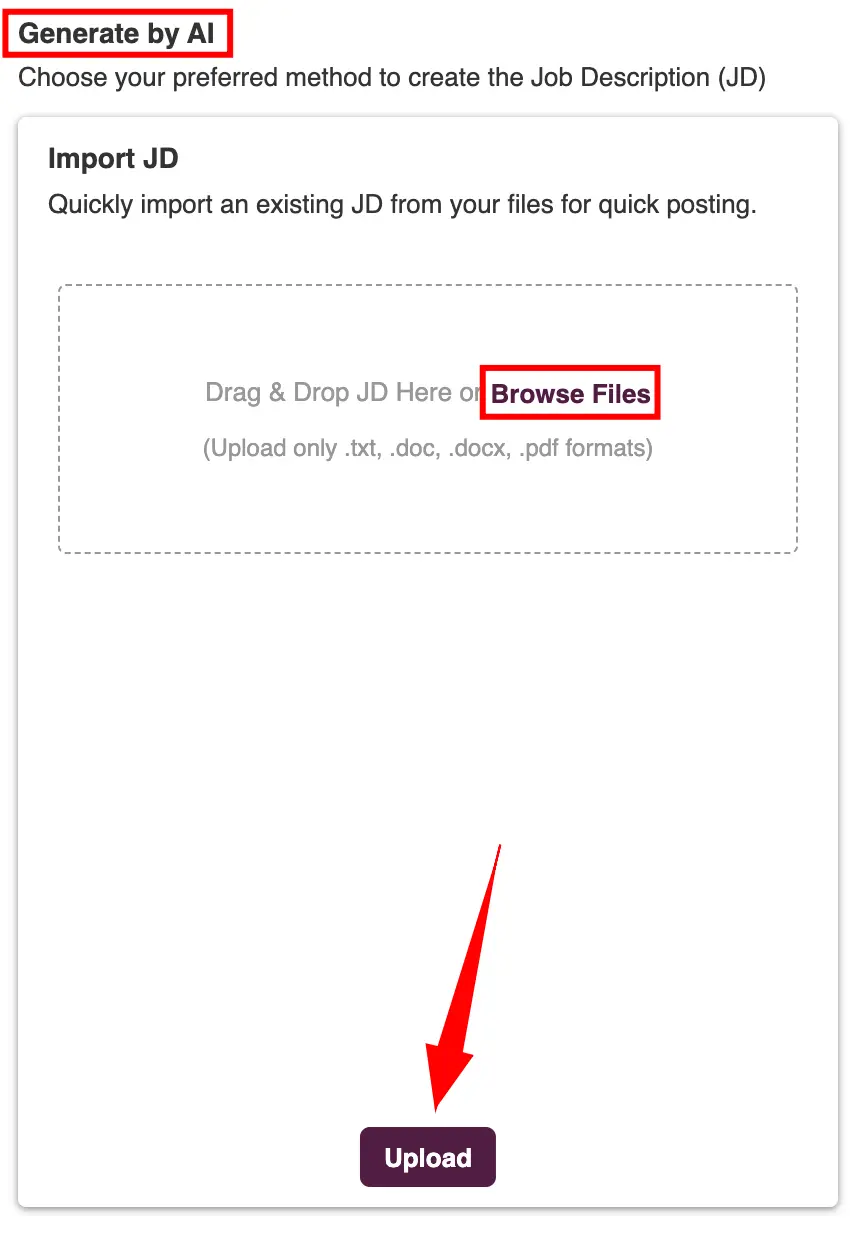
- Generate by AI: Simplify job post creation using Zita's AI capabilities in two ways:
- Import JD: Click on the "Generate by AI" button.

- Choose to import a file from your computer and click on "Upload" button.
- Once the process is done, Zita’s AI will then parse the file and automatically fill in all relevant details in the job form.
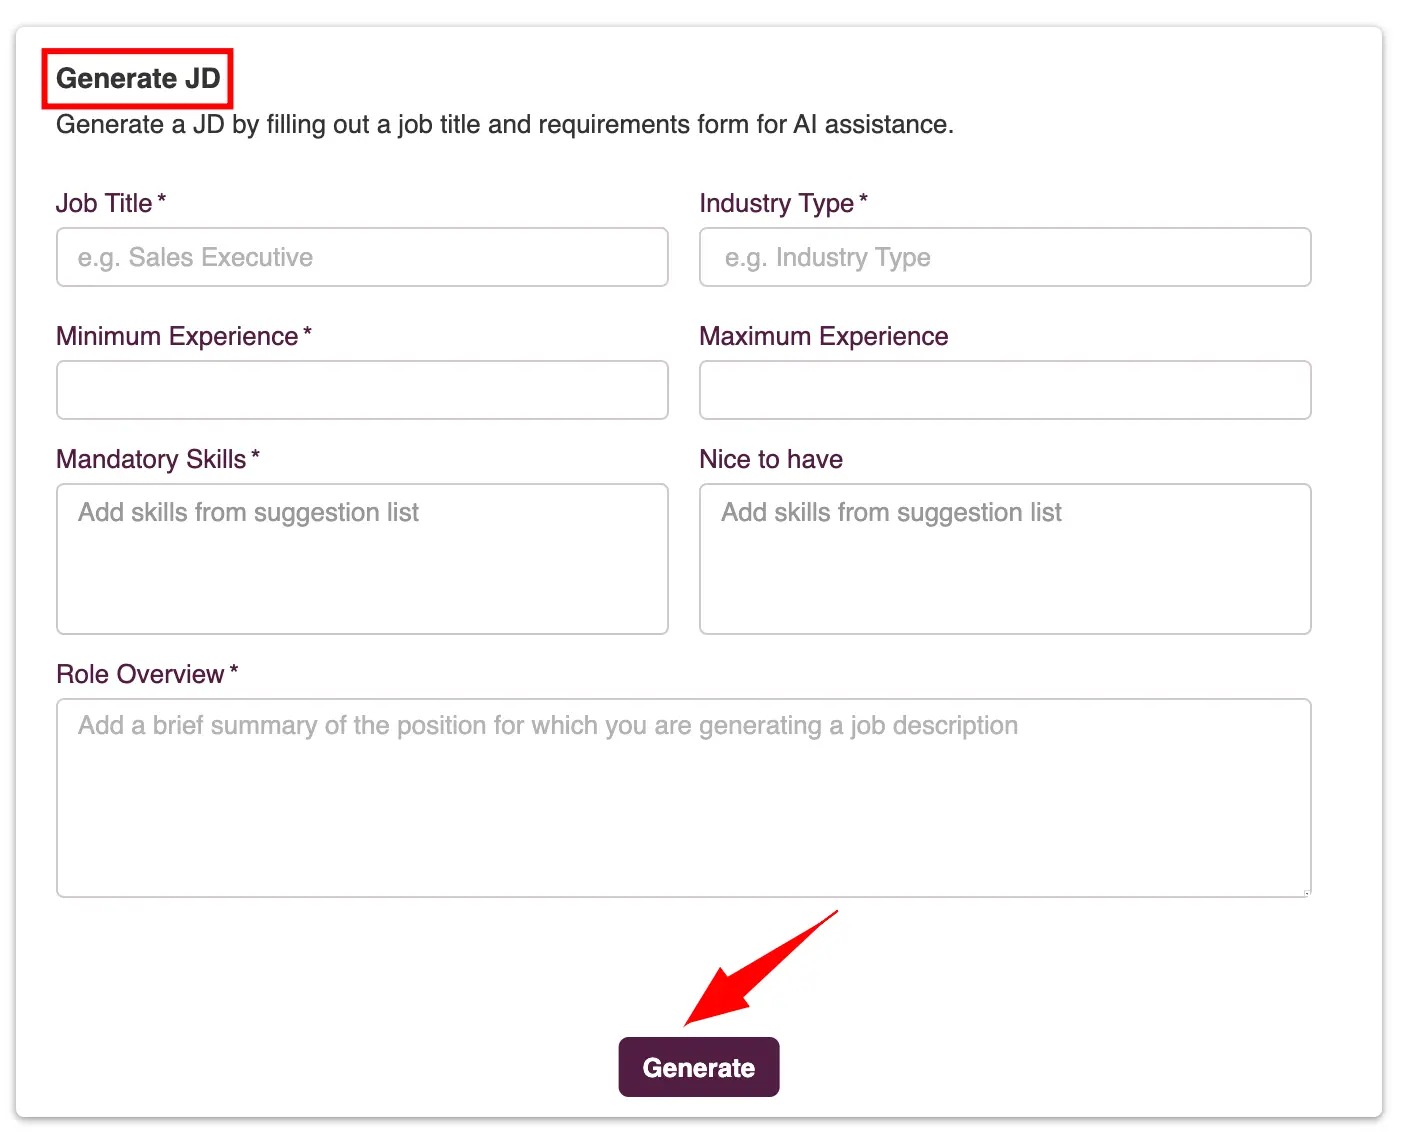
- Generate JD: Alternatively, you can input details directly into the "Generate JD" section.
- Click on the "Generate" button.
- The AI will use this information to generate the job details and auto-populate the relevant fields in the job form.This method is efficient for crafting detailed and accurate job descriptions with minimal manual input.
- JD Templates Library: As an additional option, Zita offers the ability to import from its job description template library. This convenient feature will automatically fill in all relevant details into the job form, providing an efficient way to create job postings
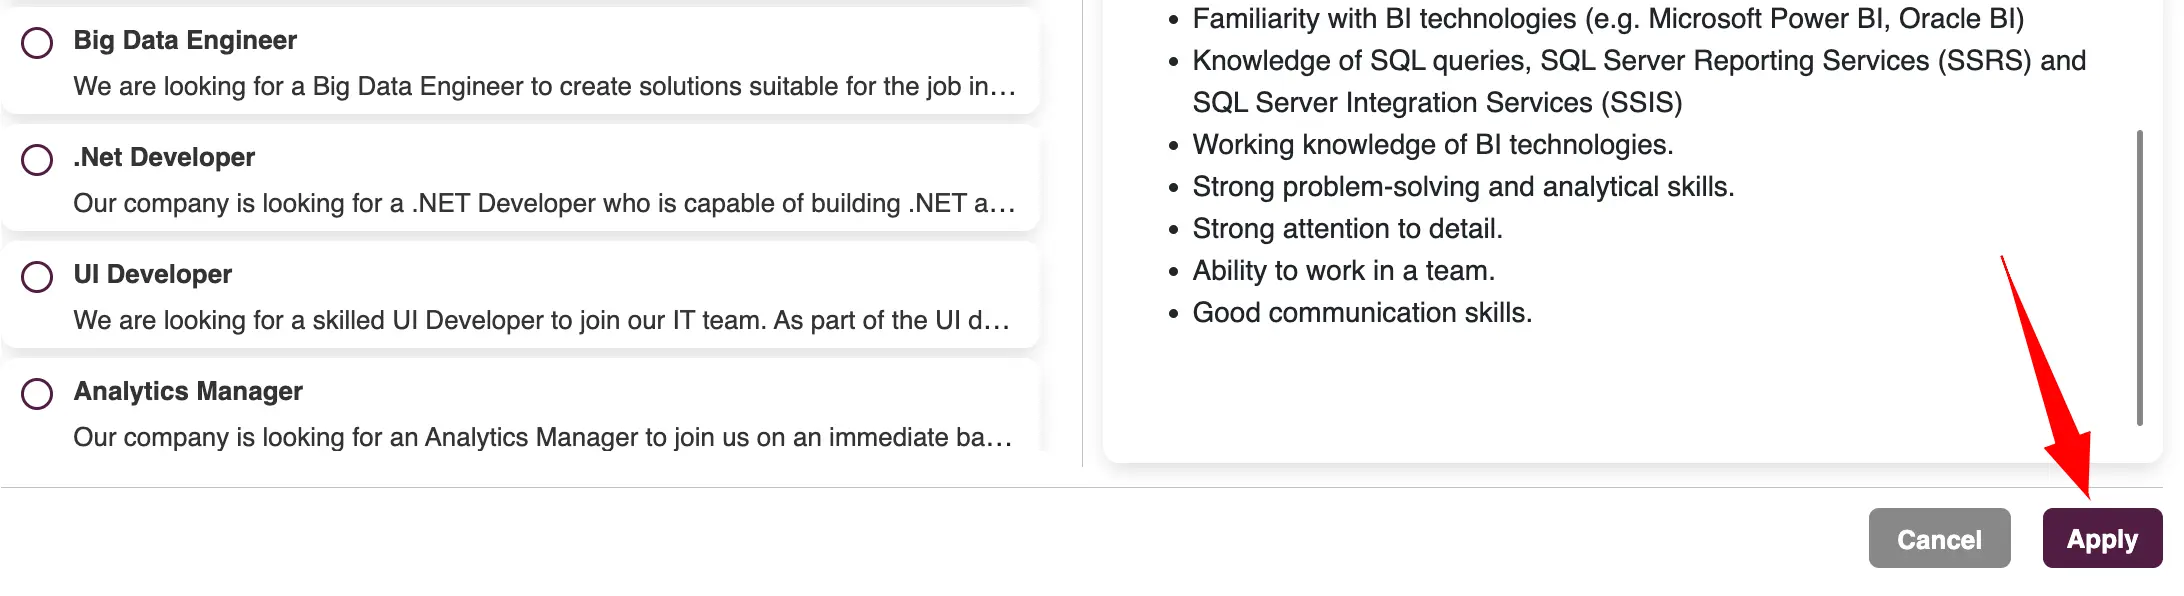
- In the job creation form, select the "Import from our templates" button to access Zita’s variety of job descriptions.
- Browse and choose a template that fits your needs; you’ll see its details displayed on the right-hand side.
- Once you’ve made your selection, click the "Apply" button, and the information from the template will automatically populate the job form.


JD Template customization
Zita allows you to create and utilize your own job description (JD) templates in the job form.
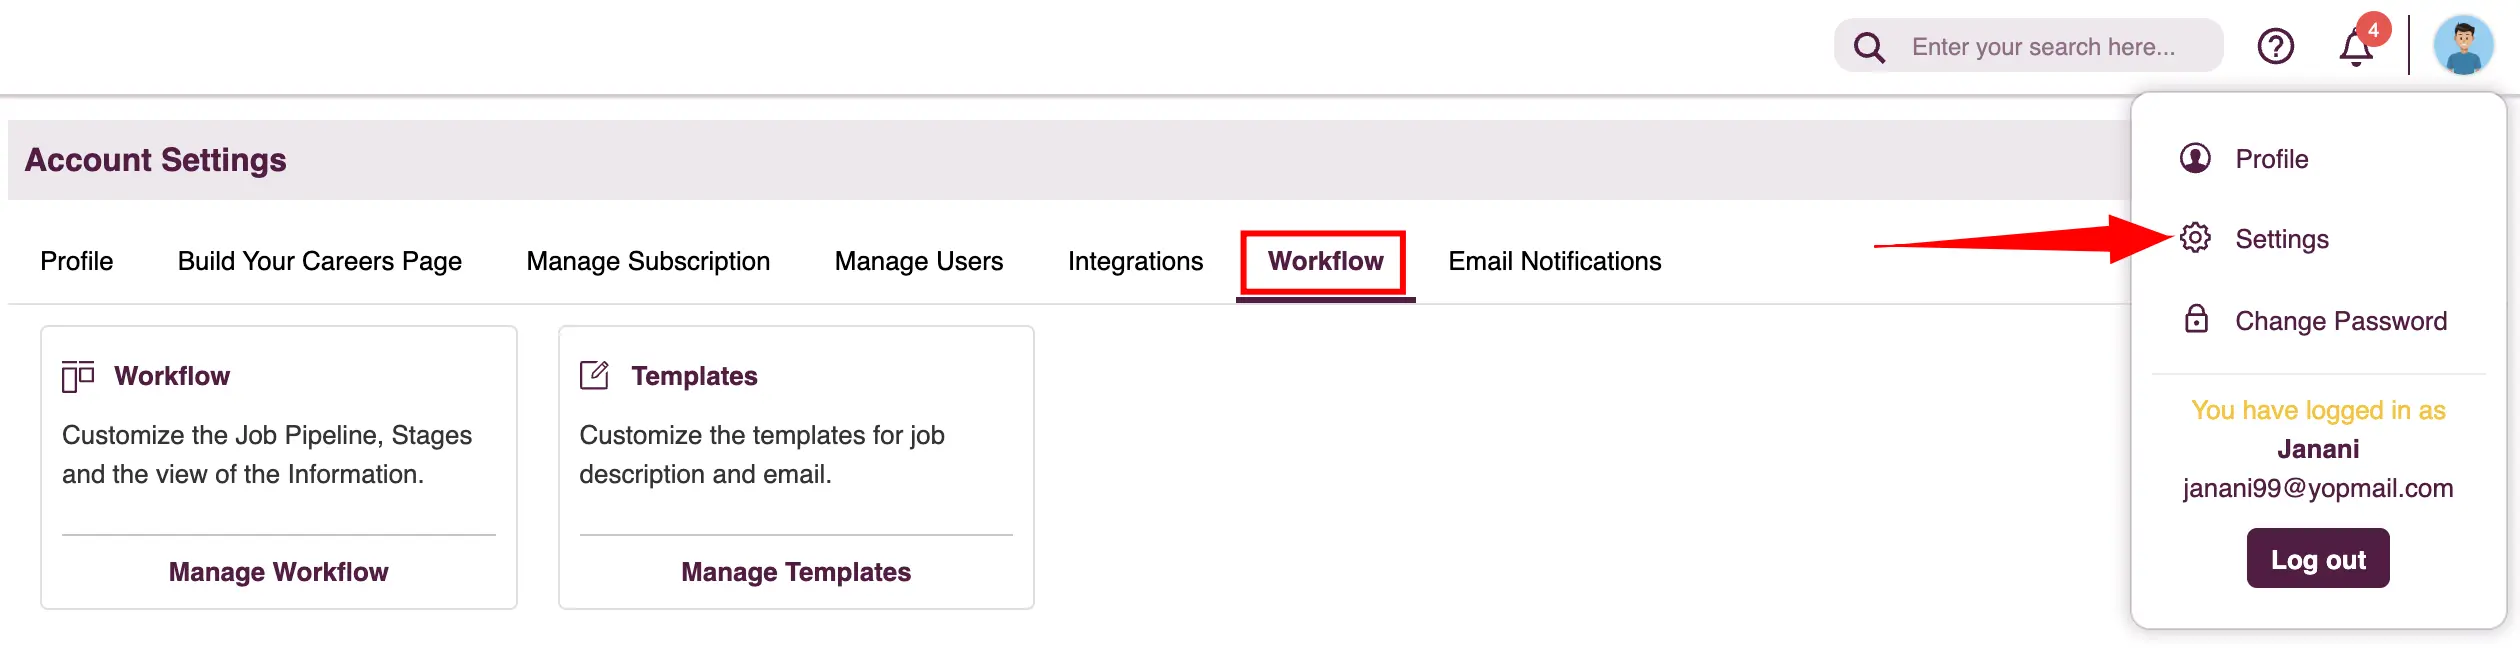
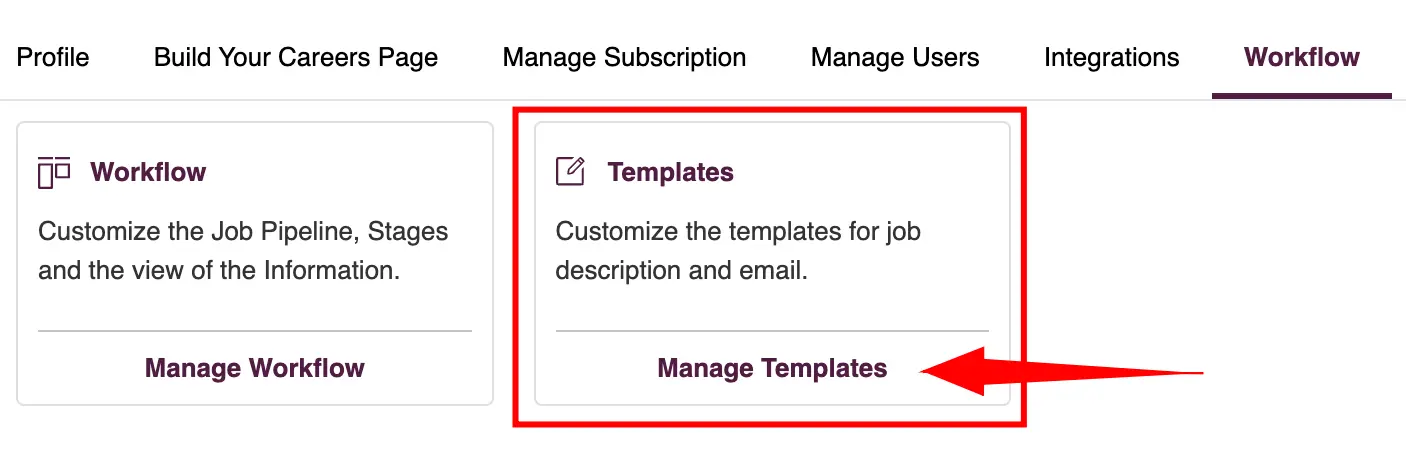
- Head to "Settings" in your Zita account and click on the "Workflow" tab.
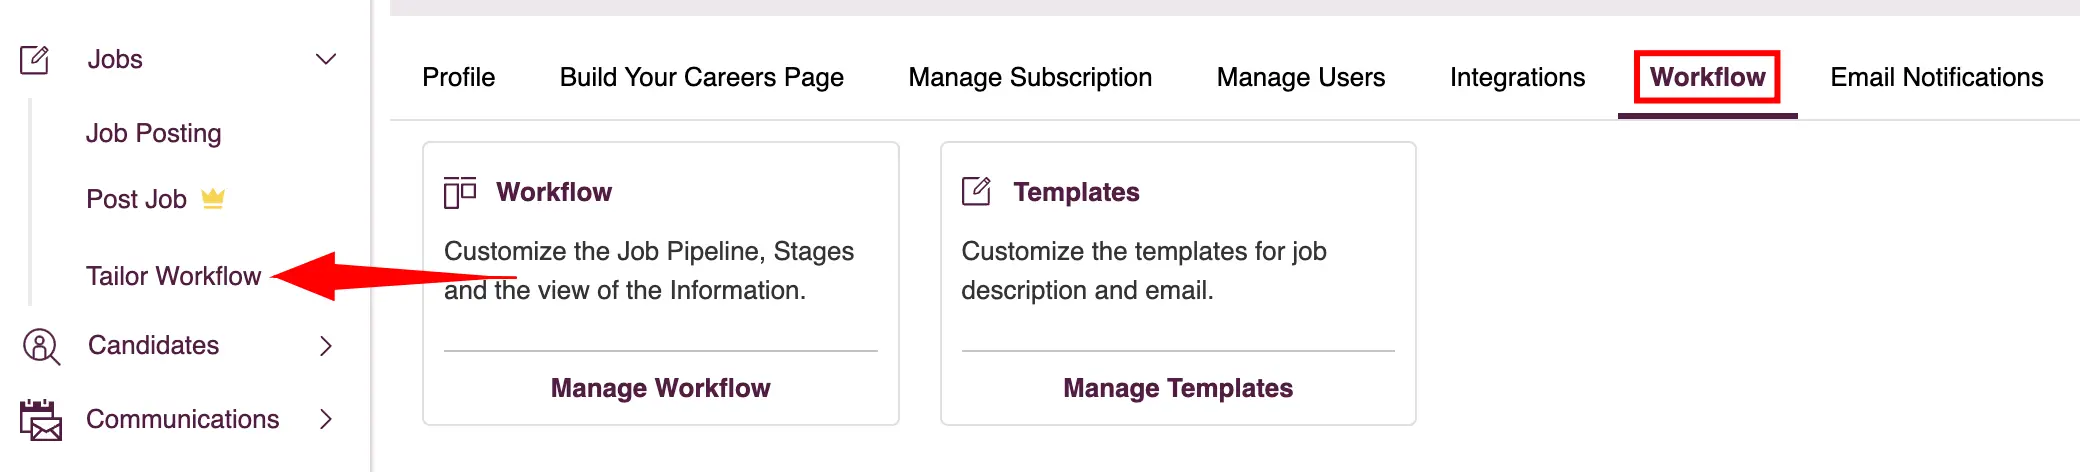
- Additionally, you can find "Tailor Workflow" in the sidebar, providing a convenient and easy way to customize the JD templates whenever you need.
- In the "Templates" card, click on the "Manage Template" button.
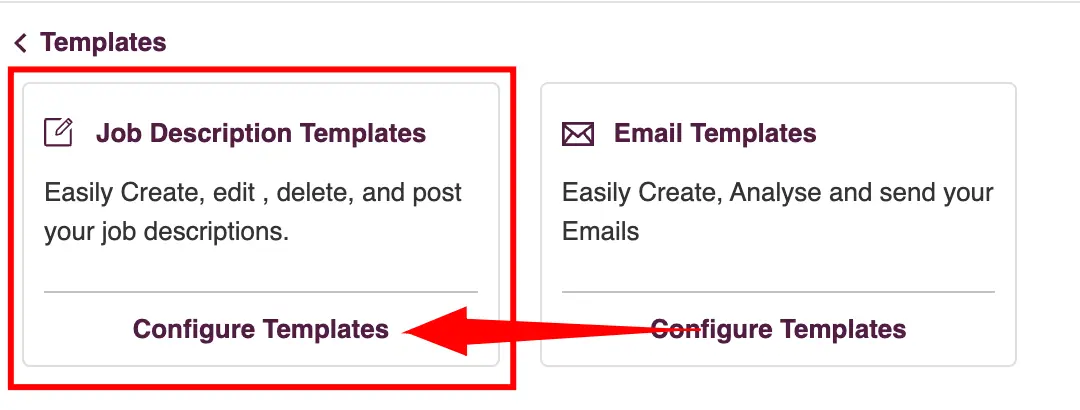
- Job Description Templates: On this card, choose "Configure Templates".
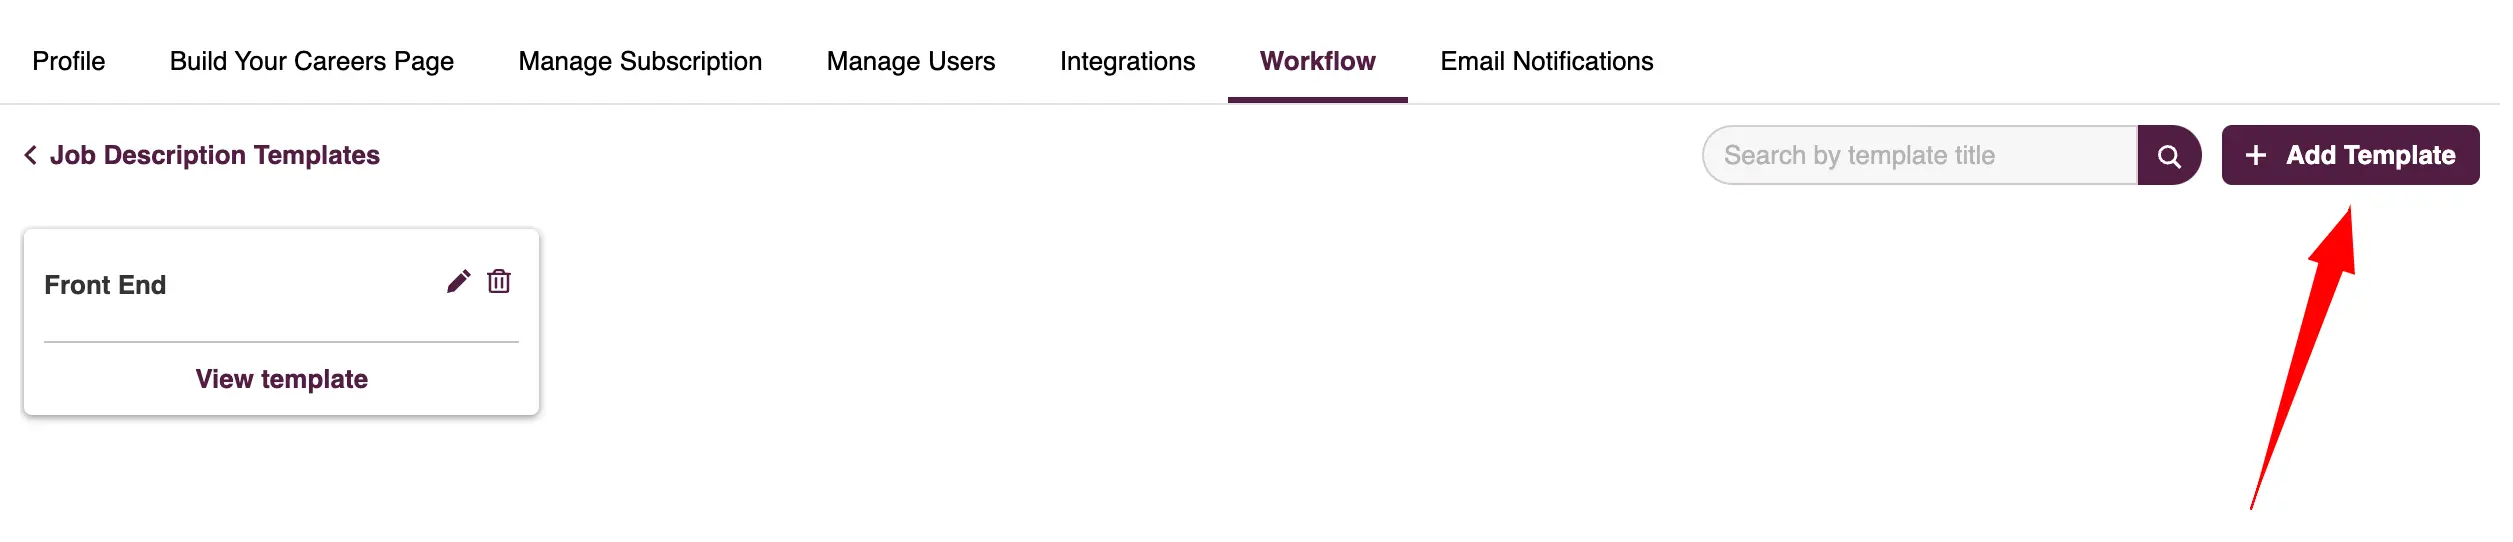
You will have three options on the Job Description Templates:
- Add a new template.
- Click on the "Add Template" button.
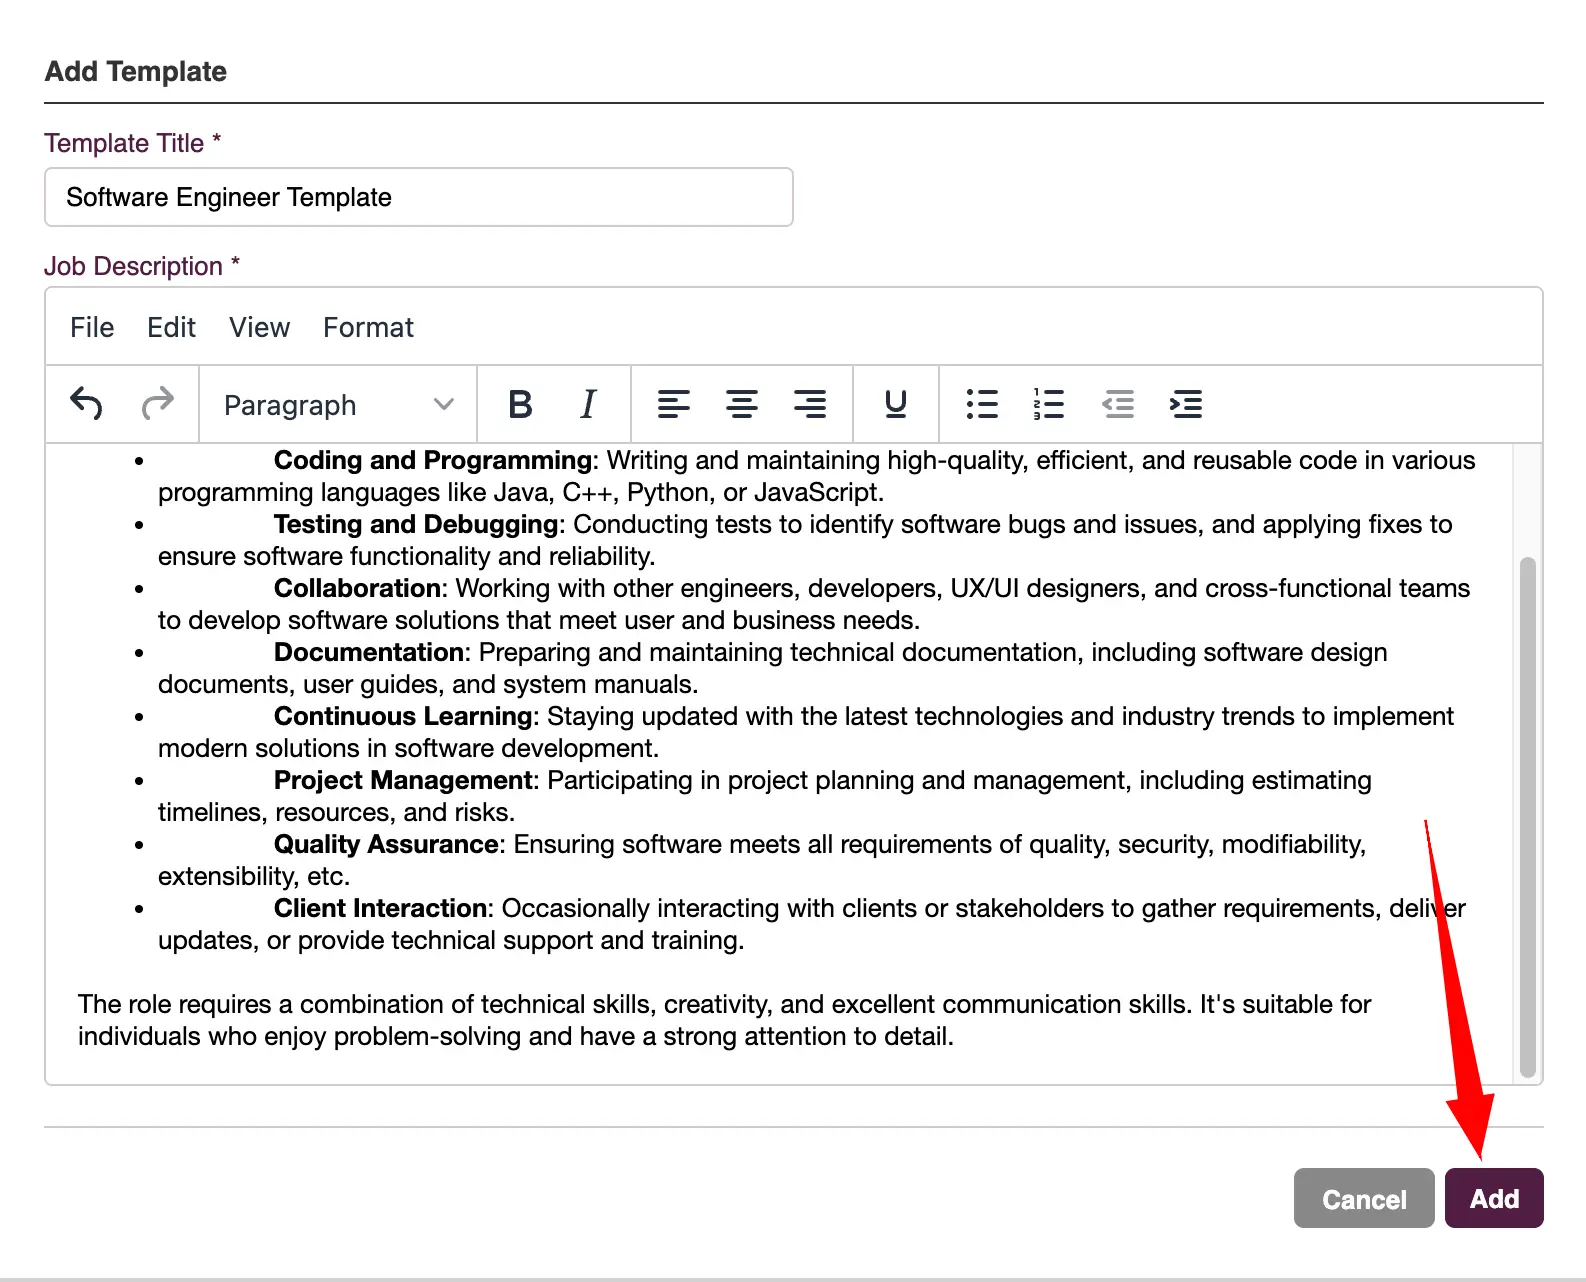
- Enter the title for your template and the job description in the provided fields.
- Once completed, click on the "Add" button to save your new template.
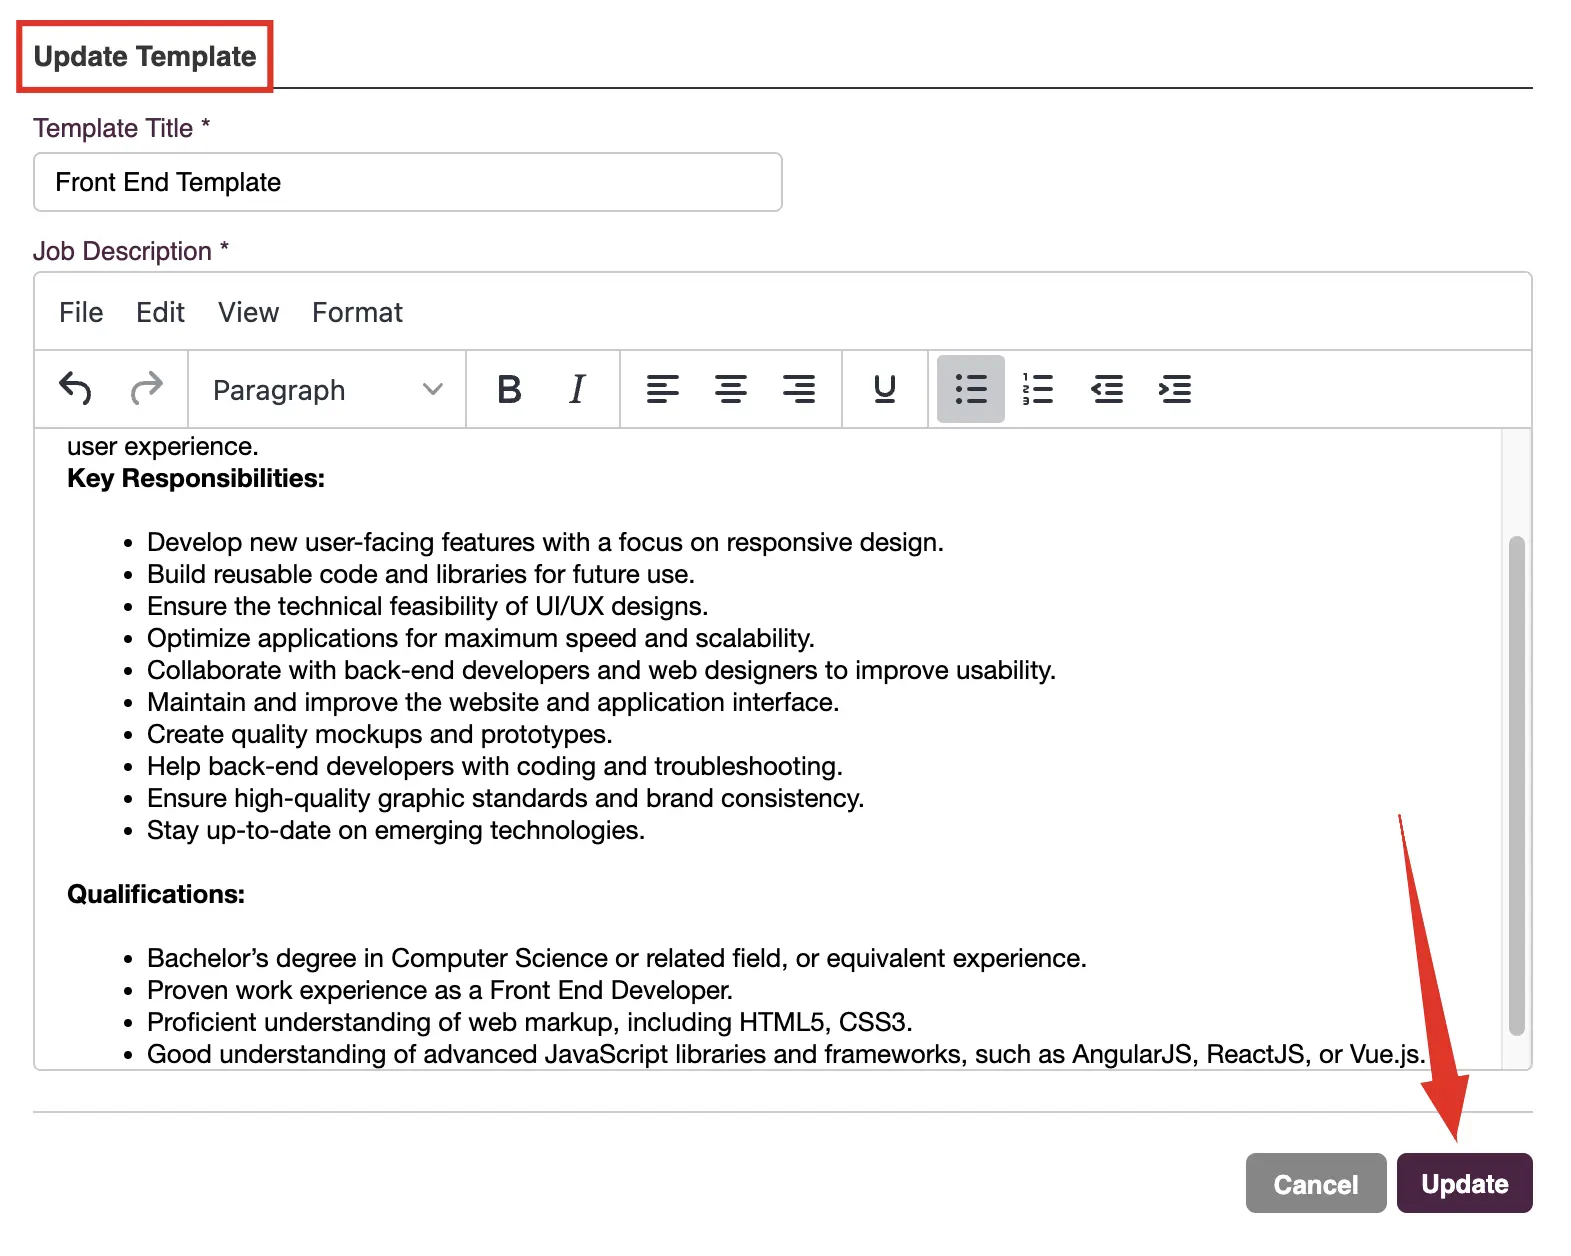
- Update an existing template.
- Locate the template you want to update and click on its "Edit" icon.
- Make the necessary changes to the template.
- Once you’re done, click on the "Update" button to save your changes.
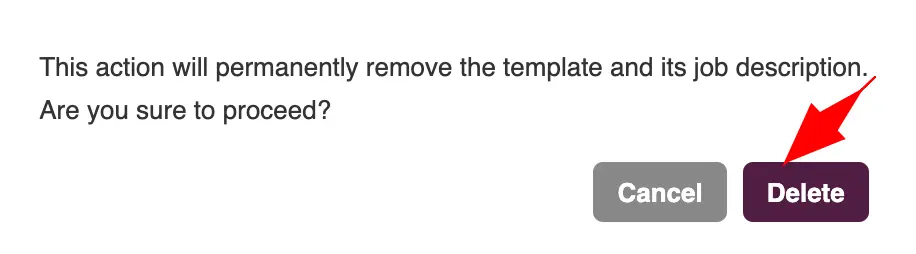
- Delete a template.
- Locate the template you want to update and click on its "Delete" icon.
- In the confirmation prompt click on the "Delete" button.
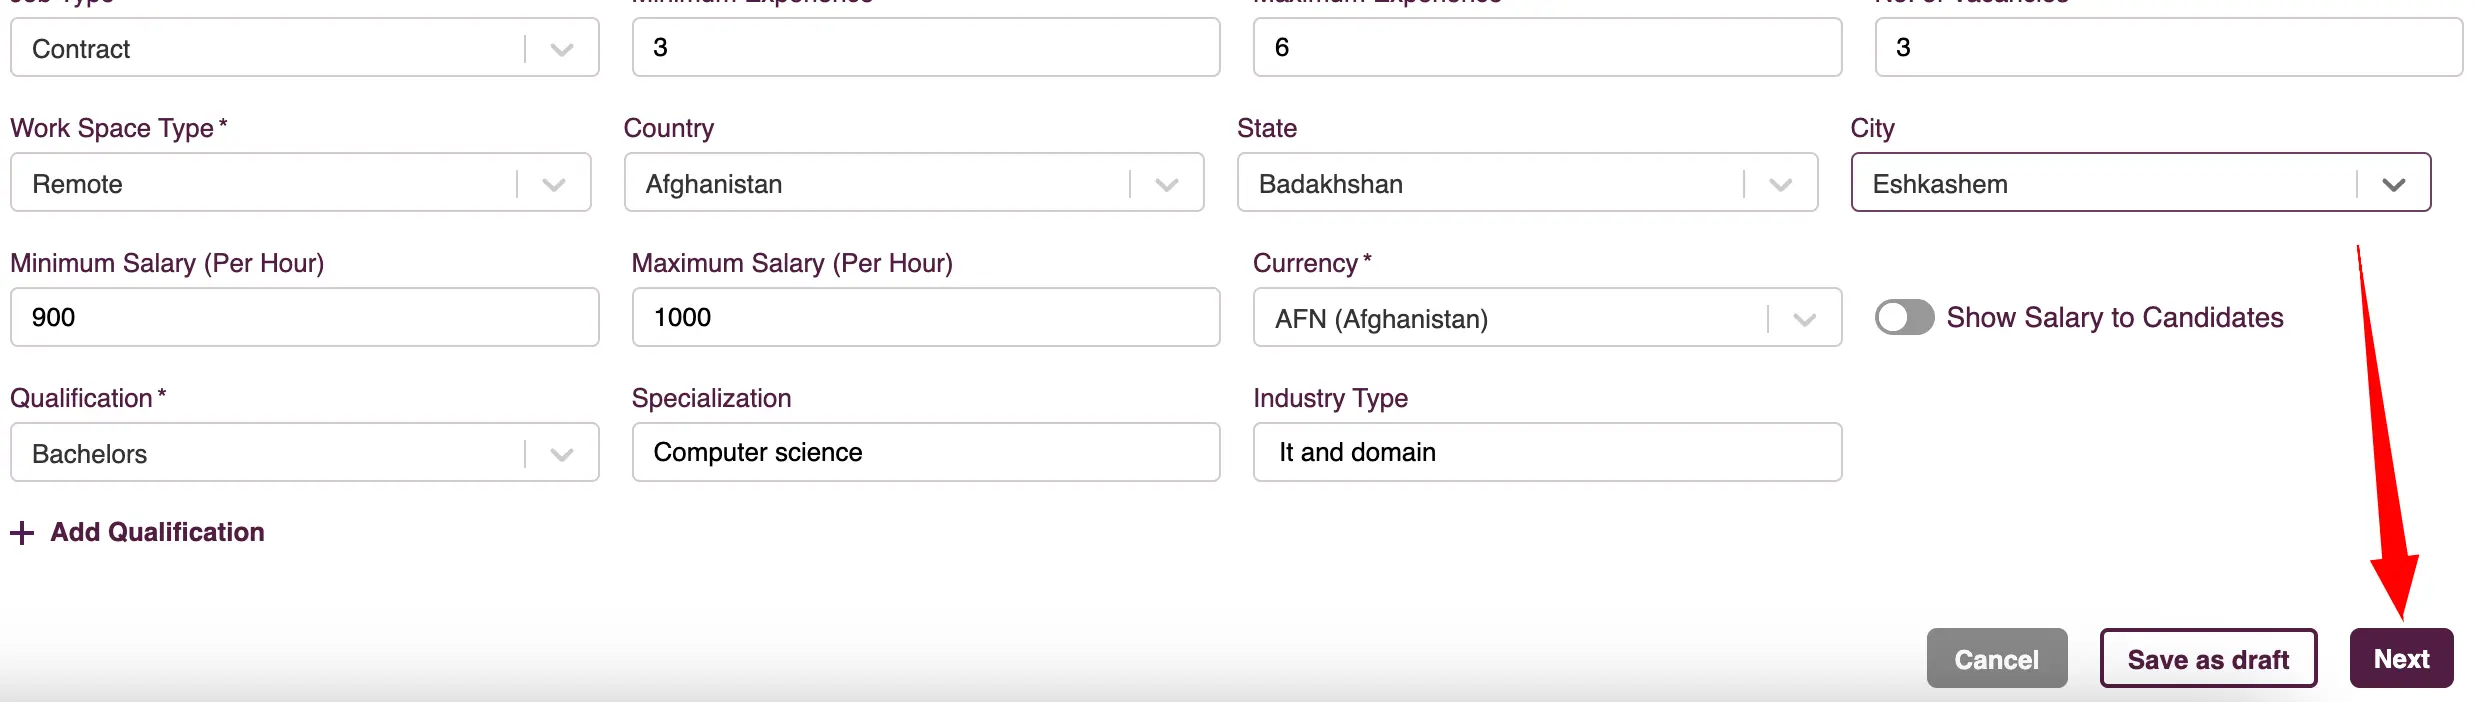
- To finalize the job creation process in Zita, simply click on the "Next" button.
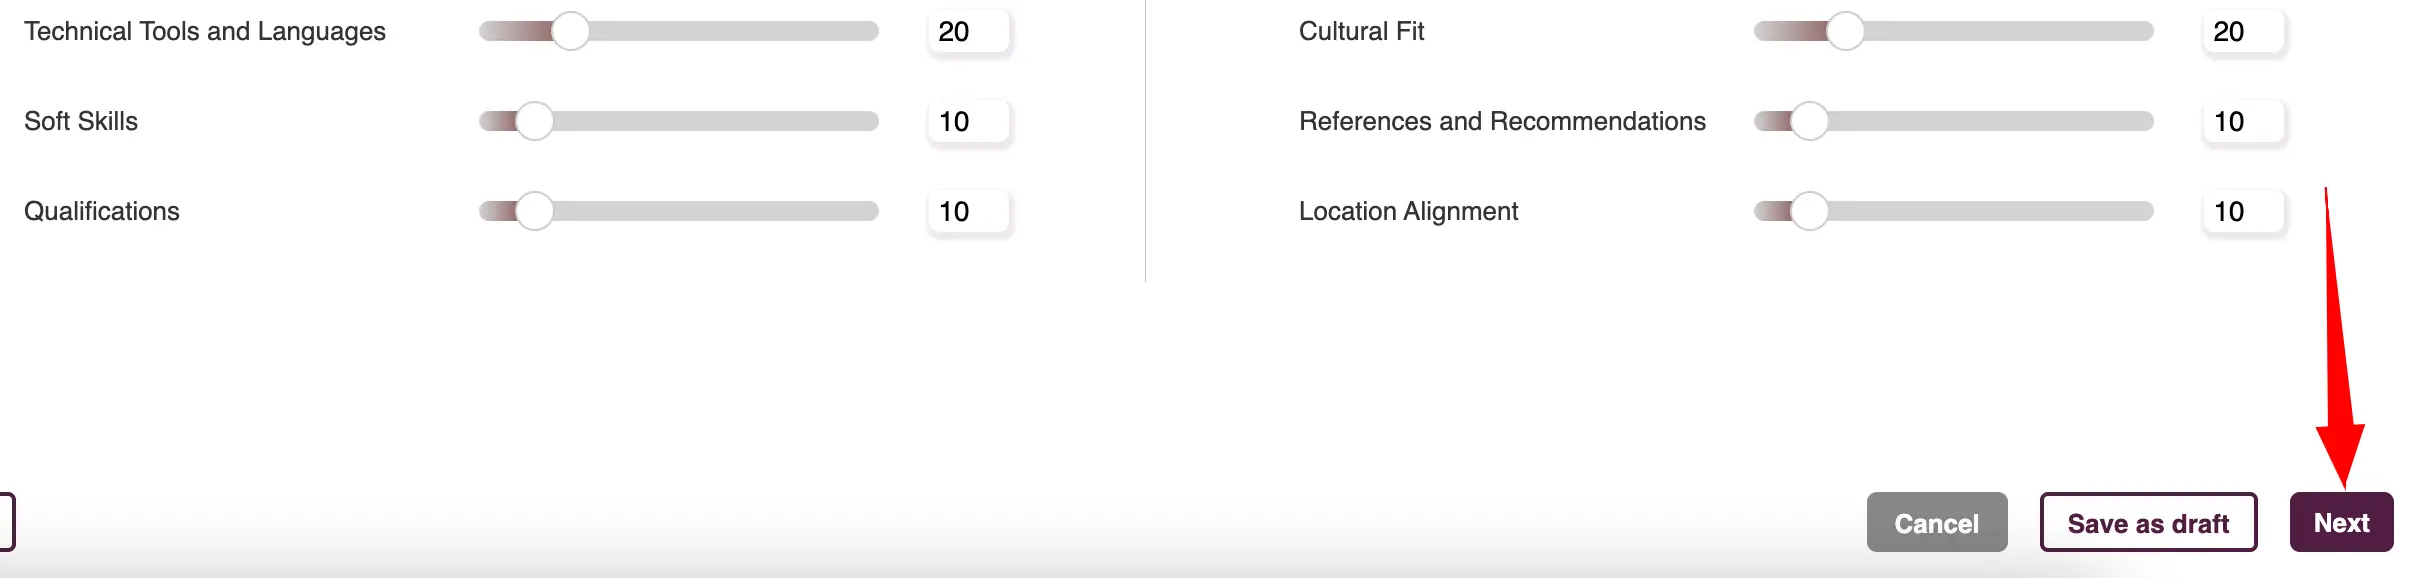
Adjustable Weightage Matching in Zita
After creating a job, Zita’s "Adjustable Weightage Matching" feature enables you to precisely tailor the evaluation of candidates. This feature includes:
- Profile Compatibility Criteria: Evaluates the alignment of candidates profiles with job requirements.
- Enhanced Matching Criteria: Provides a more in-depth analysis focusing on specific, detailed factors.
- Zita offers the flexibility to reset these criteria to default settings for consistency.
- View the Detailed information about the Customizable Weightage in Matching Analysis in the following section.
- Once you’ve adjusted and finalized these settings, click on the "Next" button to continue with the subsequent steps in the job post creation process.
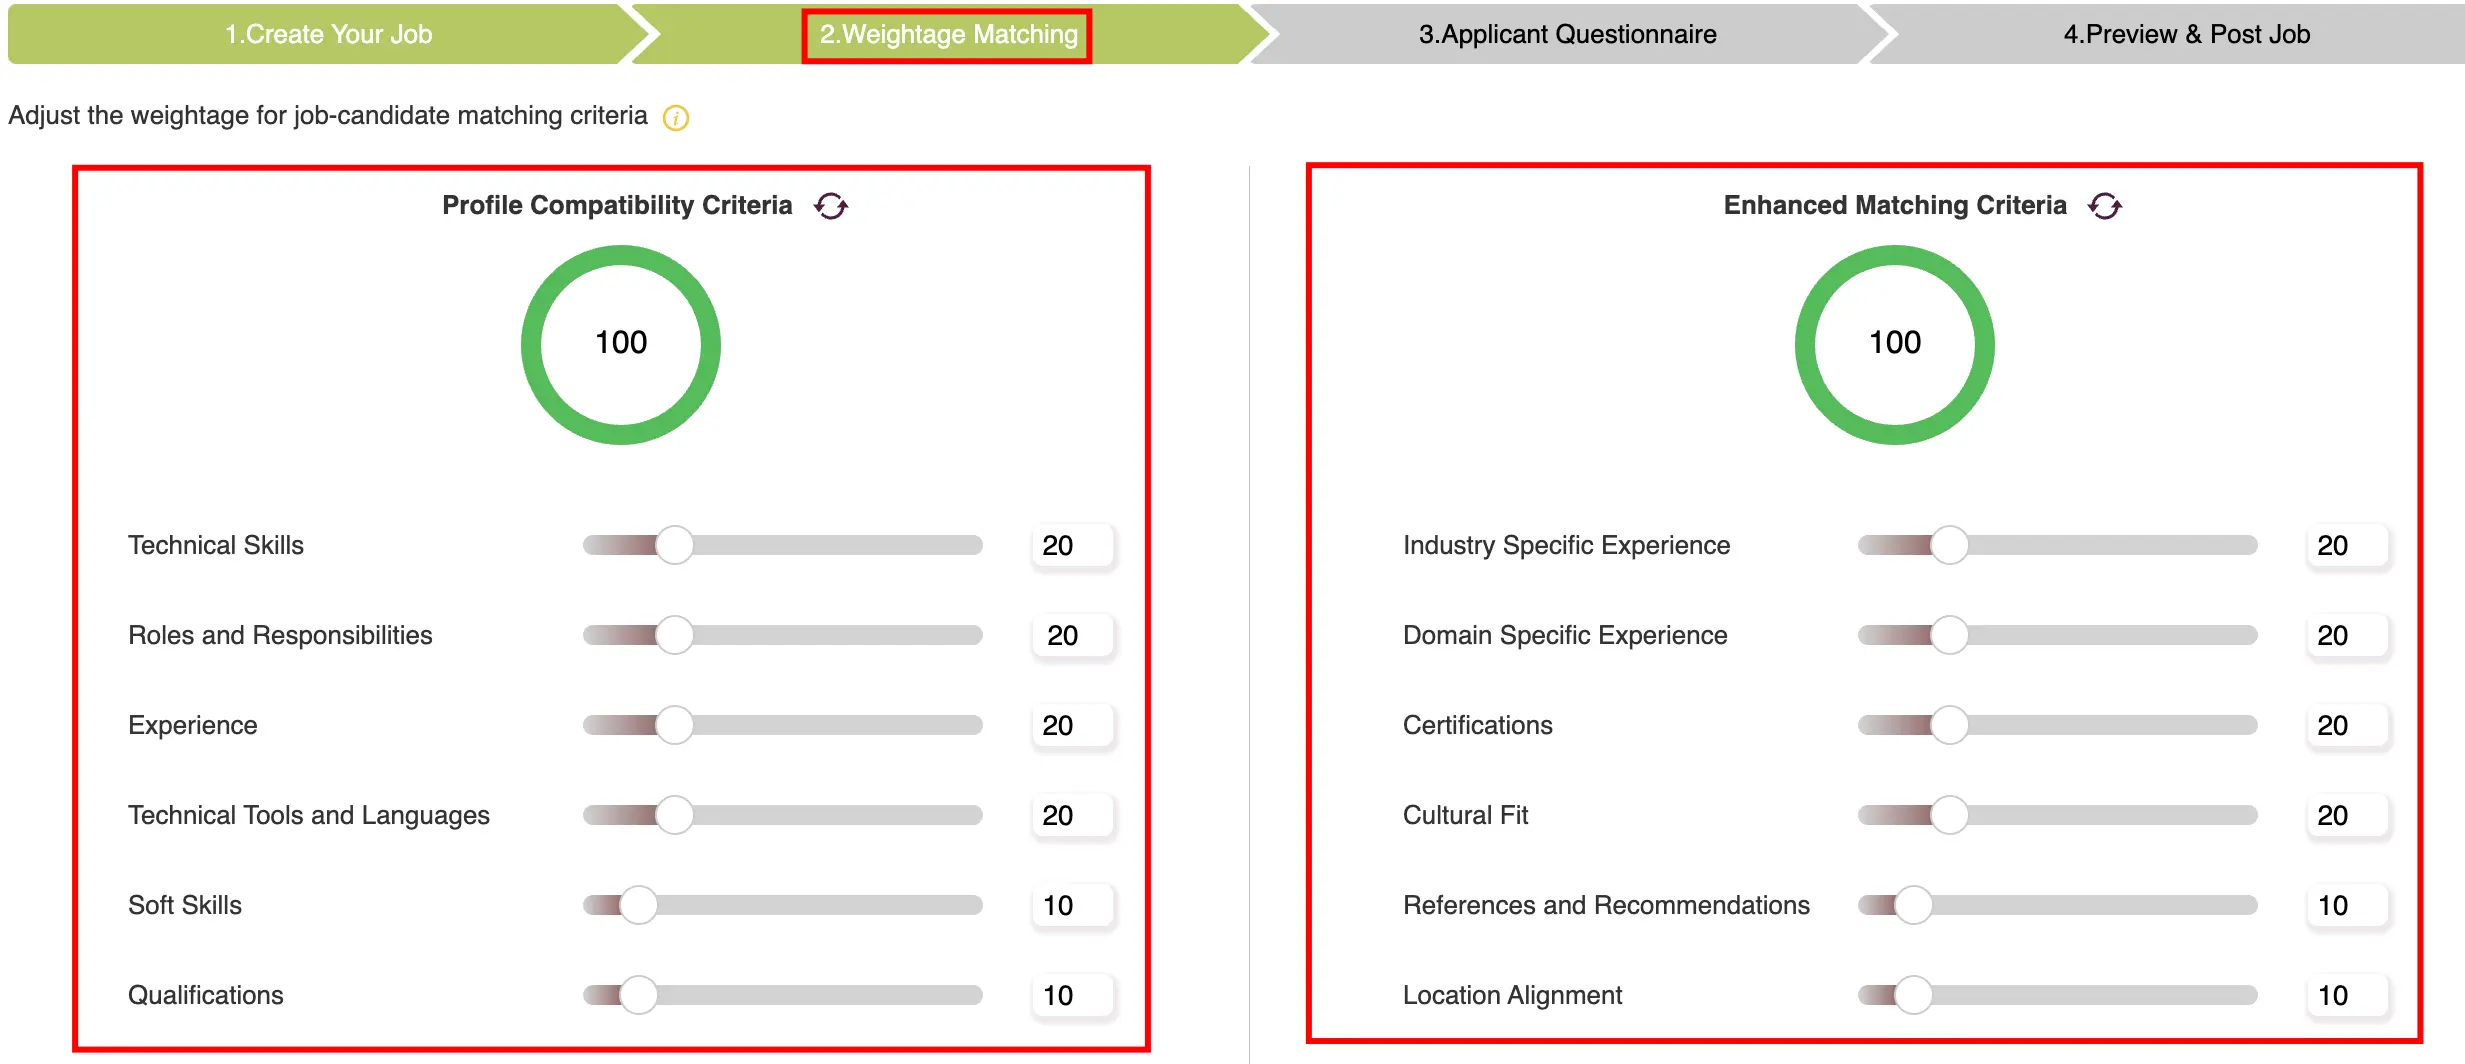
Note:
Ensure that the total matching score sums up to 100 in Zita, providing a balanced and comprehensive evaluation of each candidate's fit for the job.
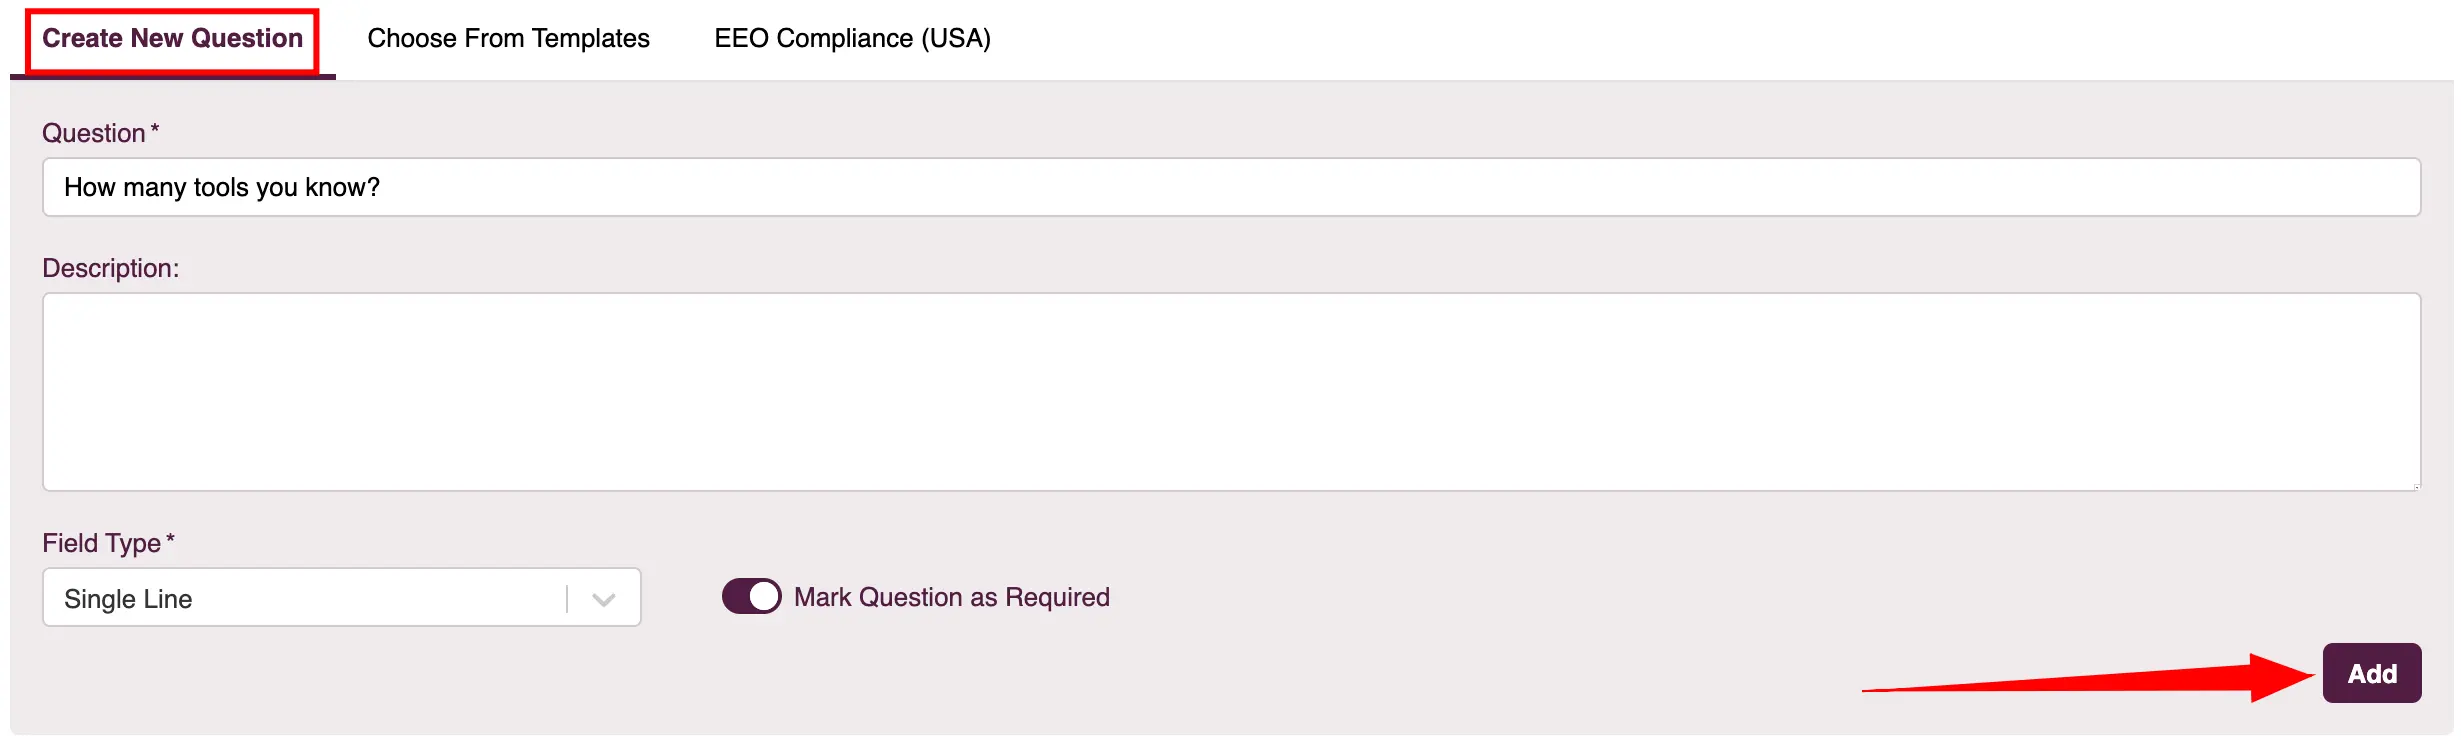
Applicant Questionnaire
Once you’ve set the Adjustable Weightage Matching in Zita, you can further enhance your job posting by adding a questionnaire for applicants.
- Simply fill in the necessary fields for each question you want to include.
- Click on “Add” to incorporate these questions into your job posting.
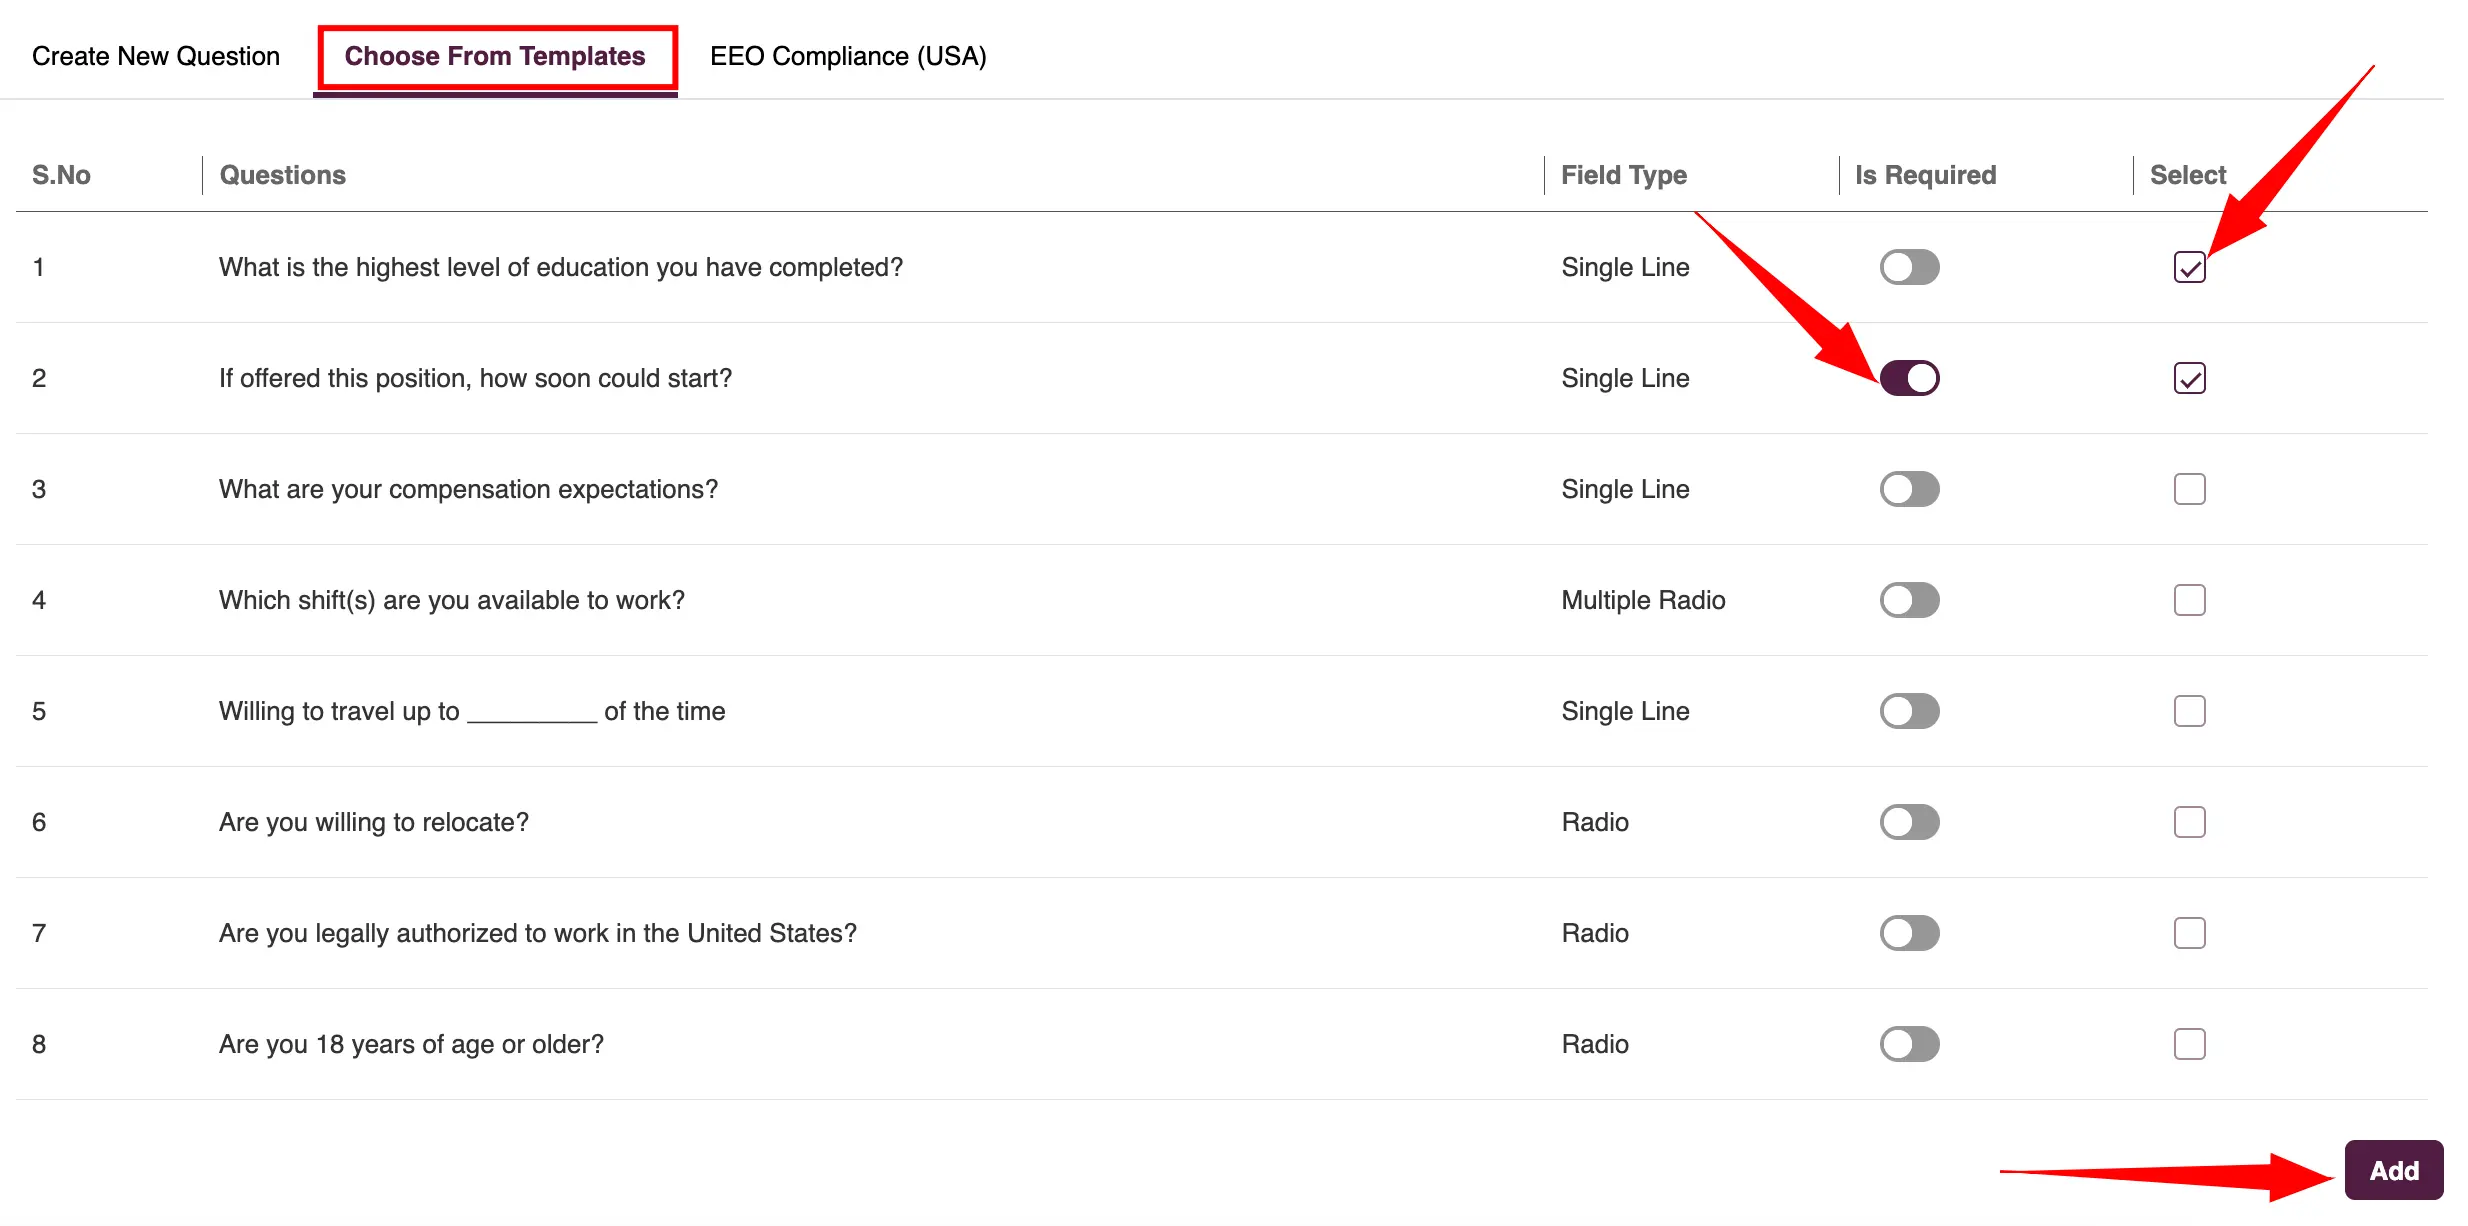
- As an additional option in Zita, you can add questions to your job posting from a pre-existing template. Simply click on "Choose from Template" and select the questions that best fit your job posting needs.
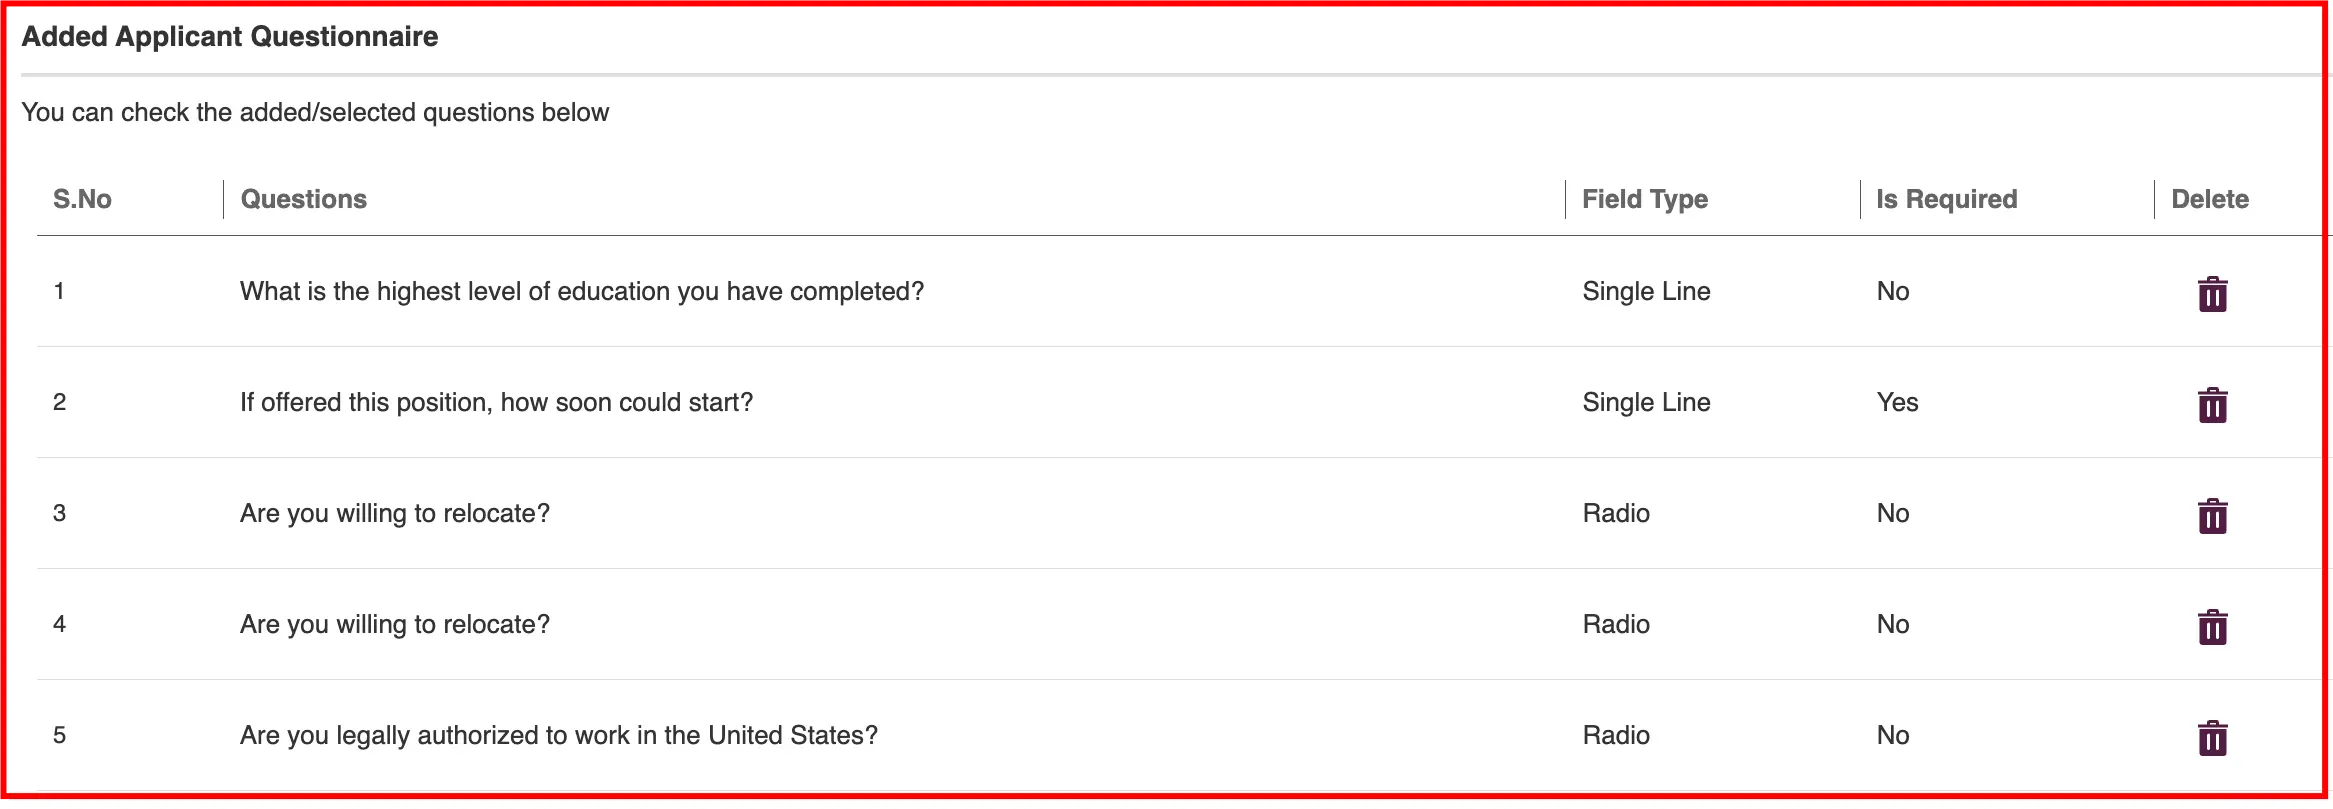
- Once you’ve added questions to your job posting, they can be viewed in the "Added Applicant Questionnaire" section.
- To see the final version of the job you,ve created in Zita before it goes live, click on “Preview” button.

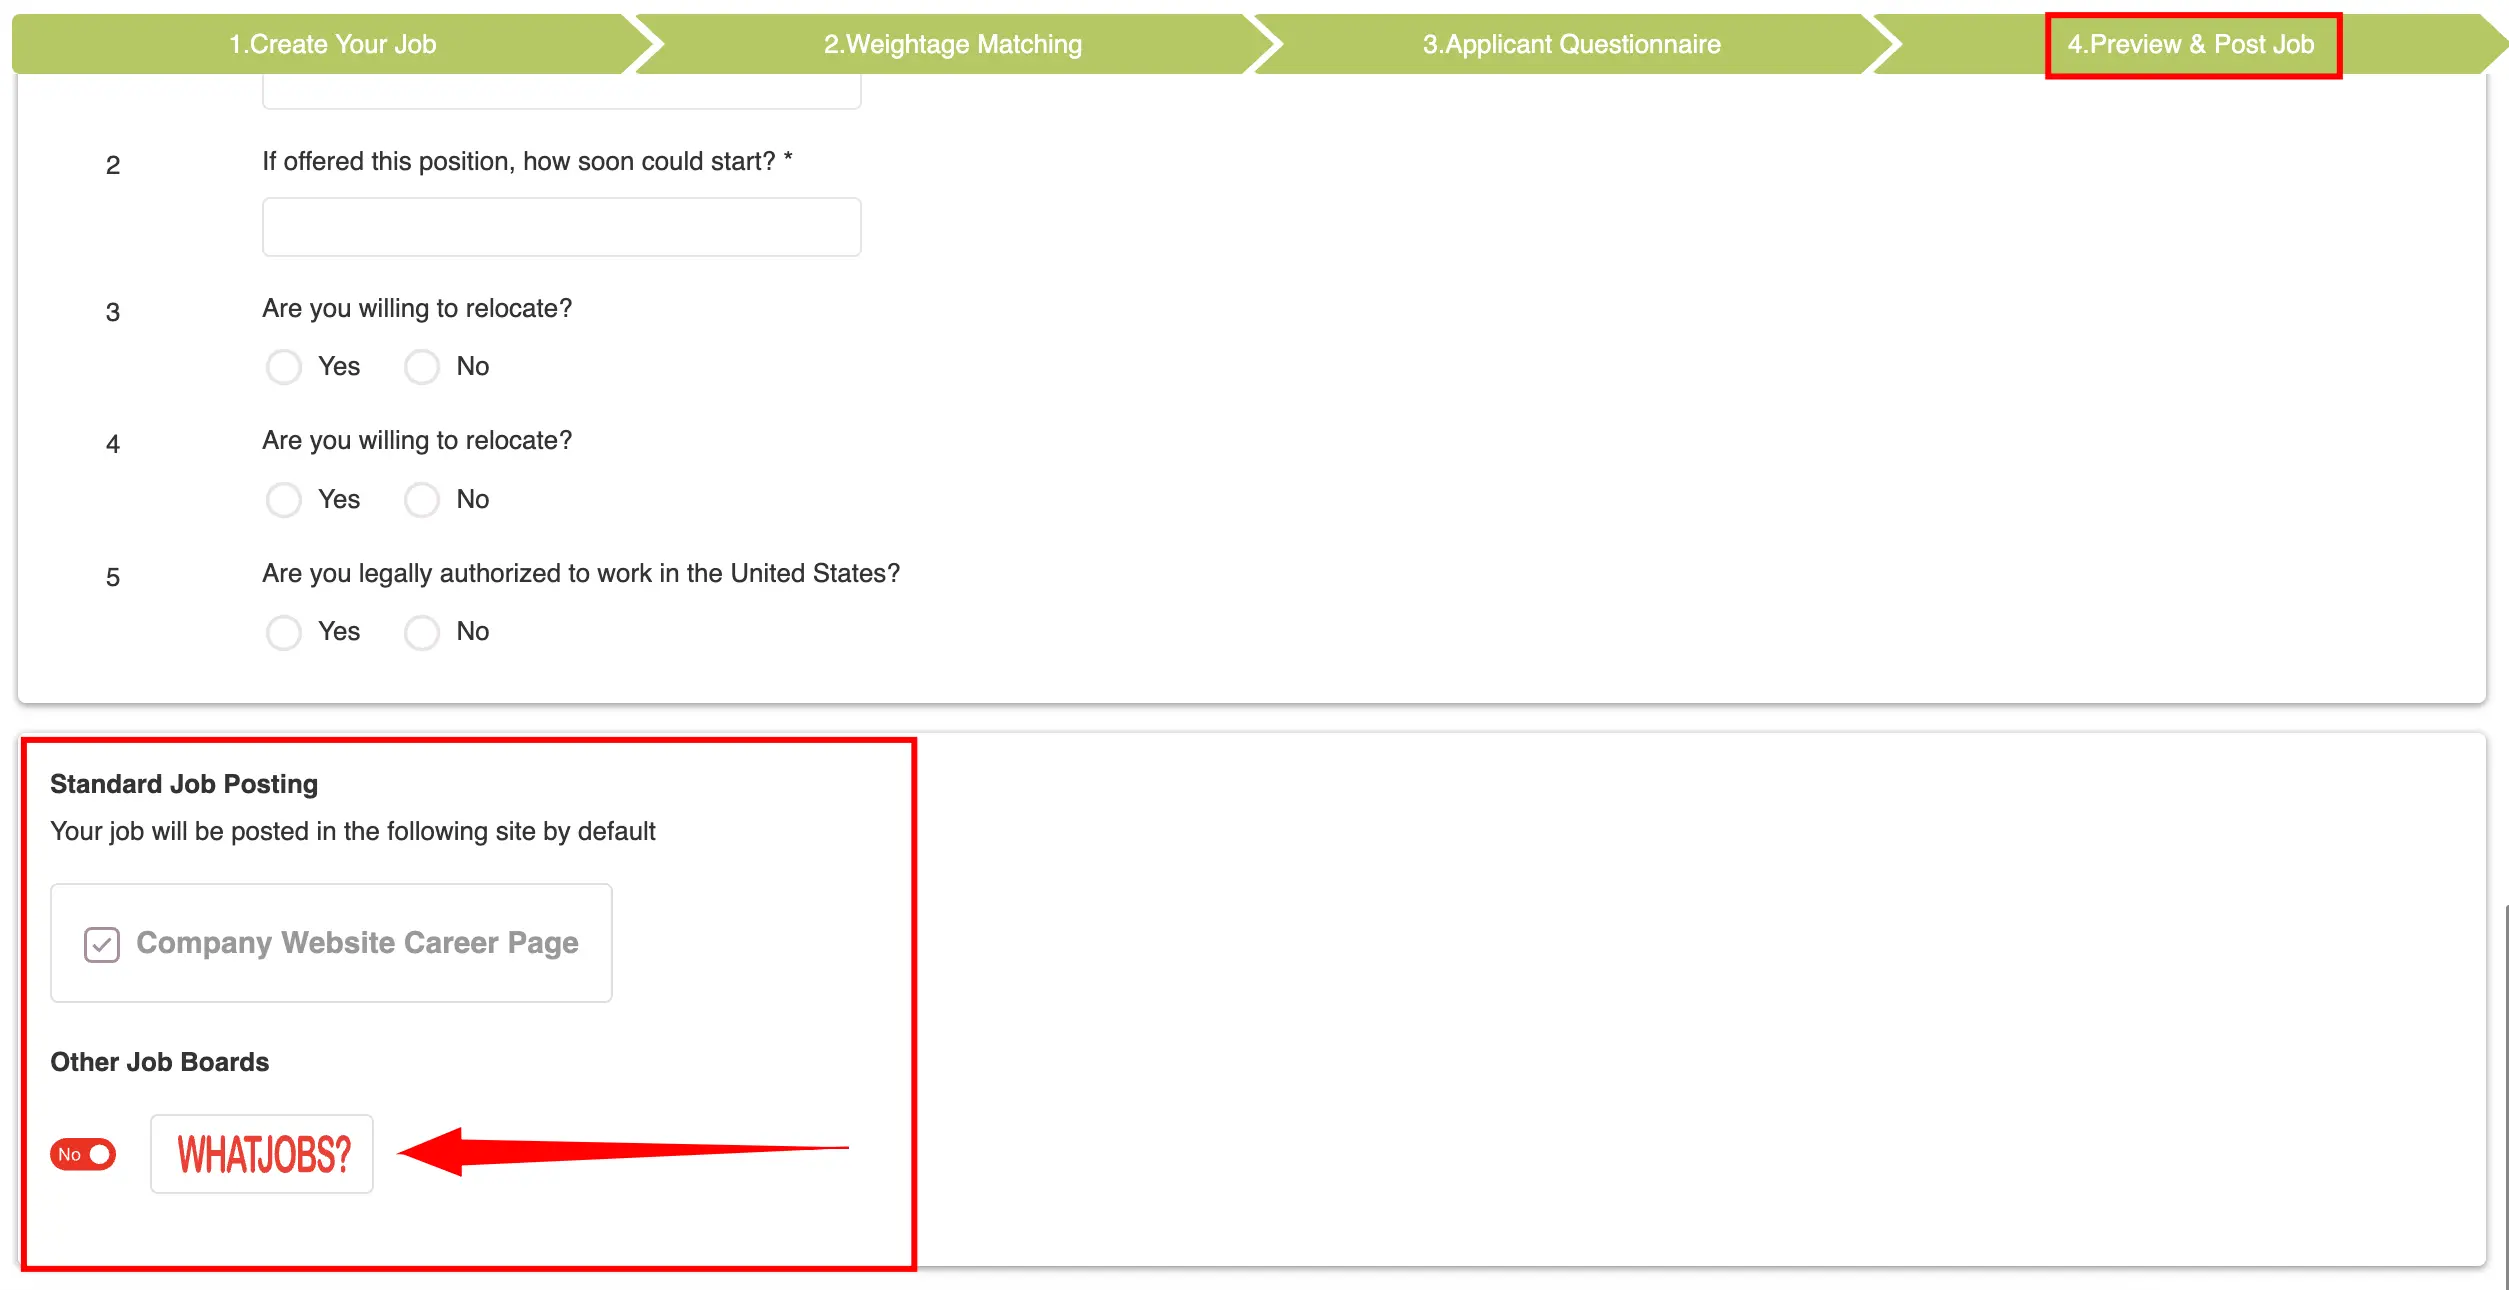
Preview & Post Job
This allows you to review and ensure everything is as intended in your job posting.
- Within the last section of "Preview & Post Job", you have the option to post your job on external job boards like "What Jobs". Simply enable this feature to expand your job posting’s reach.
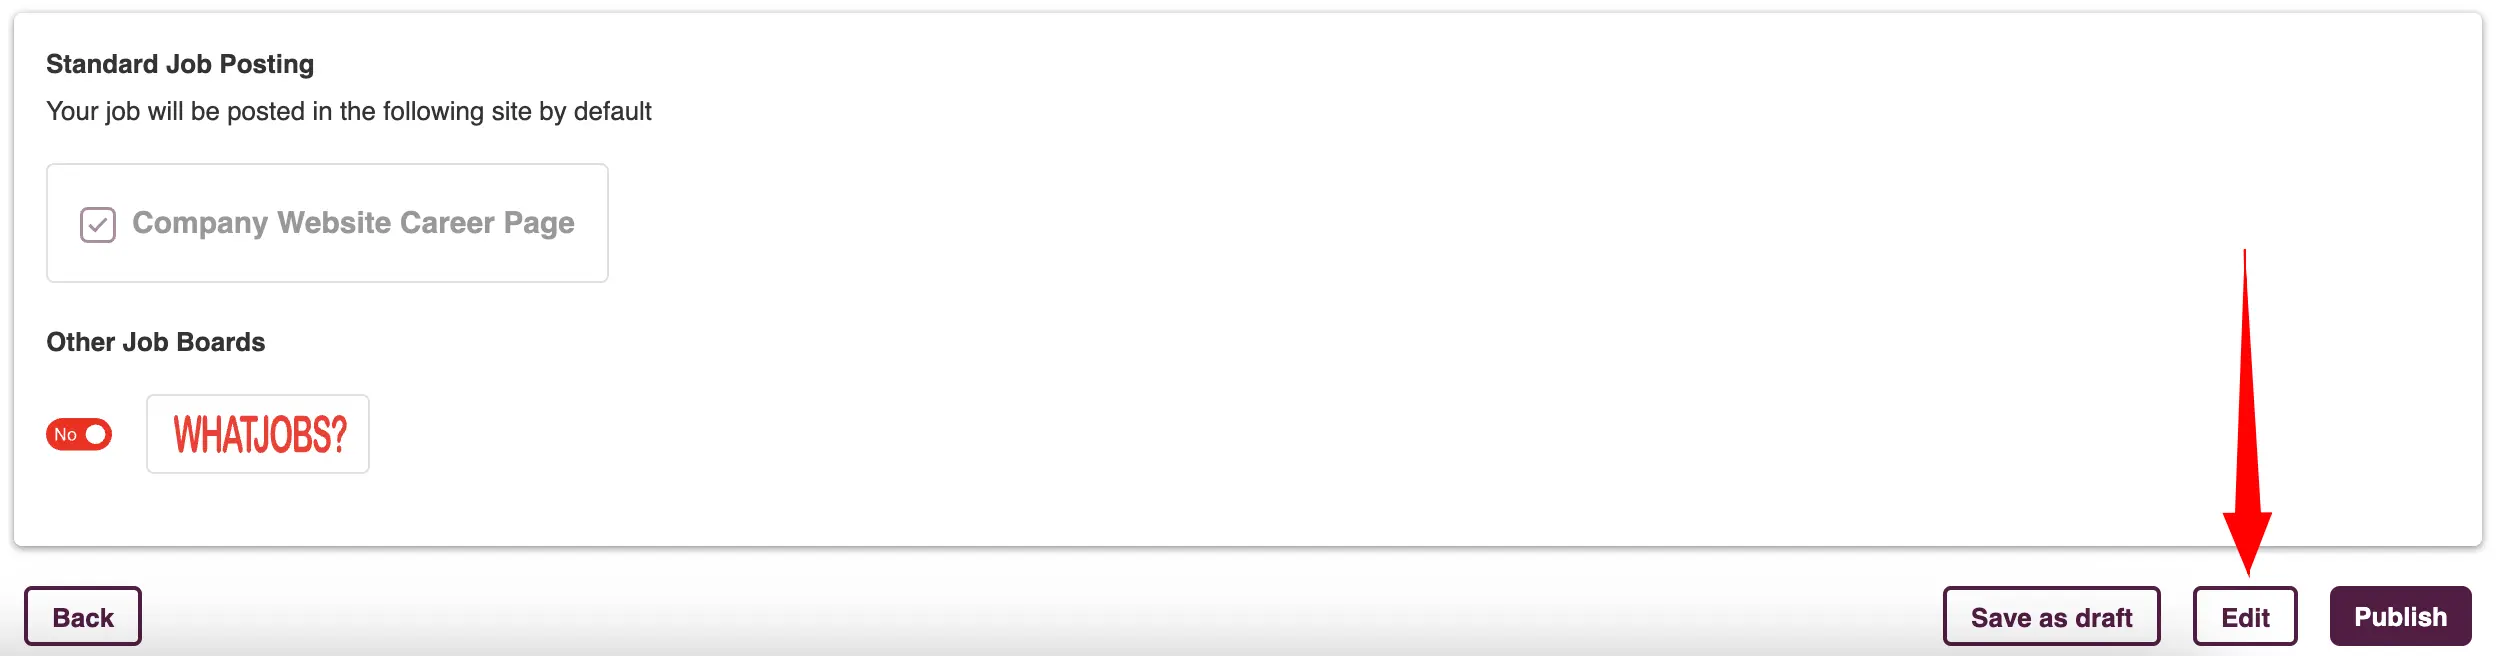
- Before publishing your job in Zita, you have the flexibility to make edits at any point. Simply click on the "Edit" button, which will take you back to the "Create Job" page, allowing you to modify any details of your job posting.
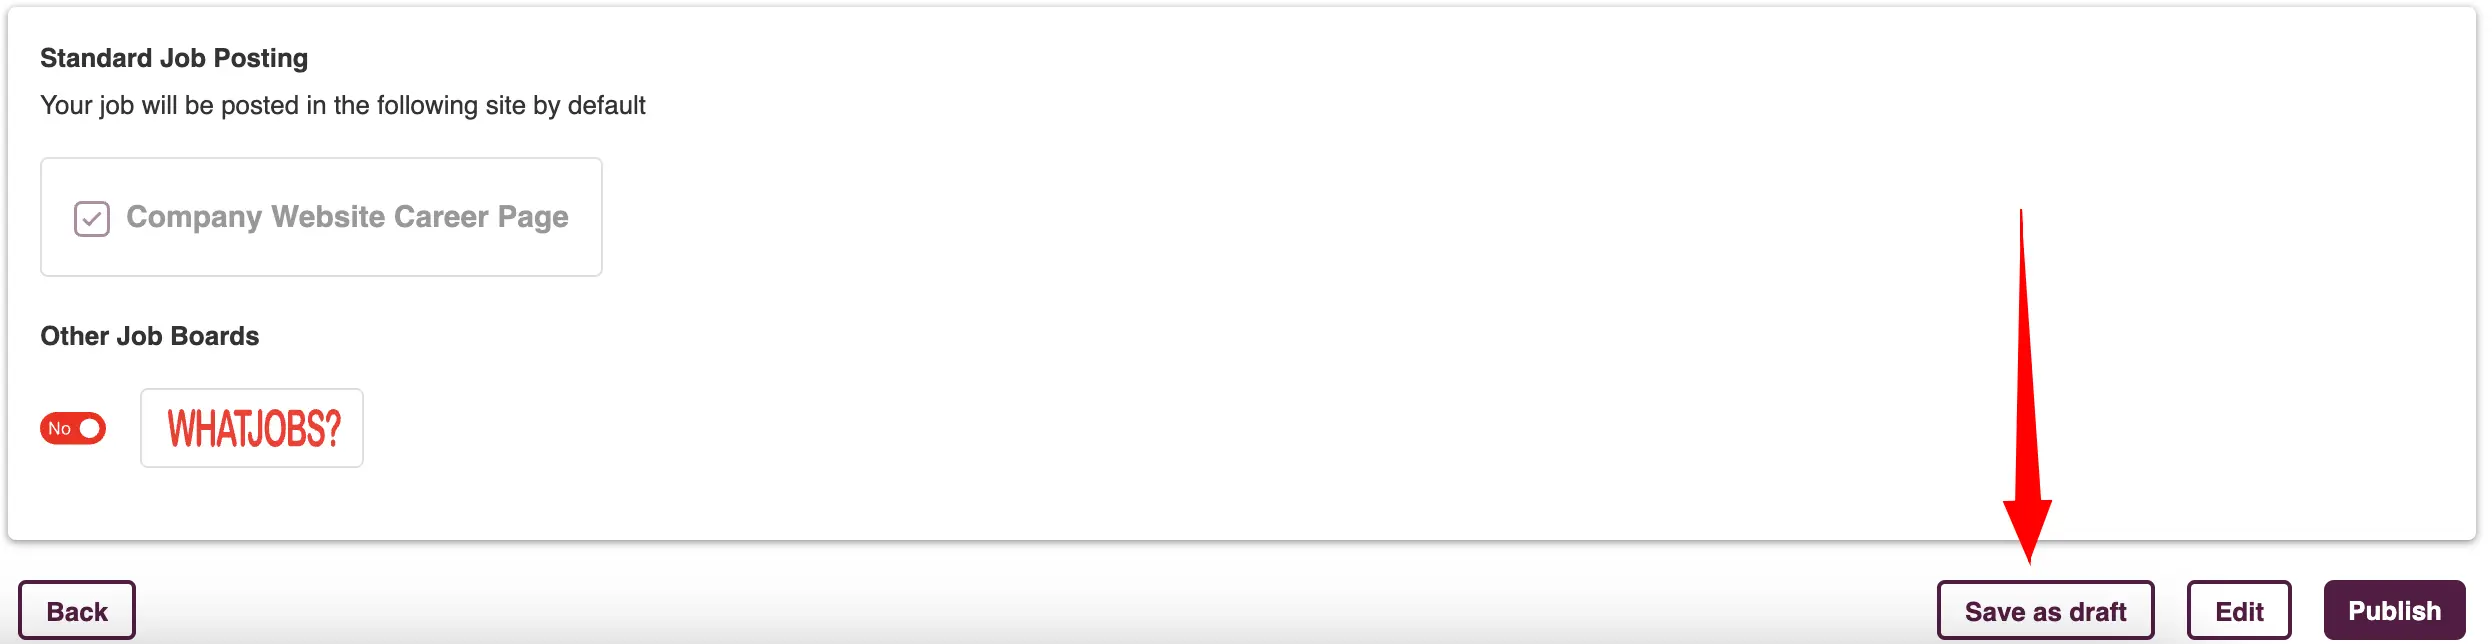
- You can save your job at any time by clicking the "Save as Drafts" button, letting you come back and finish it later.
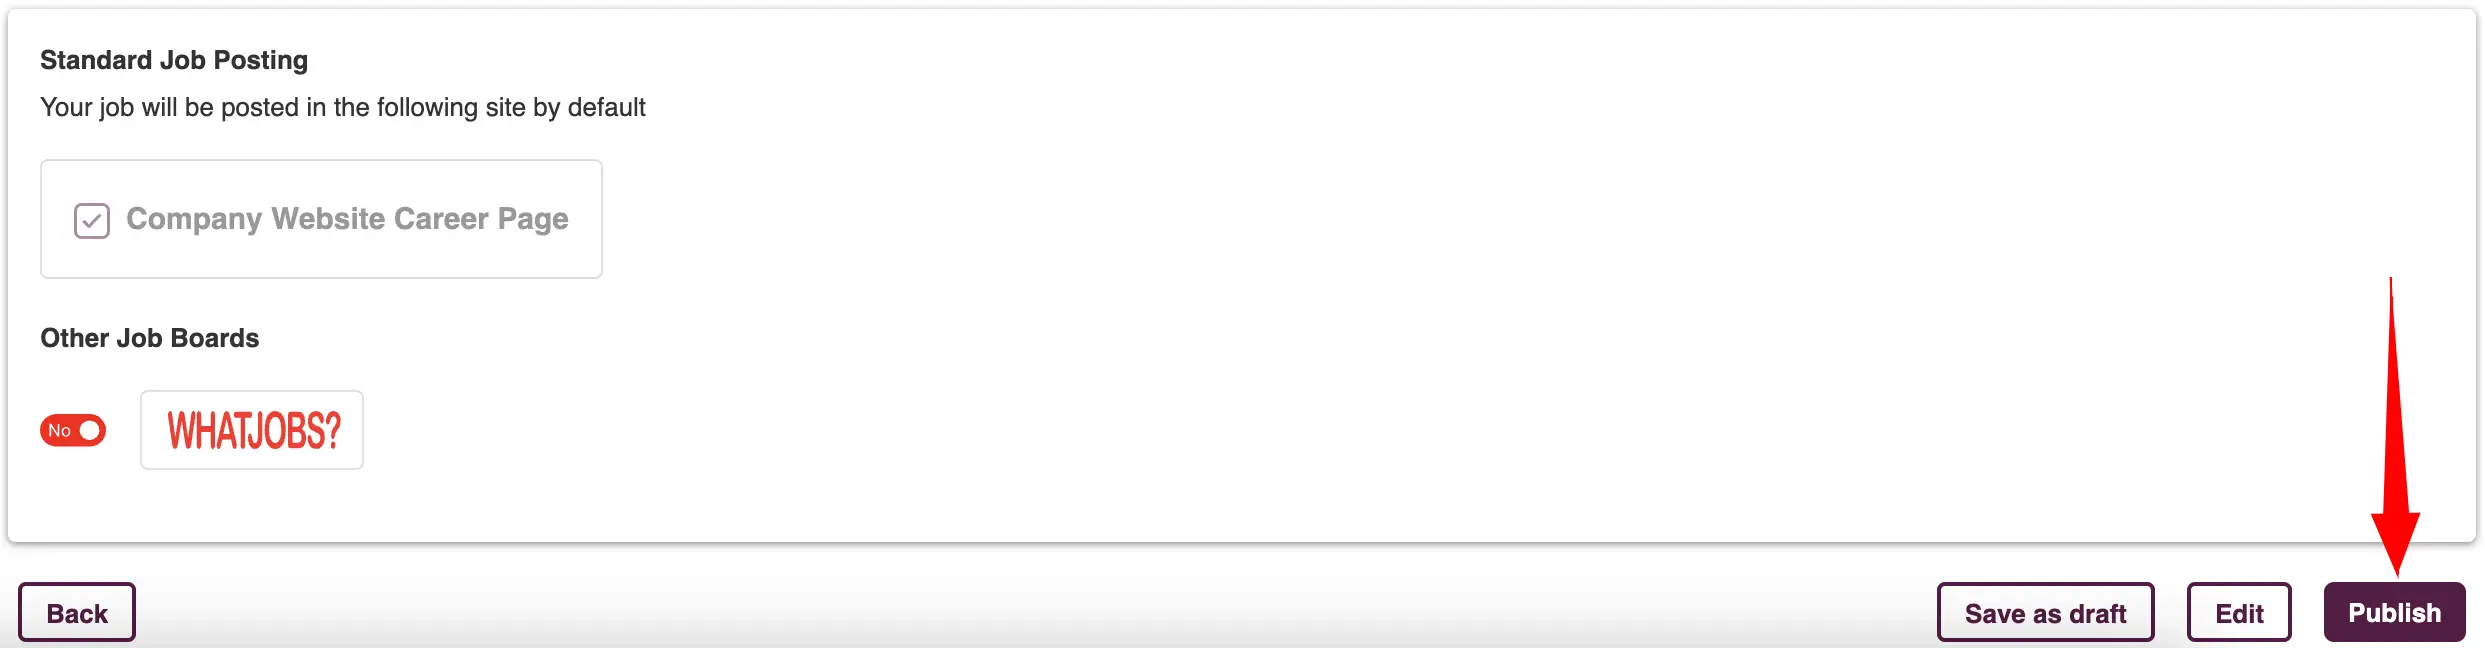
- When you’re ready to publish the job, simply click on the “Publish” button. By default, your job will be posted on your career page, making it visible to potential applicants.