Hiring Team Collaboration Tools
Overview
The Hiring Team Collaboration Tools offer streamlined recruitment teamwork, including user role management, activity logging, and options to modify, activate, or delete user accounts. Enhanced communication is facilitated through email/calendar integration and a database of email templates, alongside internal feedback notes, ensuring efficient and cohesive team coordination.
Team Collaboration
The Team Collaboration tools offer functionalities for inviting users, assigning roles, modifying details, managing user activity, and tracking through a User Activities Log, ensuring effective team management and oversight.
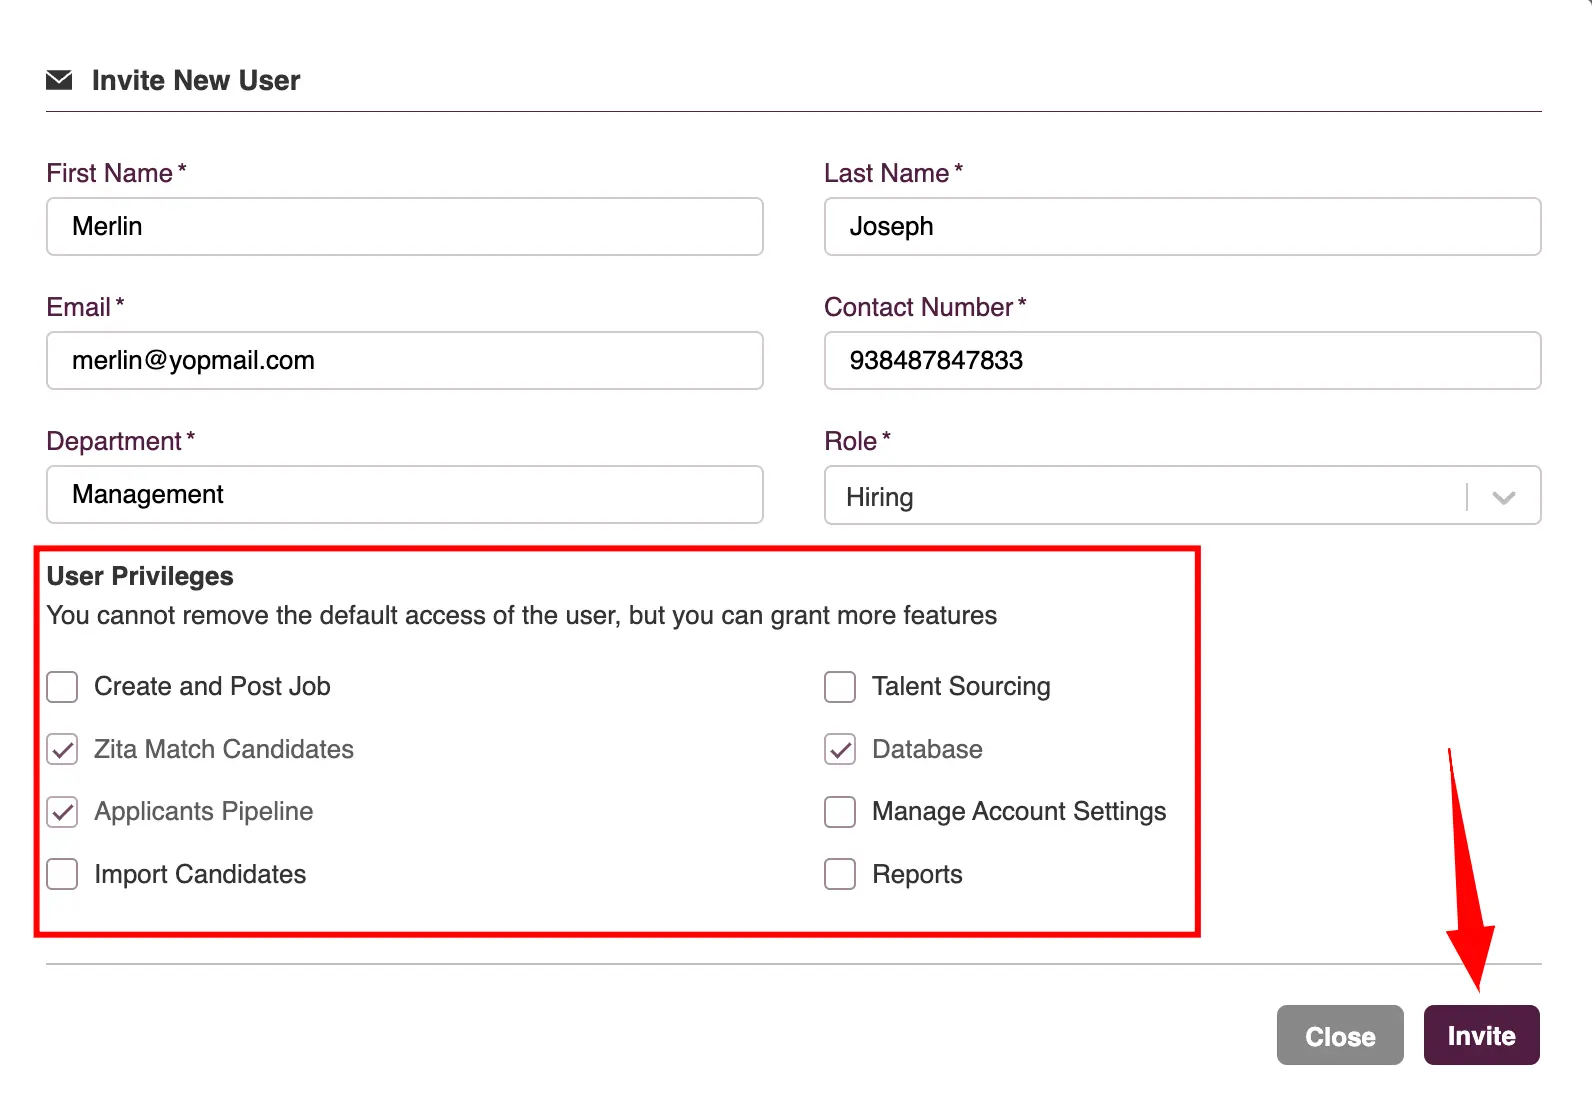
- Invite User
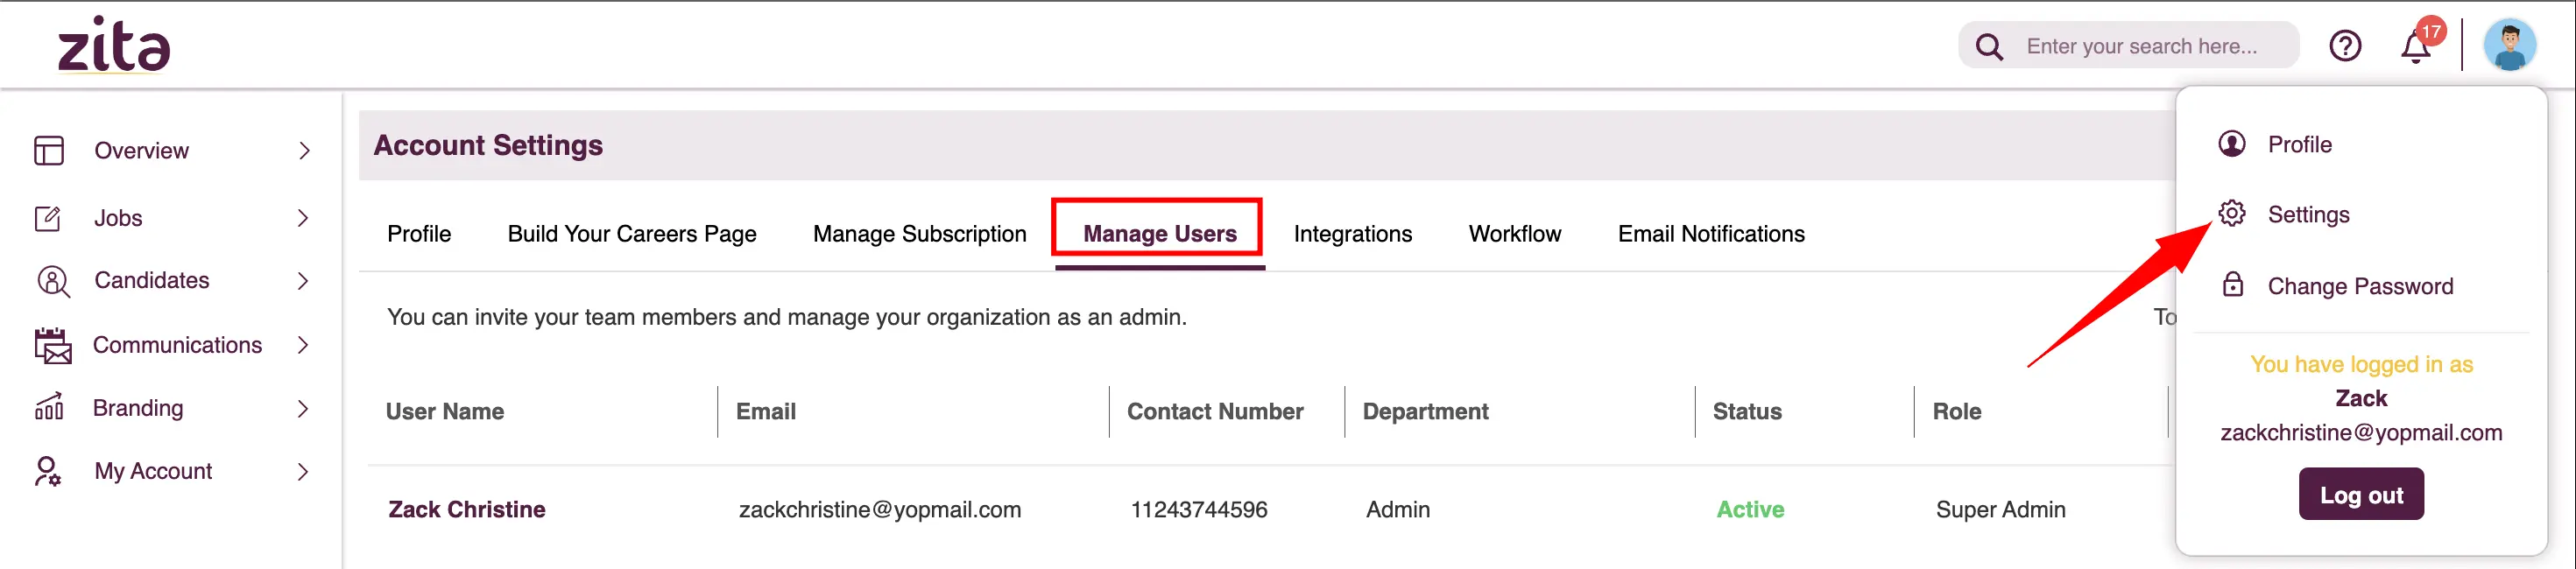
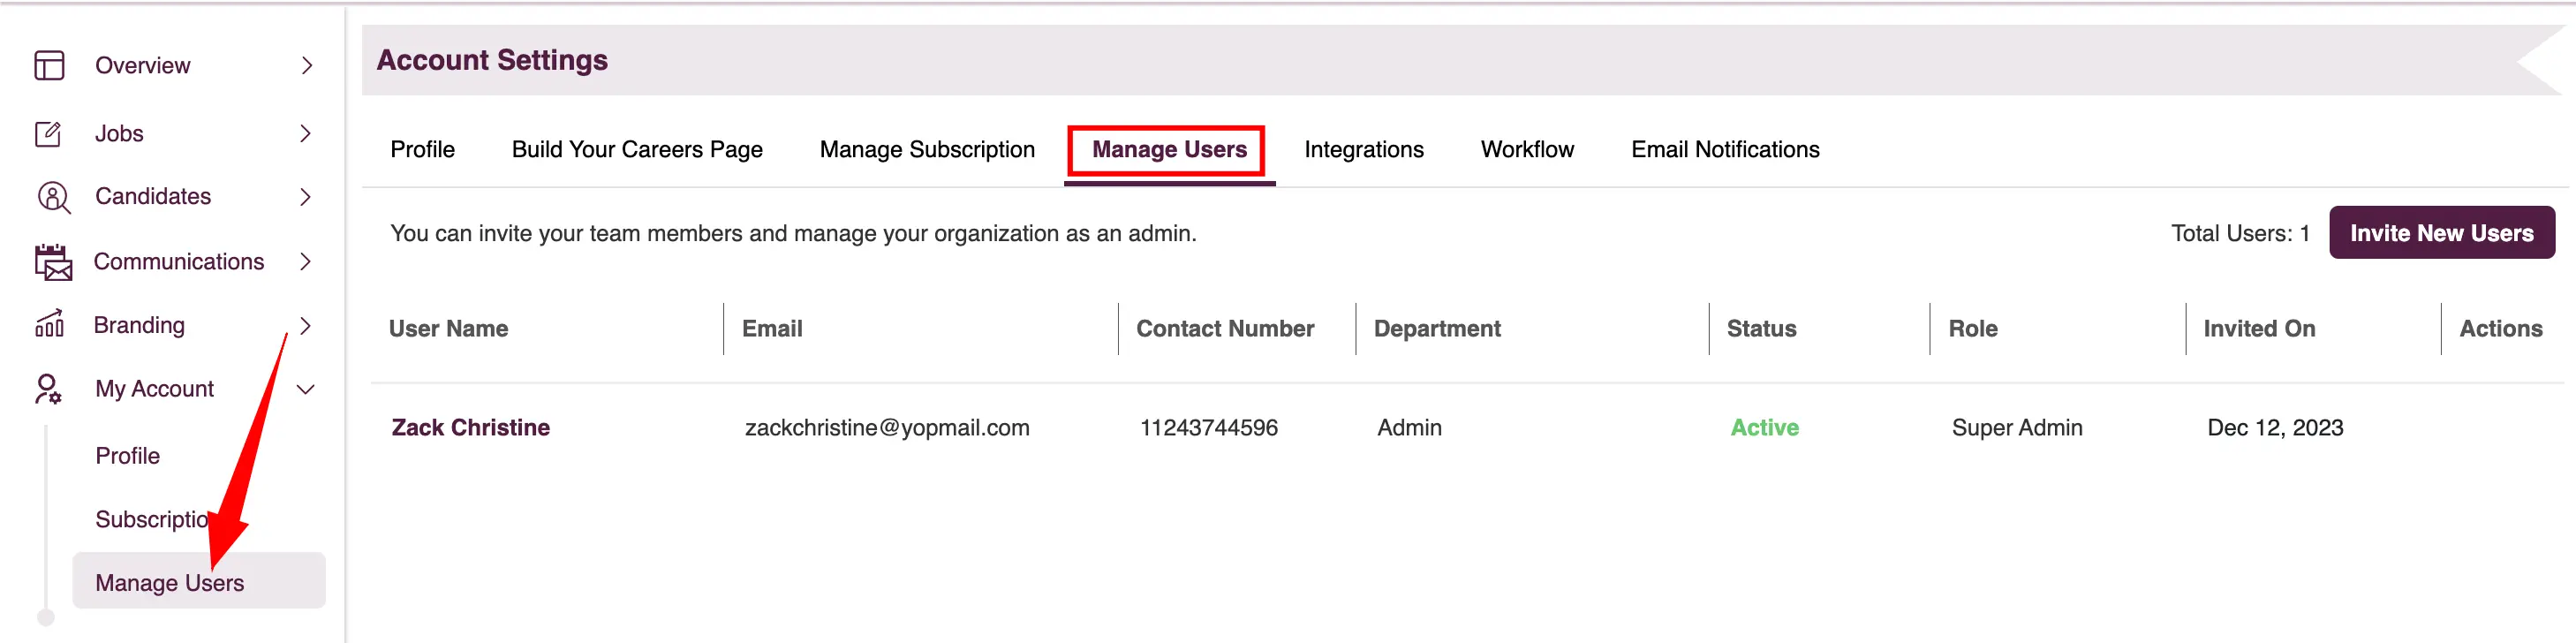
- Head to "Settings" in your Zita account and click on the "Manage Users" tab.
- Additionally, you can find "Manage Users" in the sidebar, providing a convenient and easy way to manage your user whenever you need.
- To add new users to your Zita account, click the "Invite New Users" button.
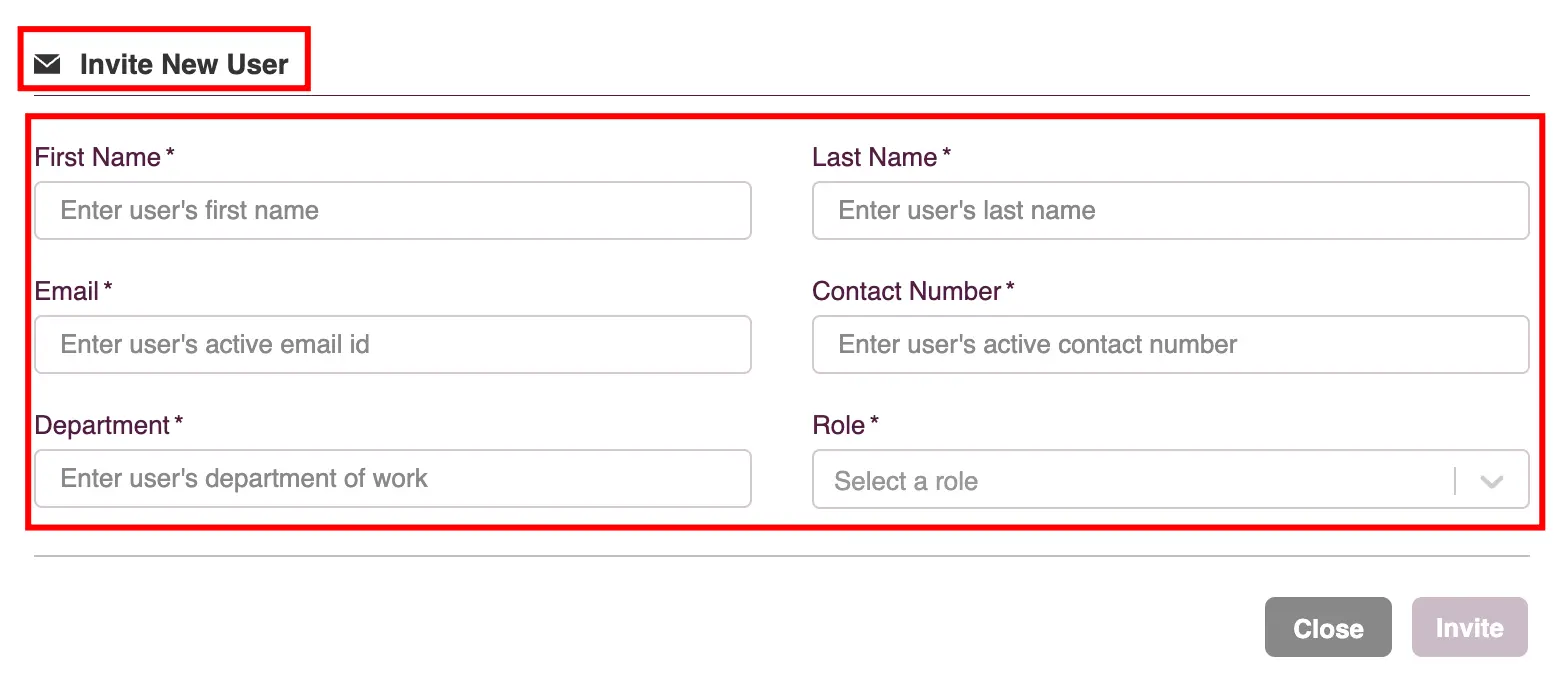
- Fill in the necessary fields and select a Role for the new user.
- Under "User Privileges", add additional privileges to the user, while the default privileges remain unchanged. Once details are completed, click "Invite" to dispatch an invitation to the provided email address.
- After inviting a user, their status stays pending until they accept. To resend an invitation email, click the "3-dots" icon in the "Actions" column and select "Resend Invite" from the dropdown.
- User Roles & Permissions
- Admin
- Holds the highest level of access, overseeing recruitment and employee data management.
- Tasks include creating and posting job openings, talent sourcing, and using Zita for candidate matching.
- Complete access to the database for comprehensive management.
- Manages the applicant pipeline and Jobs Workflow and can import candidate details.
- Full access to all account settings for comprehensive system configuration.
- Equipped with Reports privilege to review recruitment metrics and efficiencies.
- HR
- Second-highest level of access, pivotal in managing the recruitment process and talent.
- Empowered to create and post job openings, conduct talent sourcing, and use Zita for precise candidate matching.
- Granted access to the database for managing candidate information.
- Oversees the movement of applicants through the pipeline along with the Jobs Workflow and can import candidate details.
- Access to Reports for analyzing recruitment metrics and performance.
- With enabled privileges, basic access to manage account settings for necessary system adjustments.
- Hiring
- Tailored for individuals involved in candidate selection and evaluation, with the lowest level of specified access.
- Initially, access to Zita for candidate matching, the database for candidate information management, and oversight of the applicant pipeline & Jobs Workflow.
- With enabled privileges, access expands to creating and posting job openings, engaging in talent sourcing, and importing candidate details.
- Basic access to manage account settings, allowing for system configuration adjustments relevant to recruitment tasks.
- Granted access to Reports for an in-depth analysis of recruitment metrics and performance.
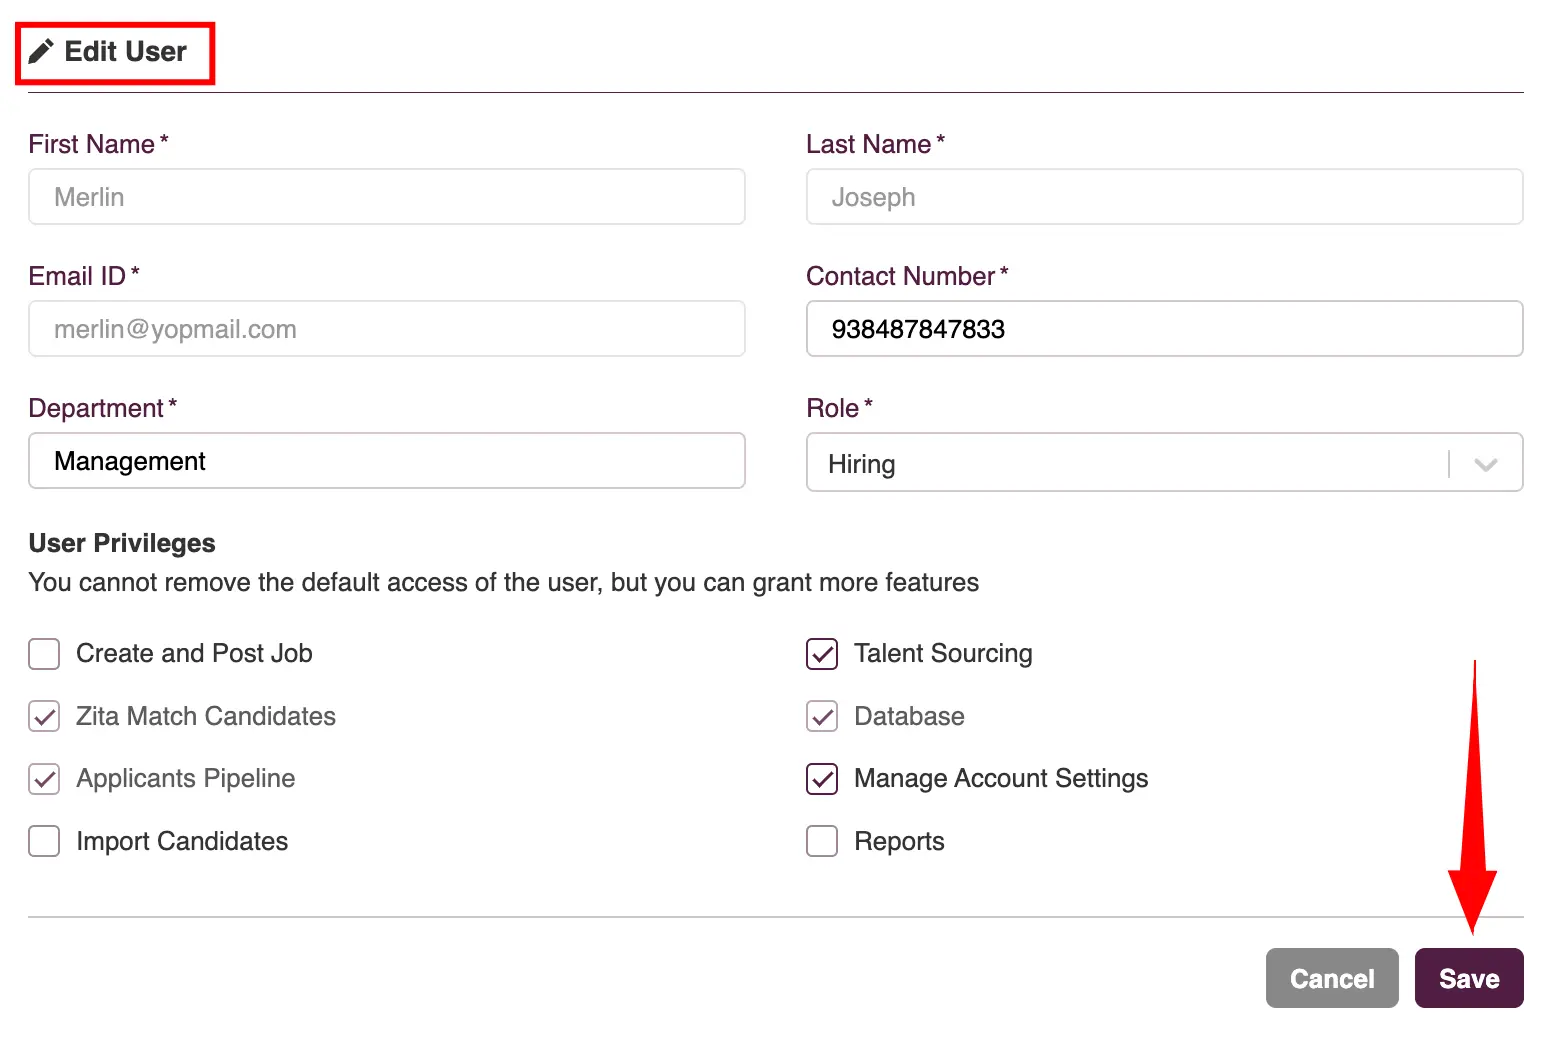
- Modify Details
- Head to"Settings" in your Zita account and click on the "Manage Users" tab.
- Additionally, you can find "Manage Users" in the sidebar, providing a convenient and easy way to manage your user whenever you need.
- Click the "3-dots" in the Action column and select "Edit" from the dropdown menu.
- In the Edit User section, you can change the Department, Contact, and Role. Choose the new role from the dropdown and click "Save" .
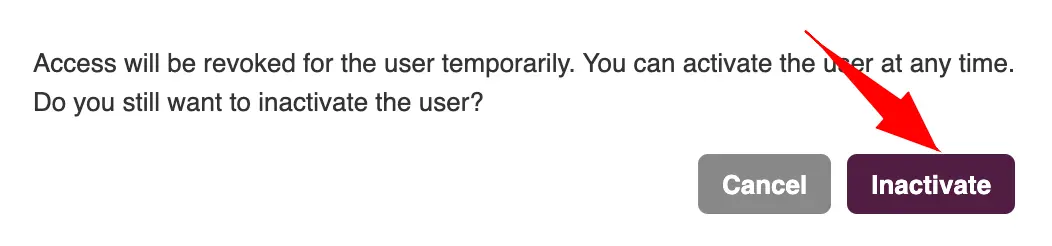
- Inactivate or Reactivate Users
- Head to "Settings" in your Zita account and click on the "Manage Users" tab.
- Additionally, you can find "Manage Users" in the sidebar, providing a convenient and easy way to manage your user whenever you need.
- Click the "3-dots" icon in the Action column and select "Inactivate" from the dropdown menu.
- Click on the "Inactivate" button. This action will immediately inactivate the user, preventing them from logging in, while all their data remains securely stored on Zita.
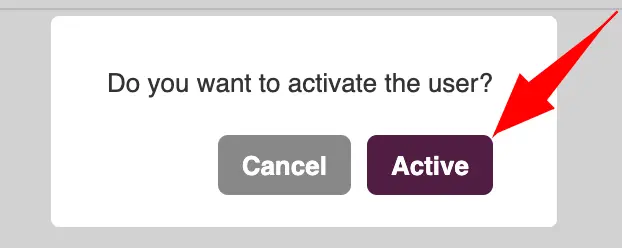
- To reactivate an inactivated user
- Click the 3-dots under the Action column and select "Activate" from the dropdown menu.
- Confirm by clicking on "Active" . This will immediately reactivate the user, enabling them to log back into their Zita account.
- Delete Users
- Deleting a user blocks their Zita login but retains their data (notes, jobs, etc.) in the system.
- Deleted users disappear from user lists and reports.
- To restore, re-invite using the same email.
- Head to "Settings" in your Zita account and click on the "Manage Users" tab.
- Additionally, you can find "Manage Users" in the sidebar, providing a convenient and easy way to manage your user whenever you need.
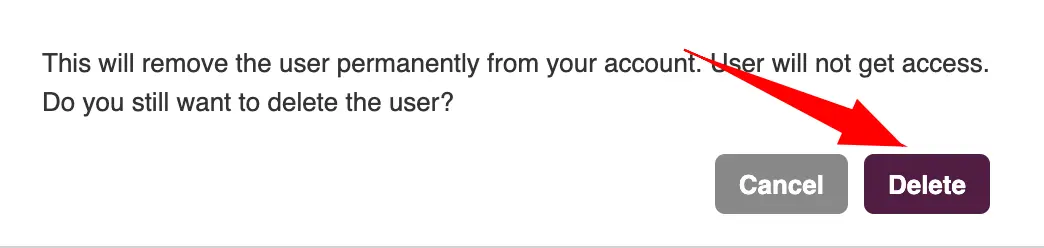
- Click the "3-dots" icon in the Action column and select "Delete" from the dropdown menu.
- Click on "Delete" to confirm. Once done, the user is immediately deleted and will lose access to their Zita account.
- User Activities Log
- Head to "Settings" in your Zita account and click on the "Manage Users" tab.
- Additionally, you can find "Manage Users" in the sidebar, providing a convenient and easy way to manage your user whenever you need.
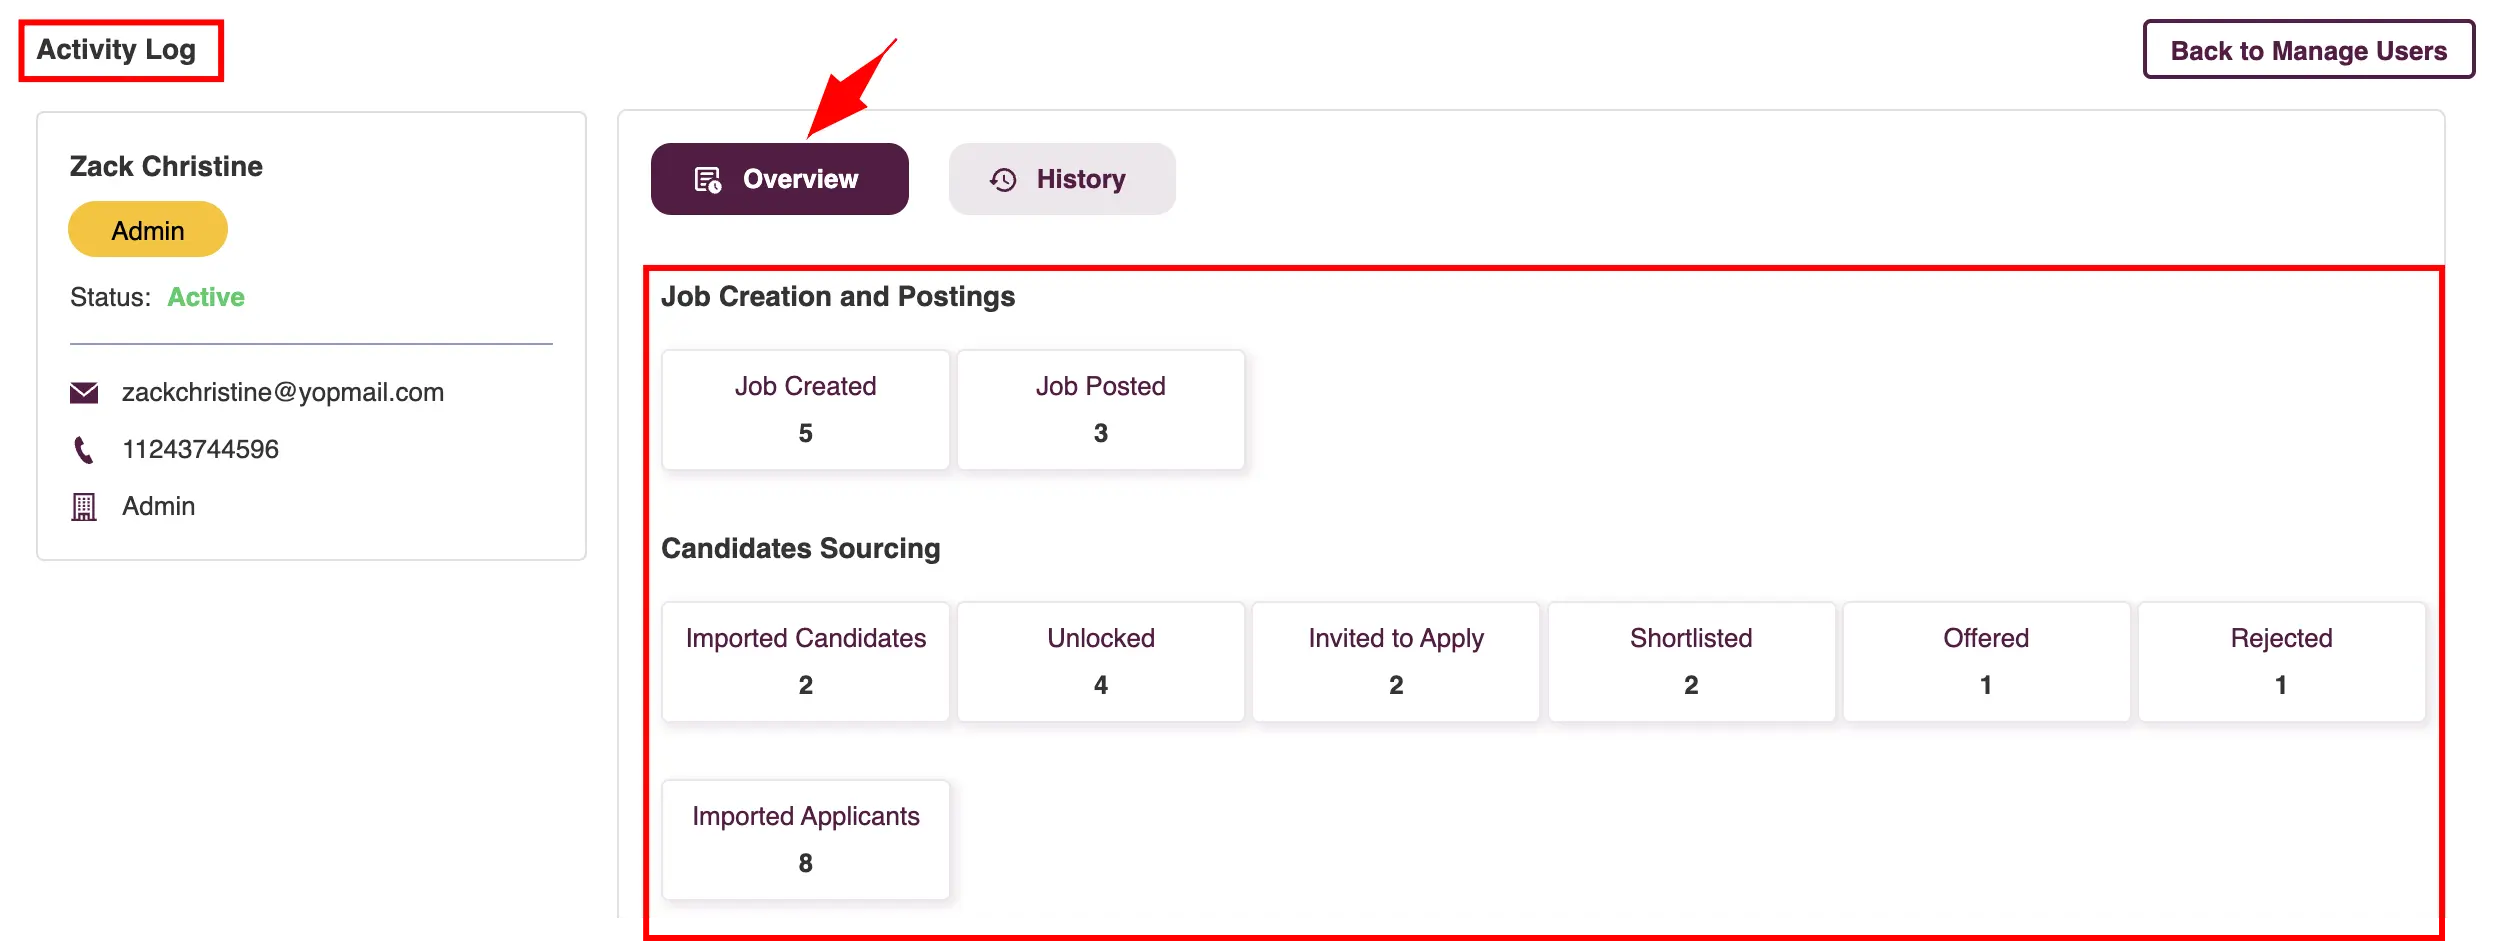
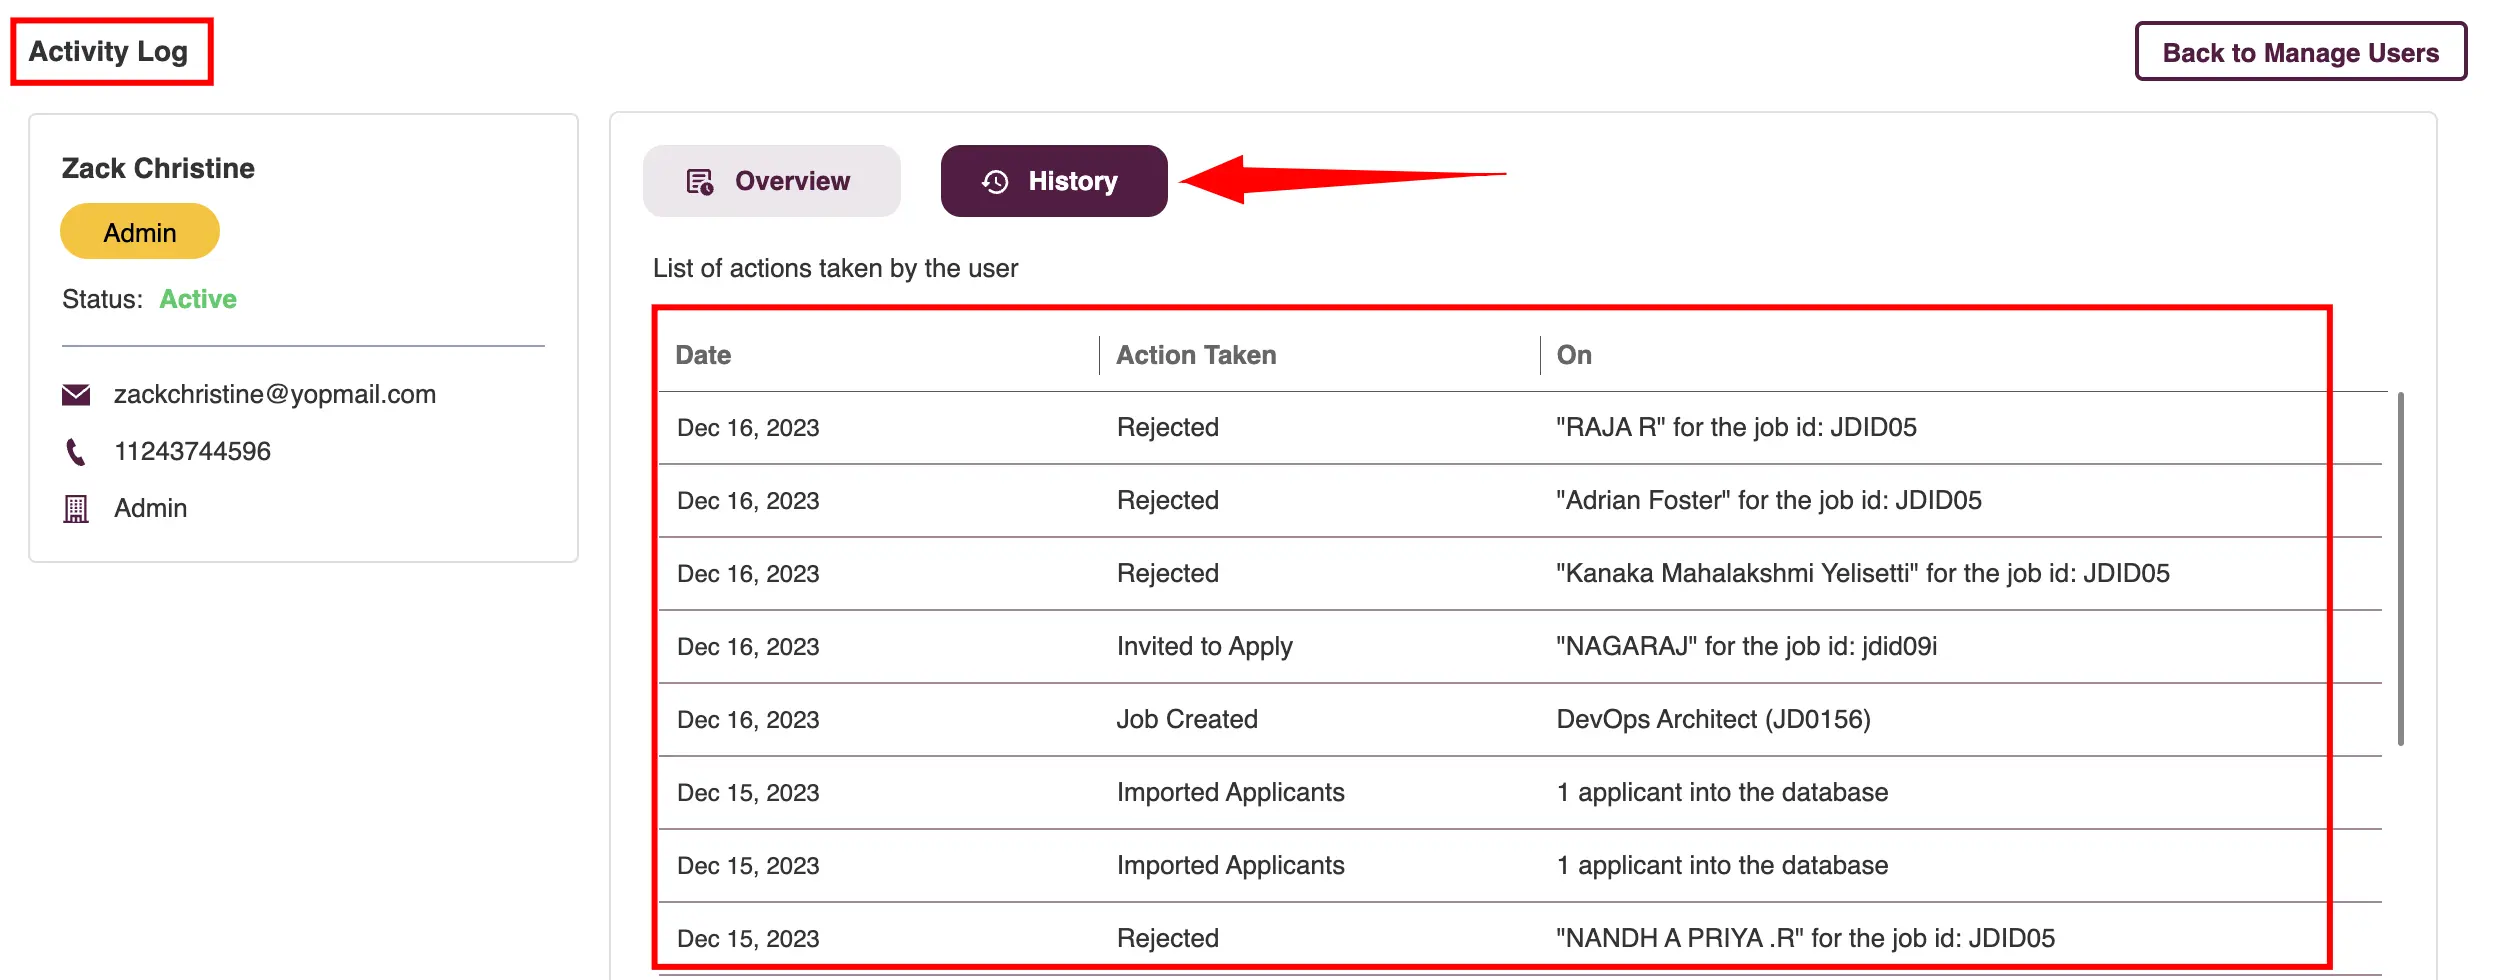
- Click on the "Username" in the user list table to view their Activity Log.
- The "Overview" presents a summary of the user’s activities.
- The "History" details each specific activity performed by the user.
Enables adding new members to the recruitment team quickly and efficiently.


Zita features three unique user roles, each with its own set of privileges. Although default access for these roles is established, you can grant users additional page permissions as required.
| Functionality | Admin | HR | Hiring |
|---|---|---|---|
| Create and Post Job | Full permission to create and post job listings | Full permission to create and post job listings | Permission with enabled privileges |
| Talent Sourcing | Full access to identify and engage candidates | Full access to identify and engage candidates | Access with enabled privileges |
| Zita Match Candidates | Access to match candidates to vacancies | Access to match candidates to vacancies | Access with enabled privileges |
| Database | Full access to candidate database | Full access to candidate database | Full access to candidate database |
| Applicants Pipeline | View and manage the flow of applicants | View and manage the flow of applicants | View and manage the flow of applicants |
| Jobs Workflow | View and manage the flow of applicants | View and manage the flow of applicants | View and manage the flow of applicants |
| Manage Account Settings | Full control over account configurations | Basic access to account settings with enabled privileges | Basic access with enabled privileges |
| Import Candidates | Permission to import candidates from external sources | Permission to import candidates from external sources | Permission with enabled privileges |
| Reports | View reports with enabled privileges | View reports | View with enabled privileges |
Zita enables you to update user information and settings withing the platform.

Zita allows you to temporarily disable or re-enable user accounts in the system as needed.
Note:
Data associated with an inactivated user is securely retained in Zita, ensuring no data loss when a user is inactivated. However, inactivated users lose their login access to the Zita application. They can be reactivated at any time, restoring their access as needed.


Tip:
You can check the status of a user under the "Status" column in Zita, which is represented with a color code for quick and easy reference.
Zita allows you to remove the user accounts from the application, while preserving their associated data within the application.
Note:

This section provides an overview and detailed history of each user's activities, like job creation, candidate shortlisting, hiring, and contacts unlocking.

Team Communication (Feedback Notes)
Zita offers real-time internal communication for team discussions about candidates, with the ability to tag team members in profiles, streamlining collaboration and enhancing hiring precision.
- This is available across various screens such as the Applicant Pipeline Profile Page, Zita Match Candidate Profile Page, and Database Profile Page, allowing team members to leave and access notes or feedback for candidates.
- You can find more information about the Feedback Notes feature in the Team Communication section under Candidate Management. Click here to view more details.
Email and Calendar Integrations
Zita streamlines workflow management by efficiently integrating both calendar events and email communications within its system, using popular platforms like Google and Microsoft. This integration significantly boosts recruitment efficiency and minimizes manual tasks.
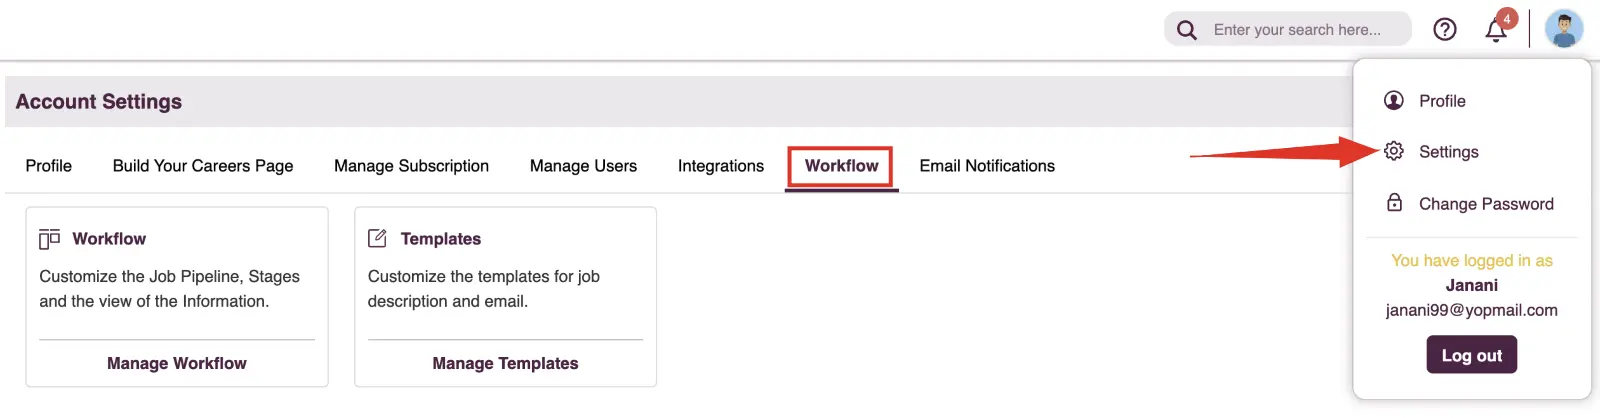
- Head to "Settings" in your Zita account and click on the "Integrations" tab.
- Additionally, you can find "Integrations" menu under communication section in the sidebar, providing a convenient and easy way to manage your integration whenever you need.

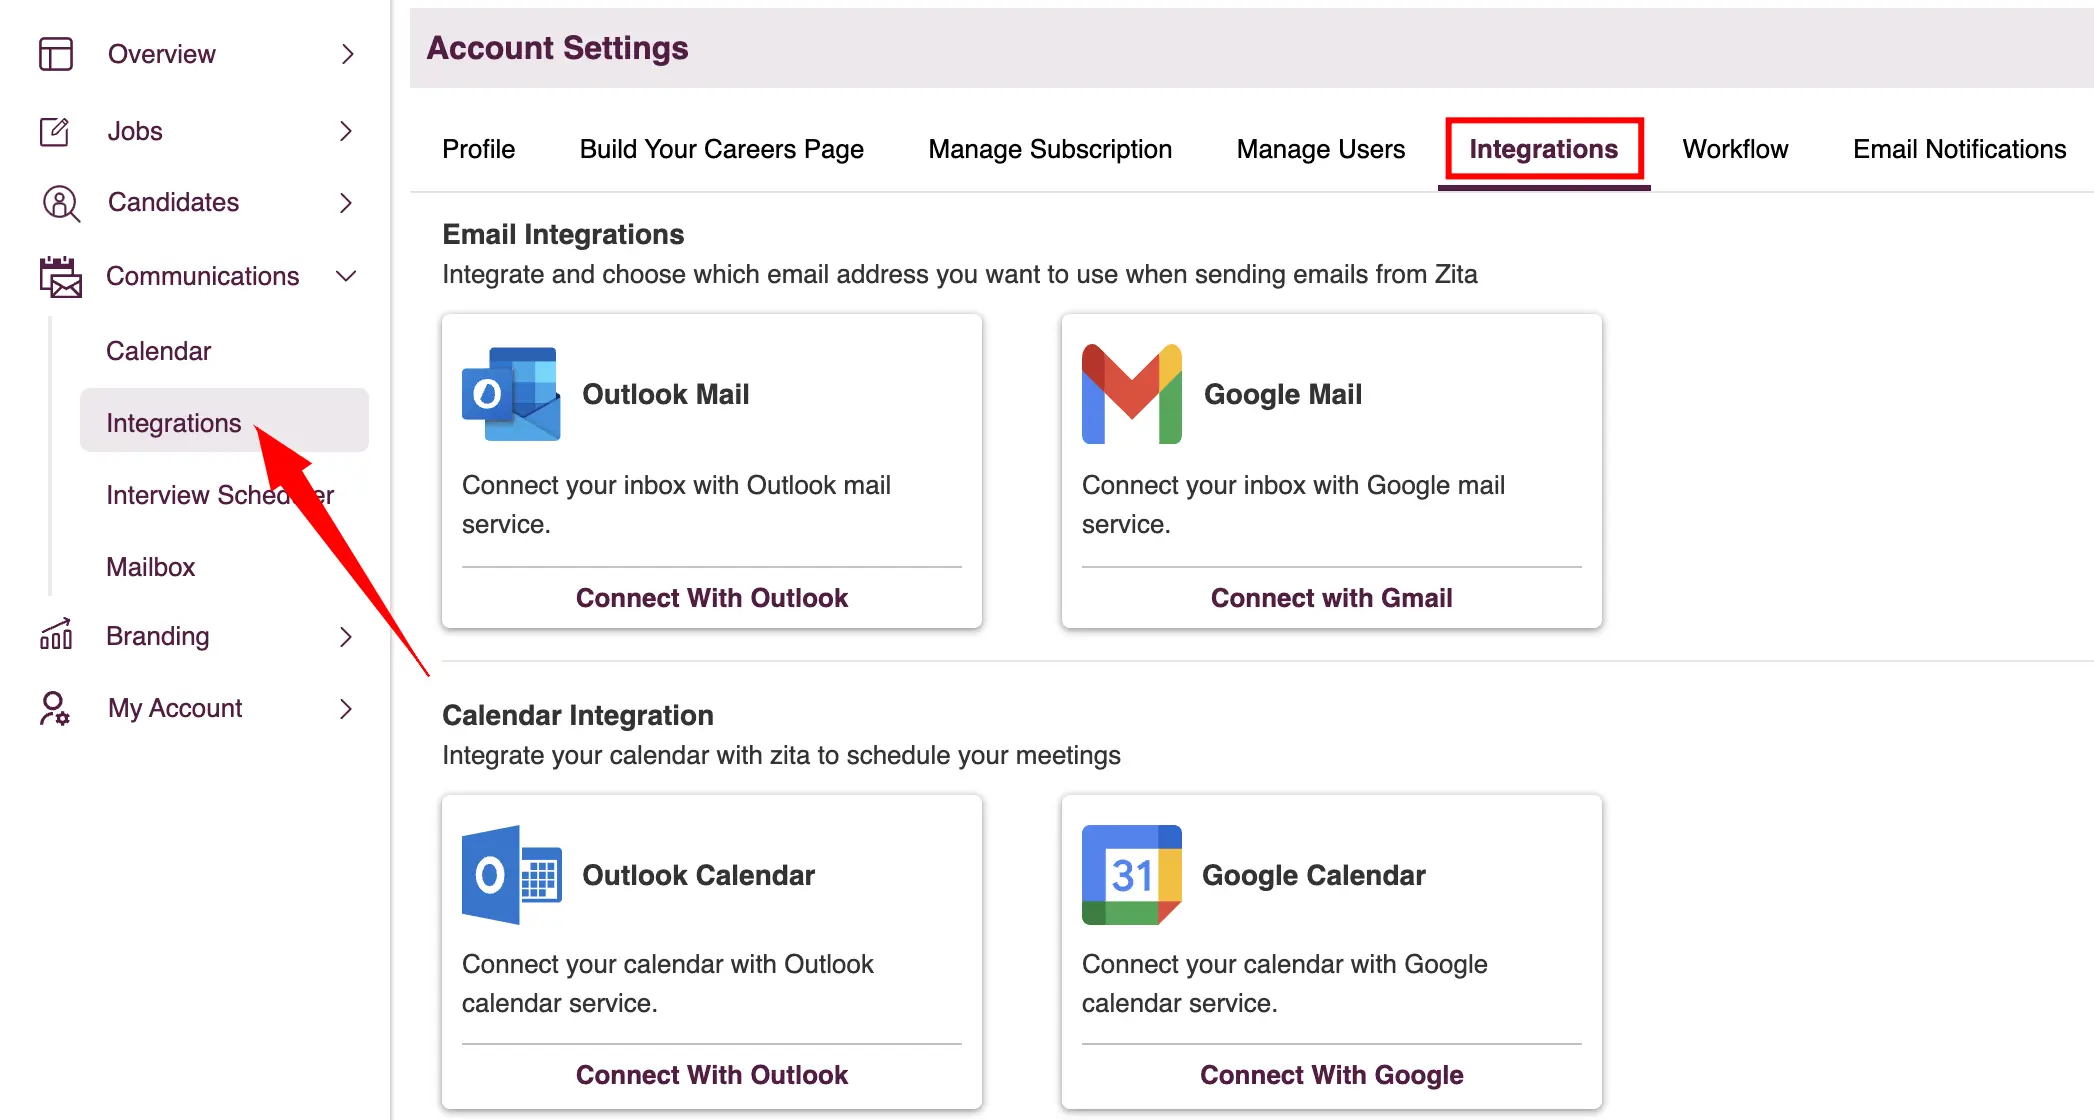
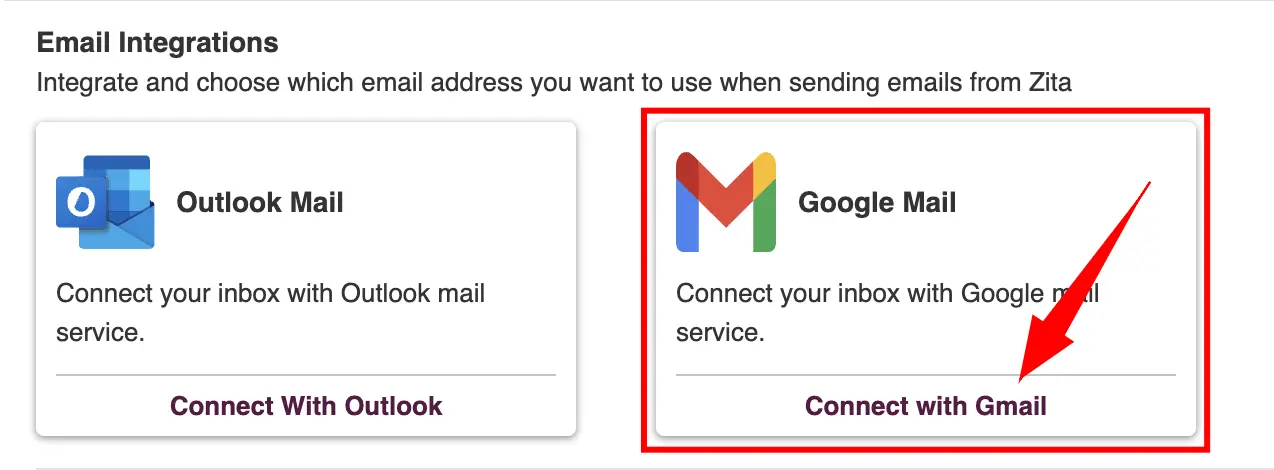
Email Integration
You have two integration options available for emails: Outlook Mail and Google Mail.
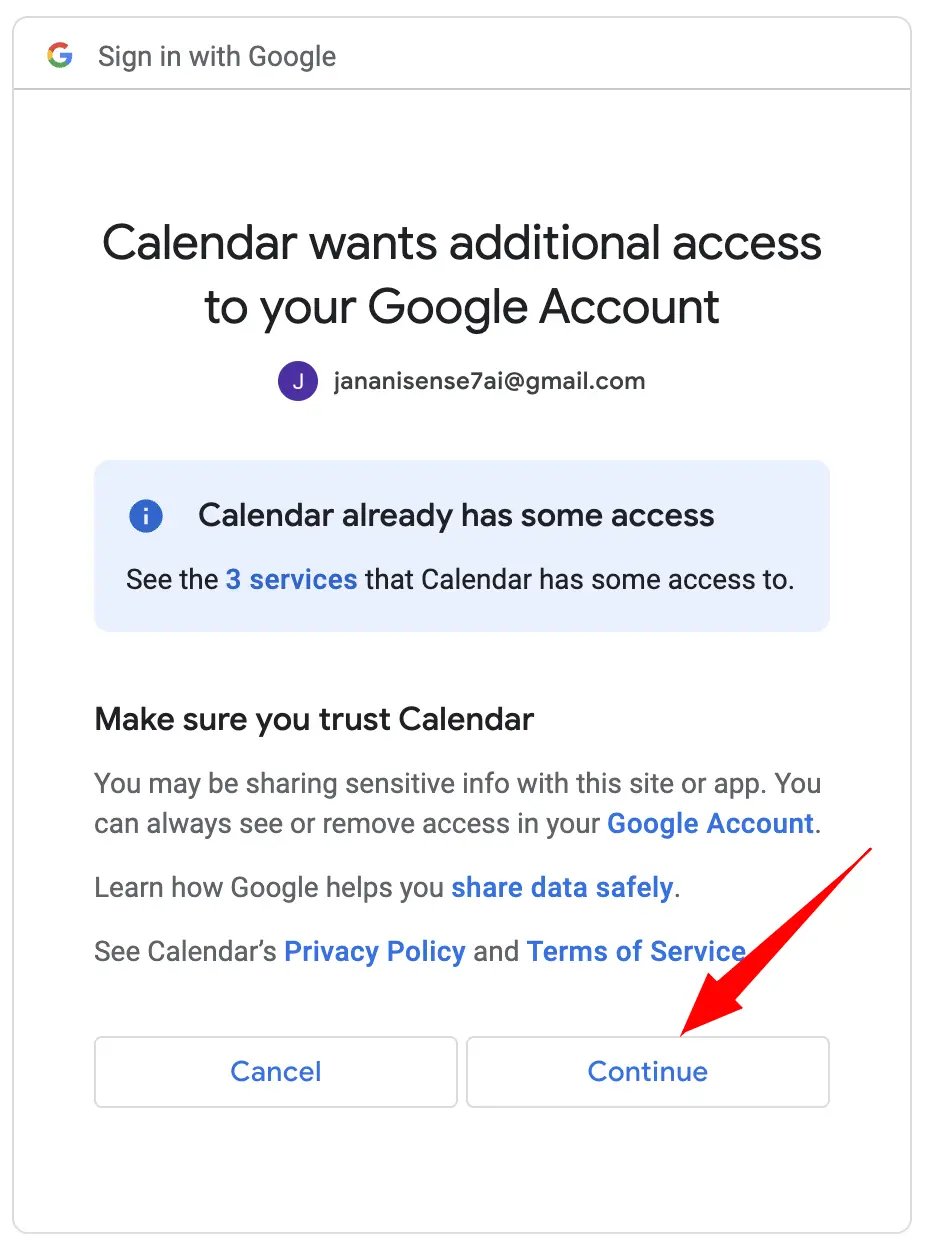
- Google Mail integration
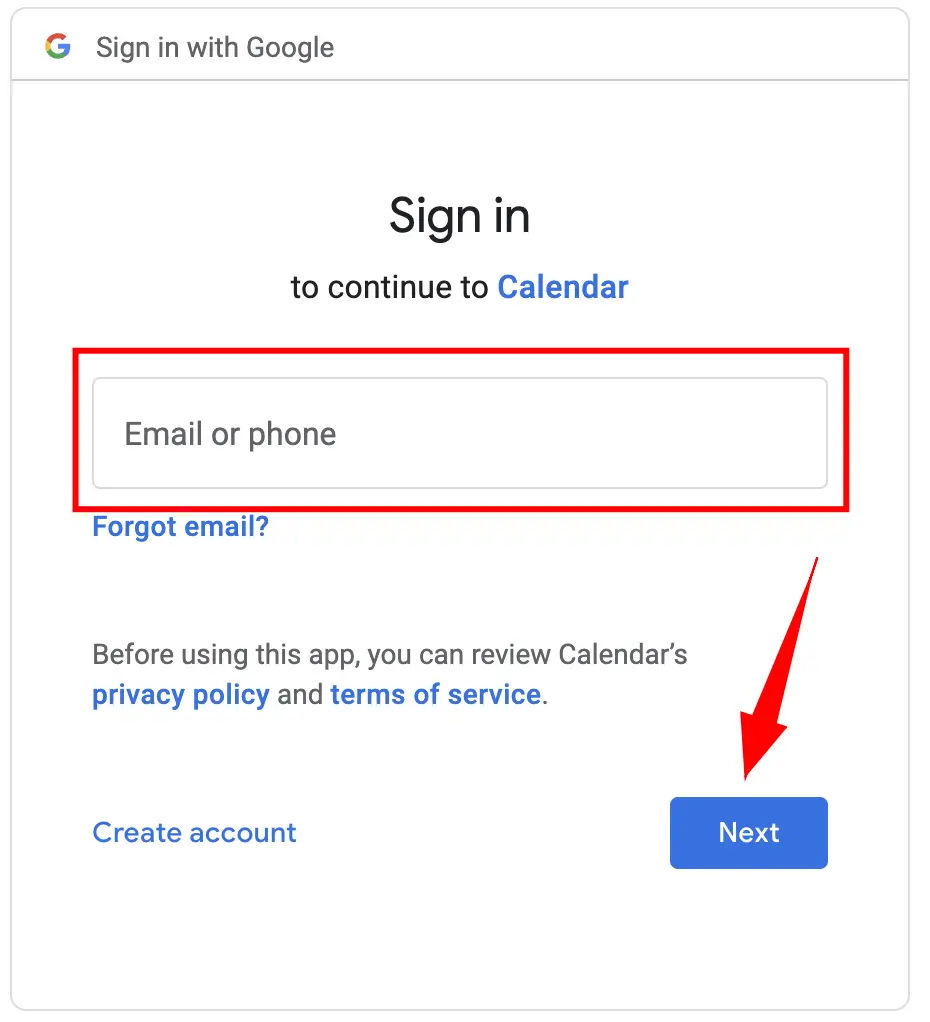
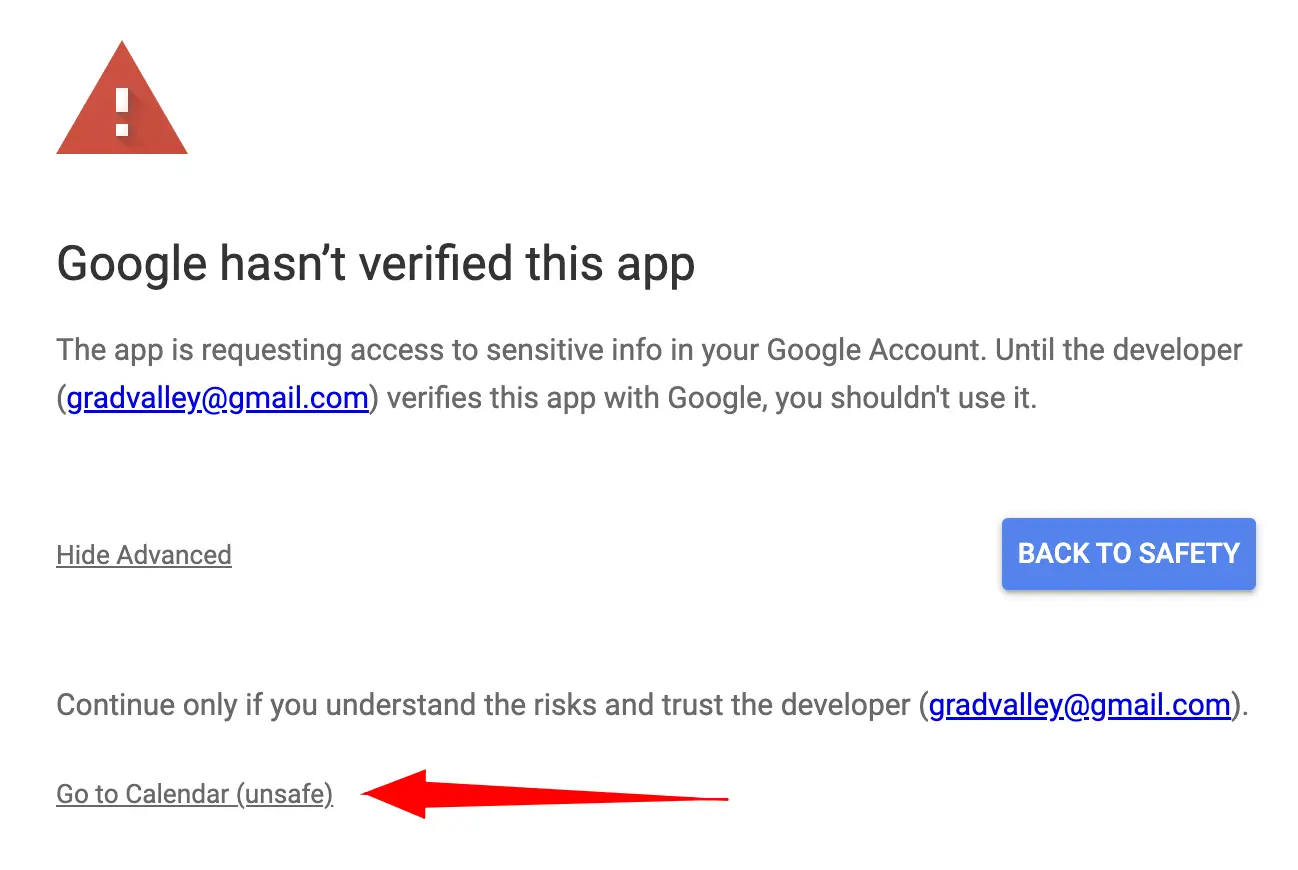
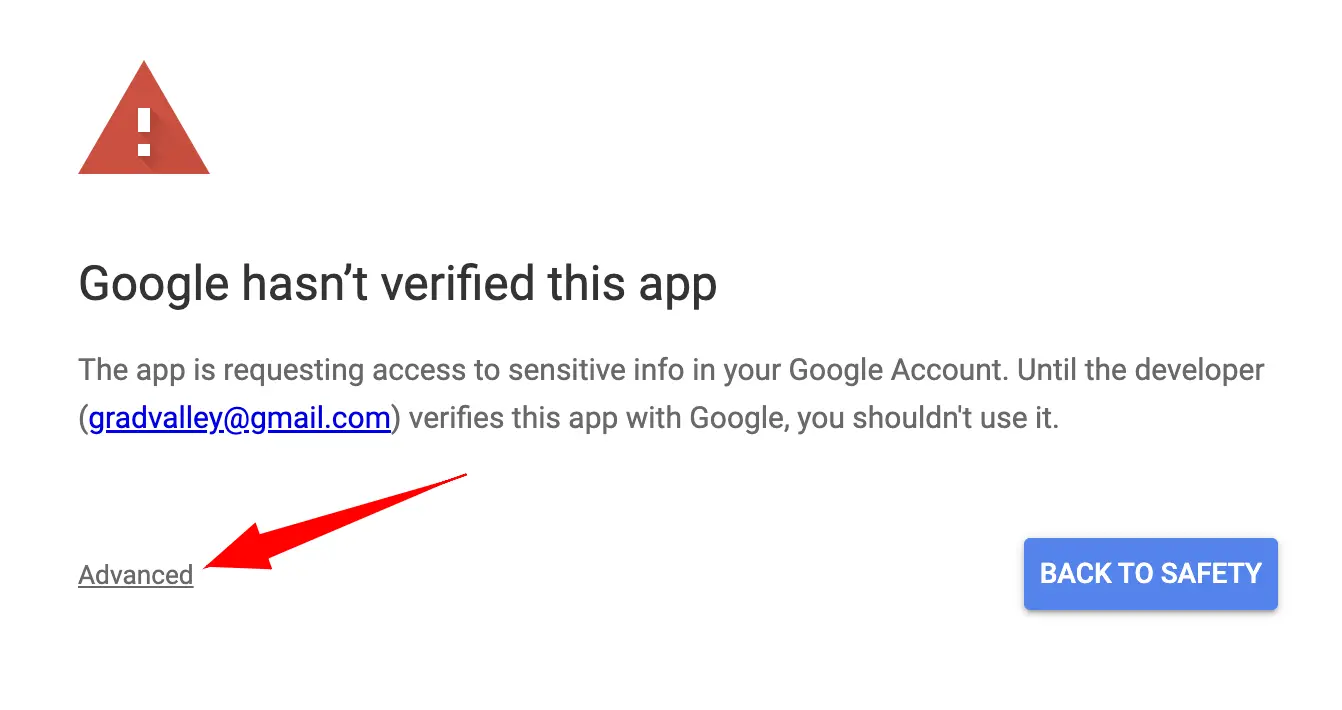
- Under the Email Integration section, simply click on "Connect with Google" to integrate with Gmail.
- You will be redirected to the Gmail platform where you will need to provide credentials and grant permission to Zita to send and receive emails. That's it! Your Gmail is now connected to Zita.
- Outlook Mail Integration
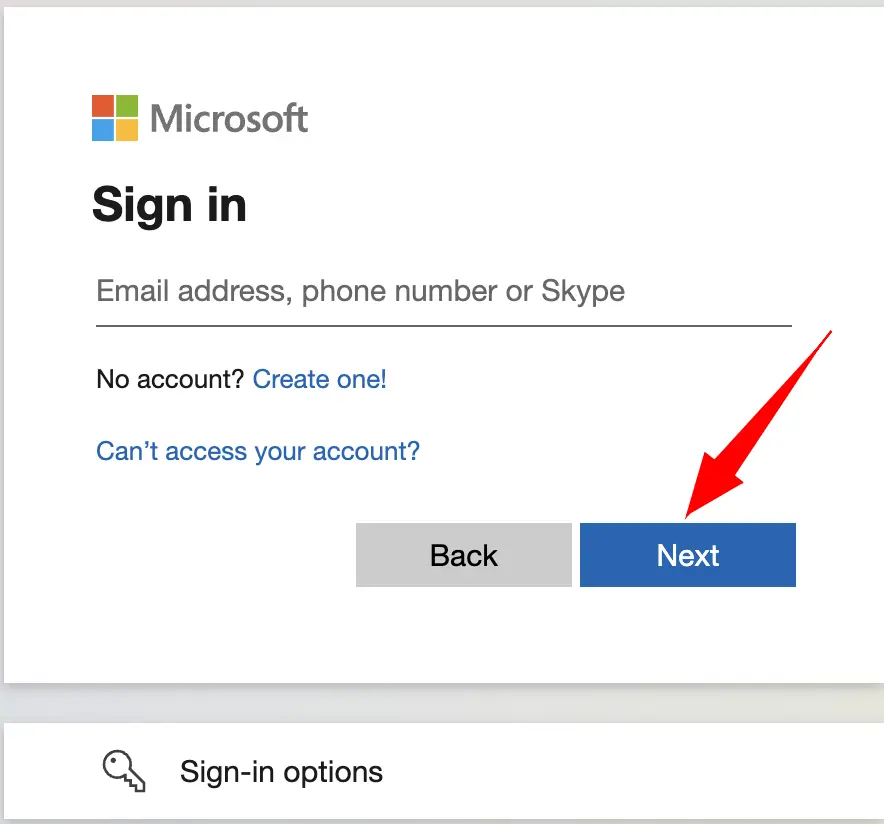
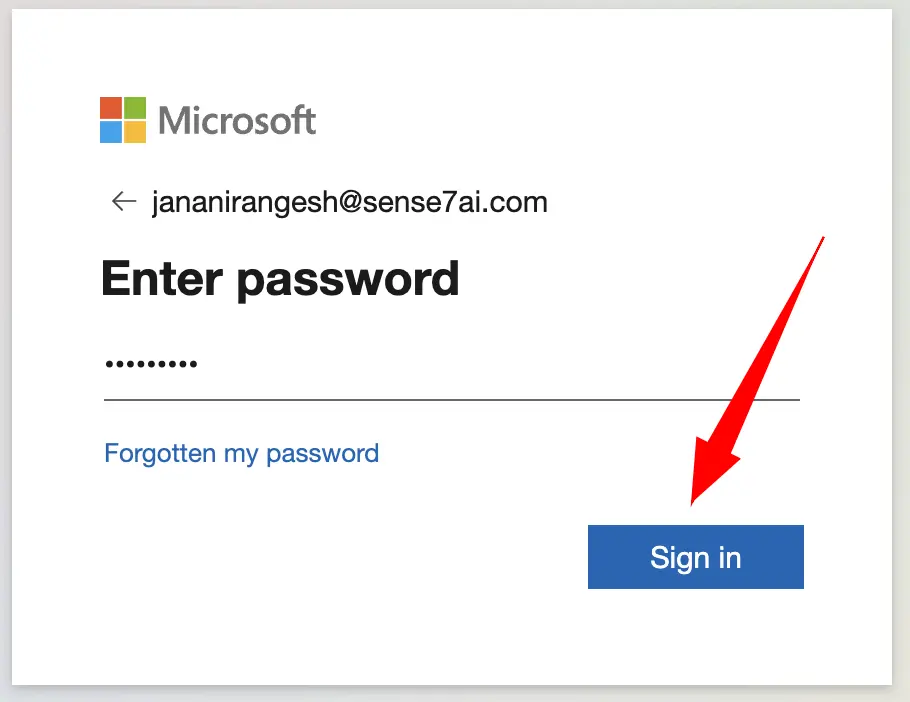
- Under the Email Integration section, simply click on "Connect with Outlook" to integrate with Outlook.
- You will be redirected to the outlook platform where you will need to provide credentials and grant permission to Zita to send and receive emails. That's it! Your Outlook is now connected to Zita.

Calendar Integration:
You can choose between two calendar integration options: Outlook Calendar and Google Calendar.
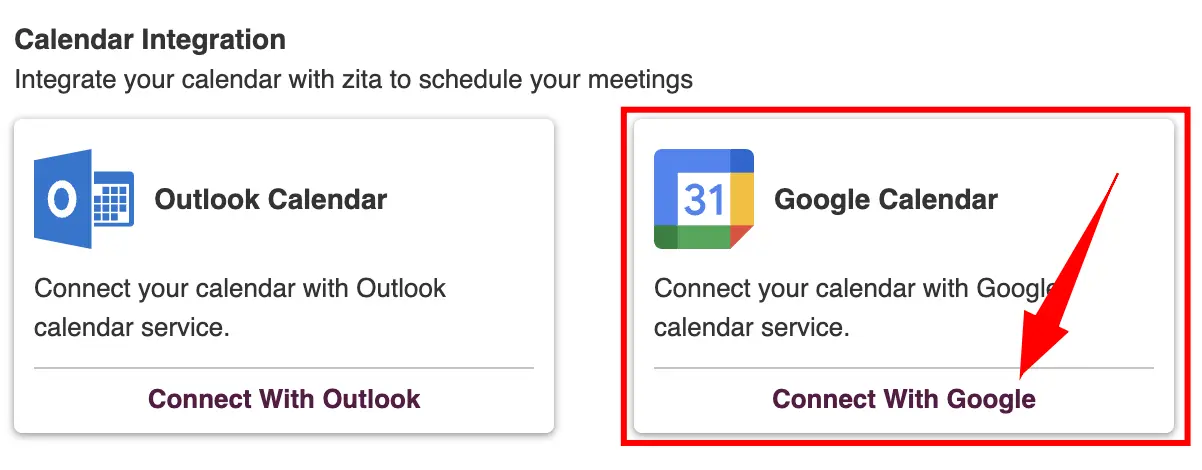
- Google Calendar integration
- Under the Calendar Integration section, simply click on "Connect with Google" to integrate with Google calendar.
- You will be redirected to the google calendar platform where you will need to provide credentials and grant permission to Zita, That's it! Your Gmail is now connected to Zita.
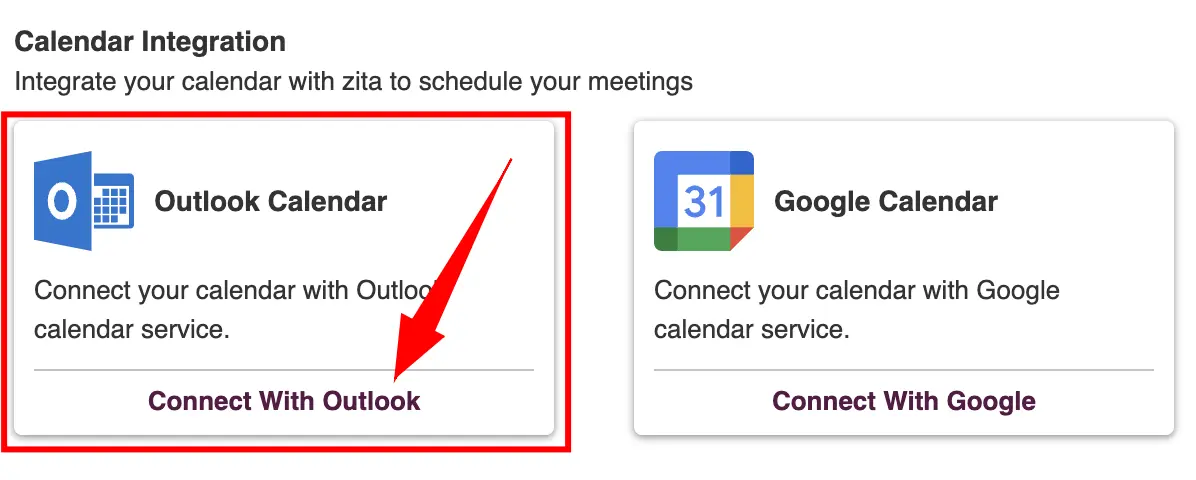
- Outlook Calendar Integration
- Under the Calendar Integration section, simply click on "Connect with Outlook" to integrate with Outlook.
- You will be redirected to the Microsoft platform where you will need to provide credentials and grant permission to Zita. That's it! Your Outlook is now connected to Zita.
Email Template Database
- In Zita, the Email Template Database is a versatile tool designed to enhance your email communication efficiency.
- Zita enables you to create and use your custom email templates directly within the email composition interface.
Create an Email template
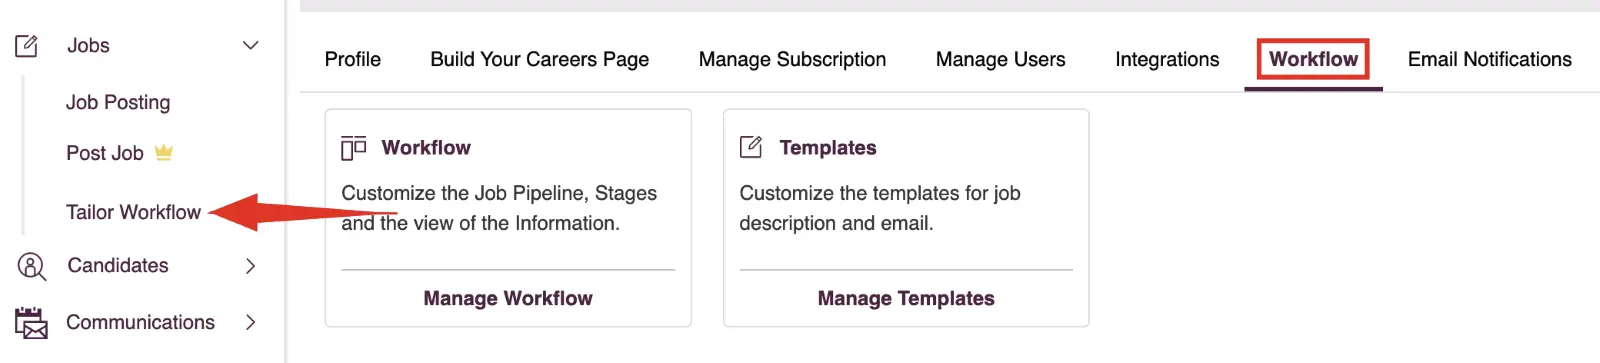
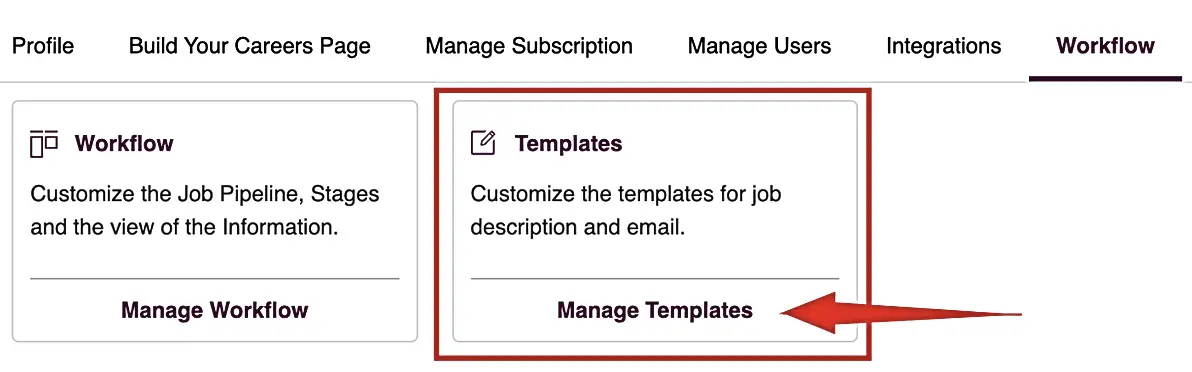
- Head to "Settings" in your Zita account and click on the "Workflow" tab.
- Additionally, you can find "Tailor Workflow" in the sidebar, providing a convenient and easy way to customize the JD templates whenever you need.
- In the "Templates" card, click on the "Manage Templates" button.
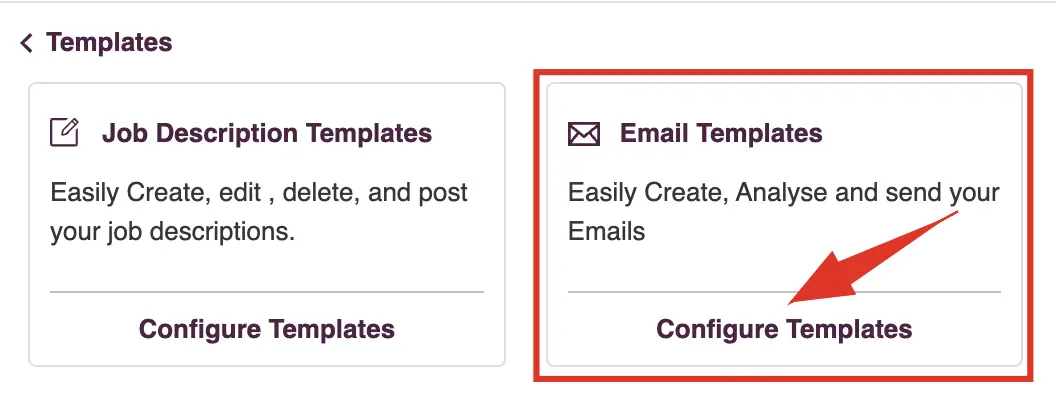
- Email Templates: On this card, choose "Configure Templates" .
- Click on the "Add Template" button.
- Enter the title for your template, Subject content and the Email content in the provided fields.
- Once completed, click on the "Add" button to save your new template.


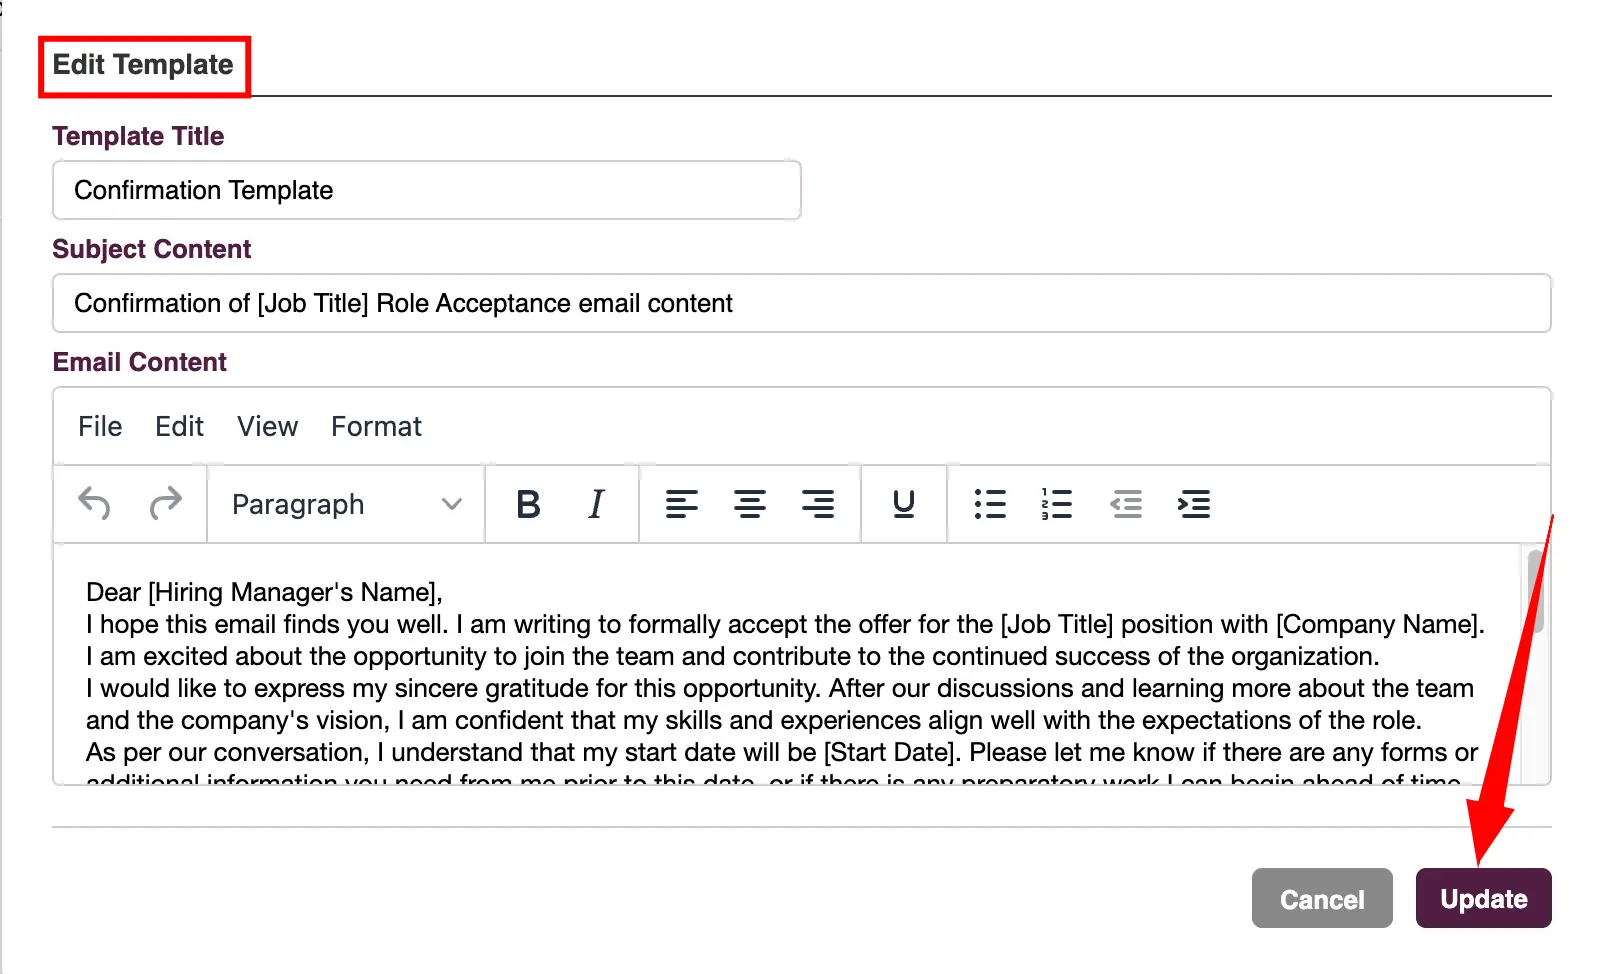
Update an existing template
- In the list of templates within Zita, find the template you wish to update and click on the "Edit" icon to make changes.
- Make the necessary changes to the template.
- Once you're done, click on the "Update" button to save your changes.
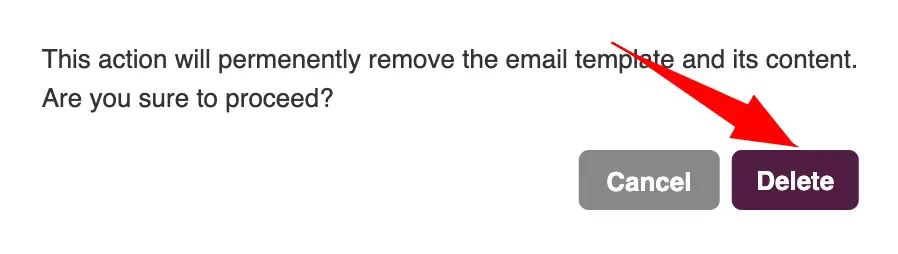
Delete Template
- In the list of templates within Zita, find the template you wish to delete and click on the "Delete" icon.
- In the confirmation popup, click on the "Delete" button to proceed with the deletion.